
Hacking Minesweeper with Ghidra - Walkthrough of Begin.RE Challenges
After focusing on Active Directory exploitation for the last few months, I wanted to mix things up and do something new. I have always wanted to do more reverse engineering and binary exploitation, so I looked for places to start out. After watching a lot of videos and reading a lot of resources I found Begin.re which seemed like a great intro course to Windows 32-bit reverse engineering.
This course includes some background modules that detail theory and give some resources to look at and some quiz questions, then it has four different binaries to reverse. Two of these are easier and done solo, the last two are more complex and take more of a walkthrough approach. The last challenge is to hack minesweeper so mines are changed to flags, so you can see them as soon as you start the game.
The course uses IDA and Ollydbg to do this, however I wanted to use a more modern approach. I used Ghidra and x64dbg on a windows 10 VM to do these challenges. I wanted to produce a write up to solidify the knowledge and I hope to do more crackme style challenges / writeups in the future.
Challenge 1 - Password
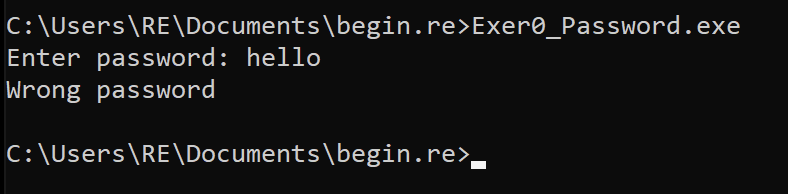
The first challenge was a simple windows binary that when executed asked for a password and told you if it was correct or not. It is a good idea to note the strings returned as well, as these can be helpful in finding the main section.
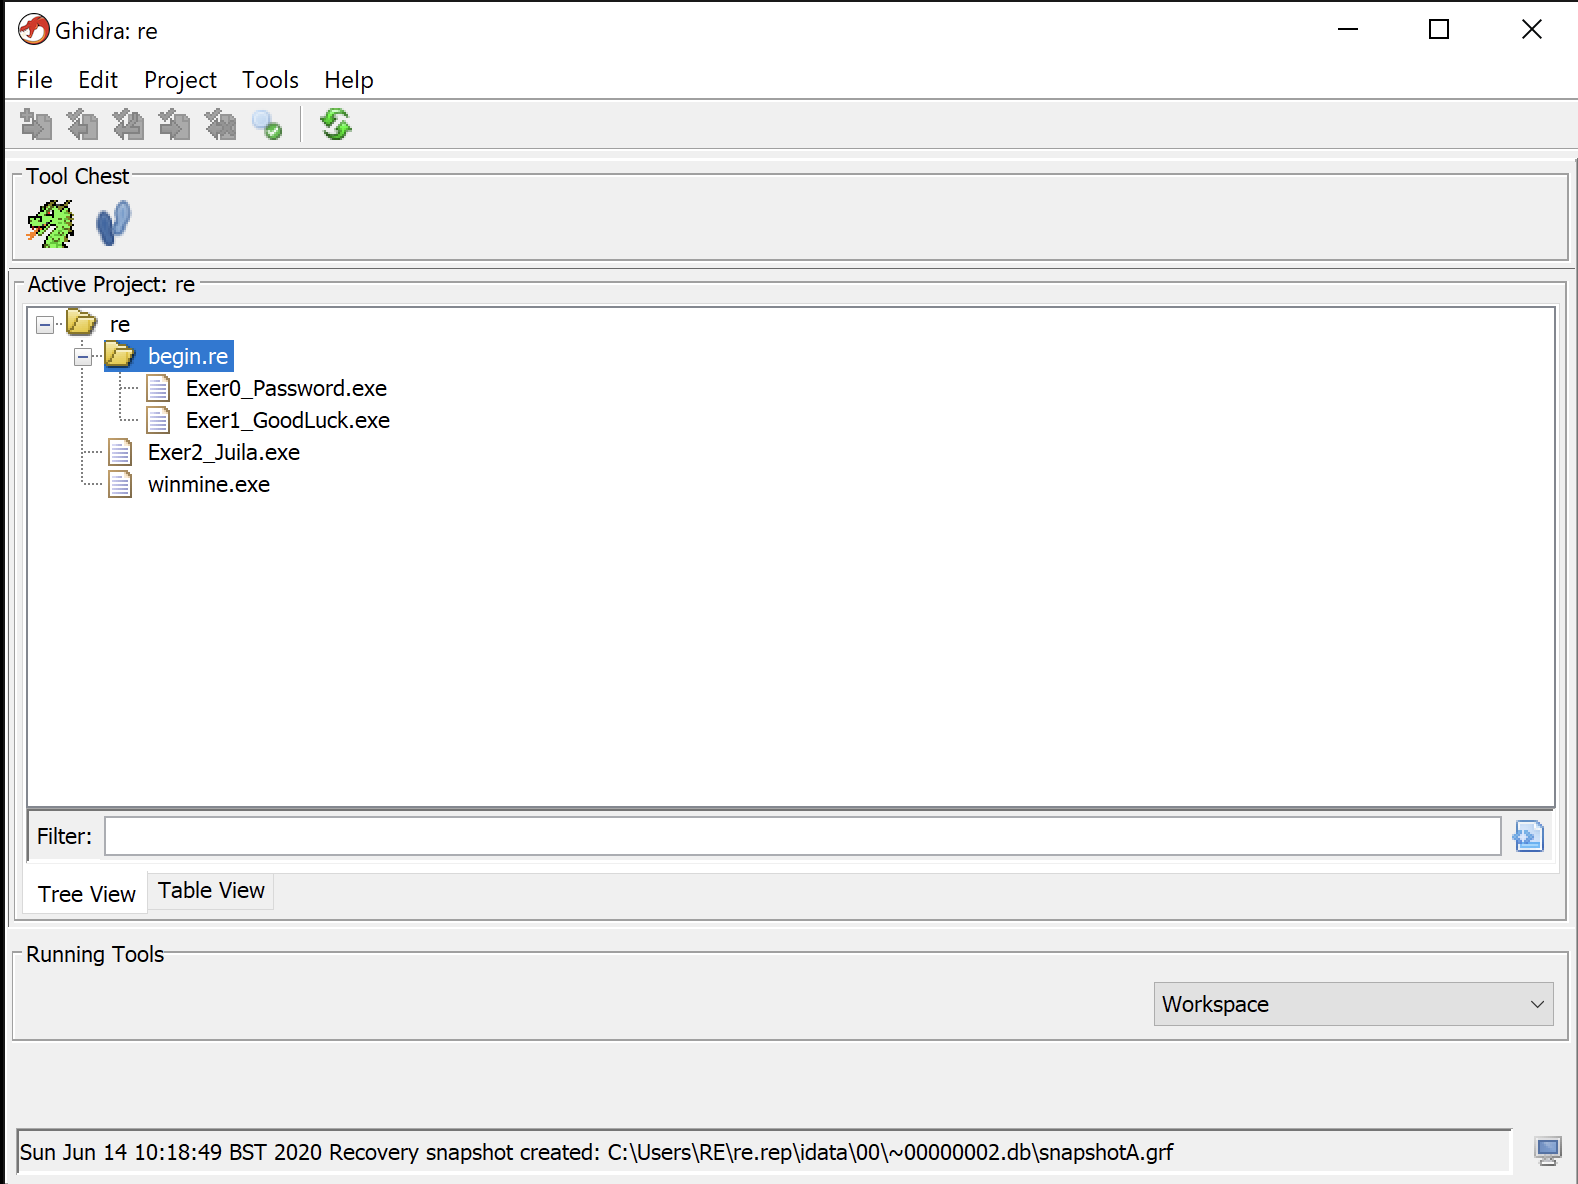
The first time you launch Ghidra it can be a bit confusing (or was for me anyway). Go into File > New project and create a project with whatever name you want, I used begin.re for ease. Then with the project folder in the screen you need to use File > Import File and choose the executable you want to analyse. You could also download all the binaries at once, put them in a folder, then use File > Batch Import and select the folder to import all the binaries at once.
Hopefully you should see a screen similar to the below.
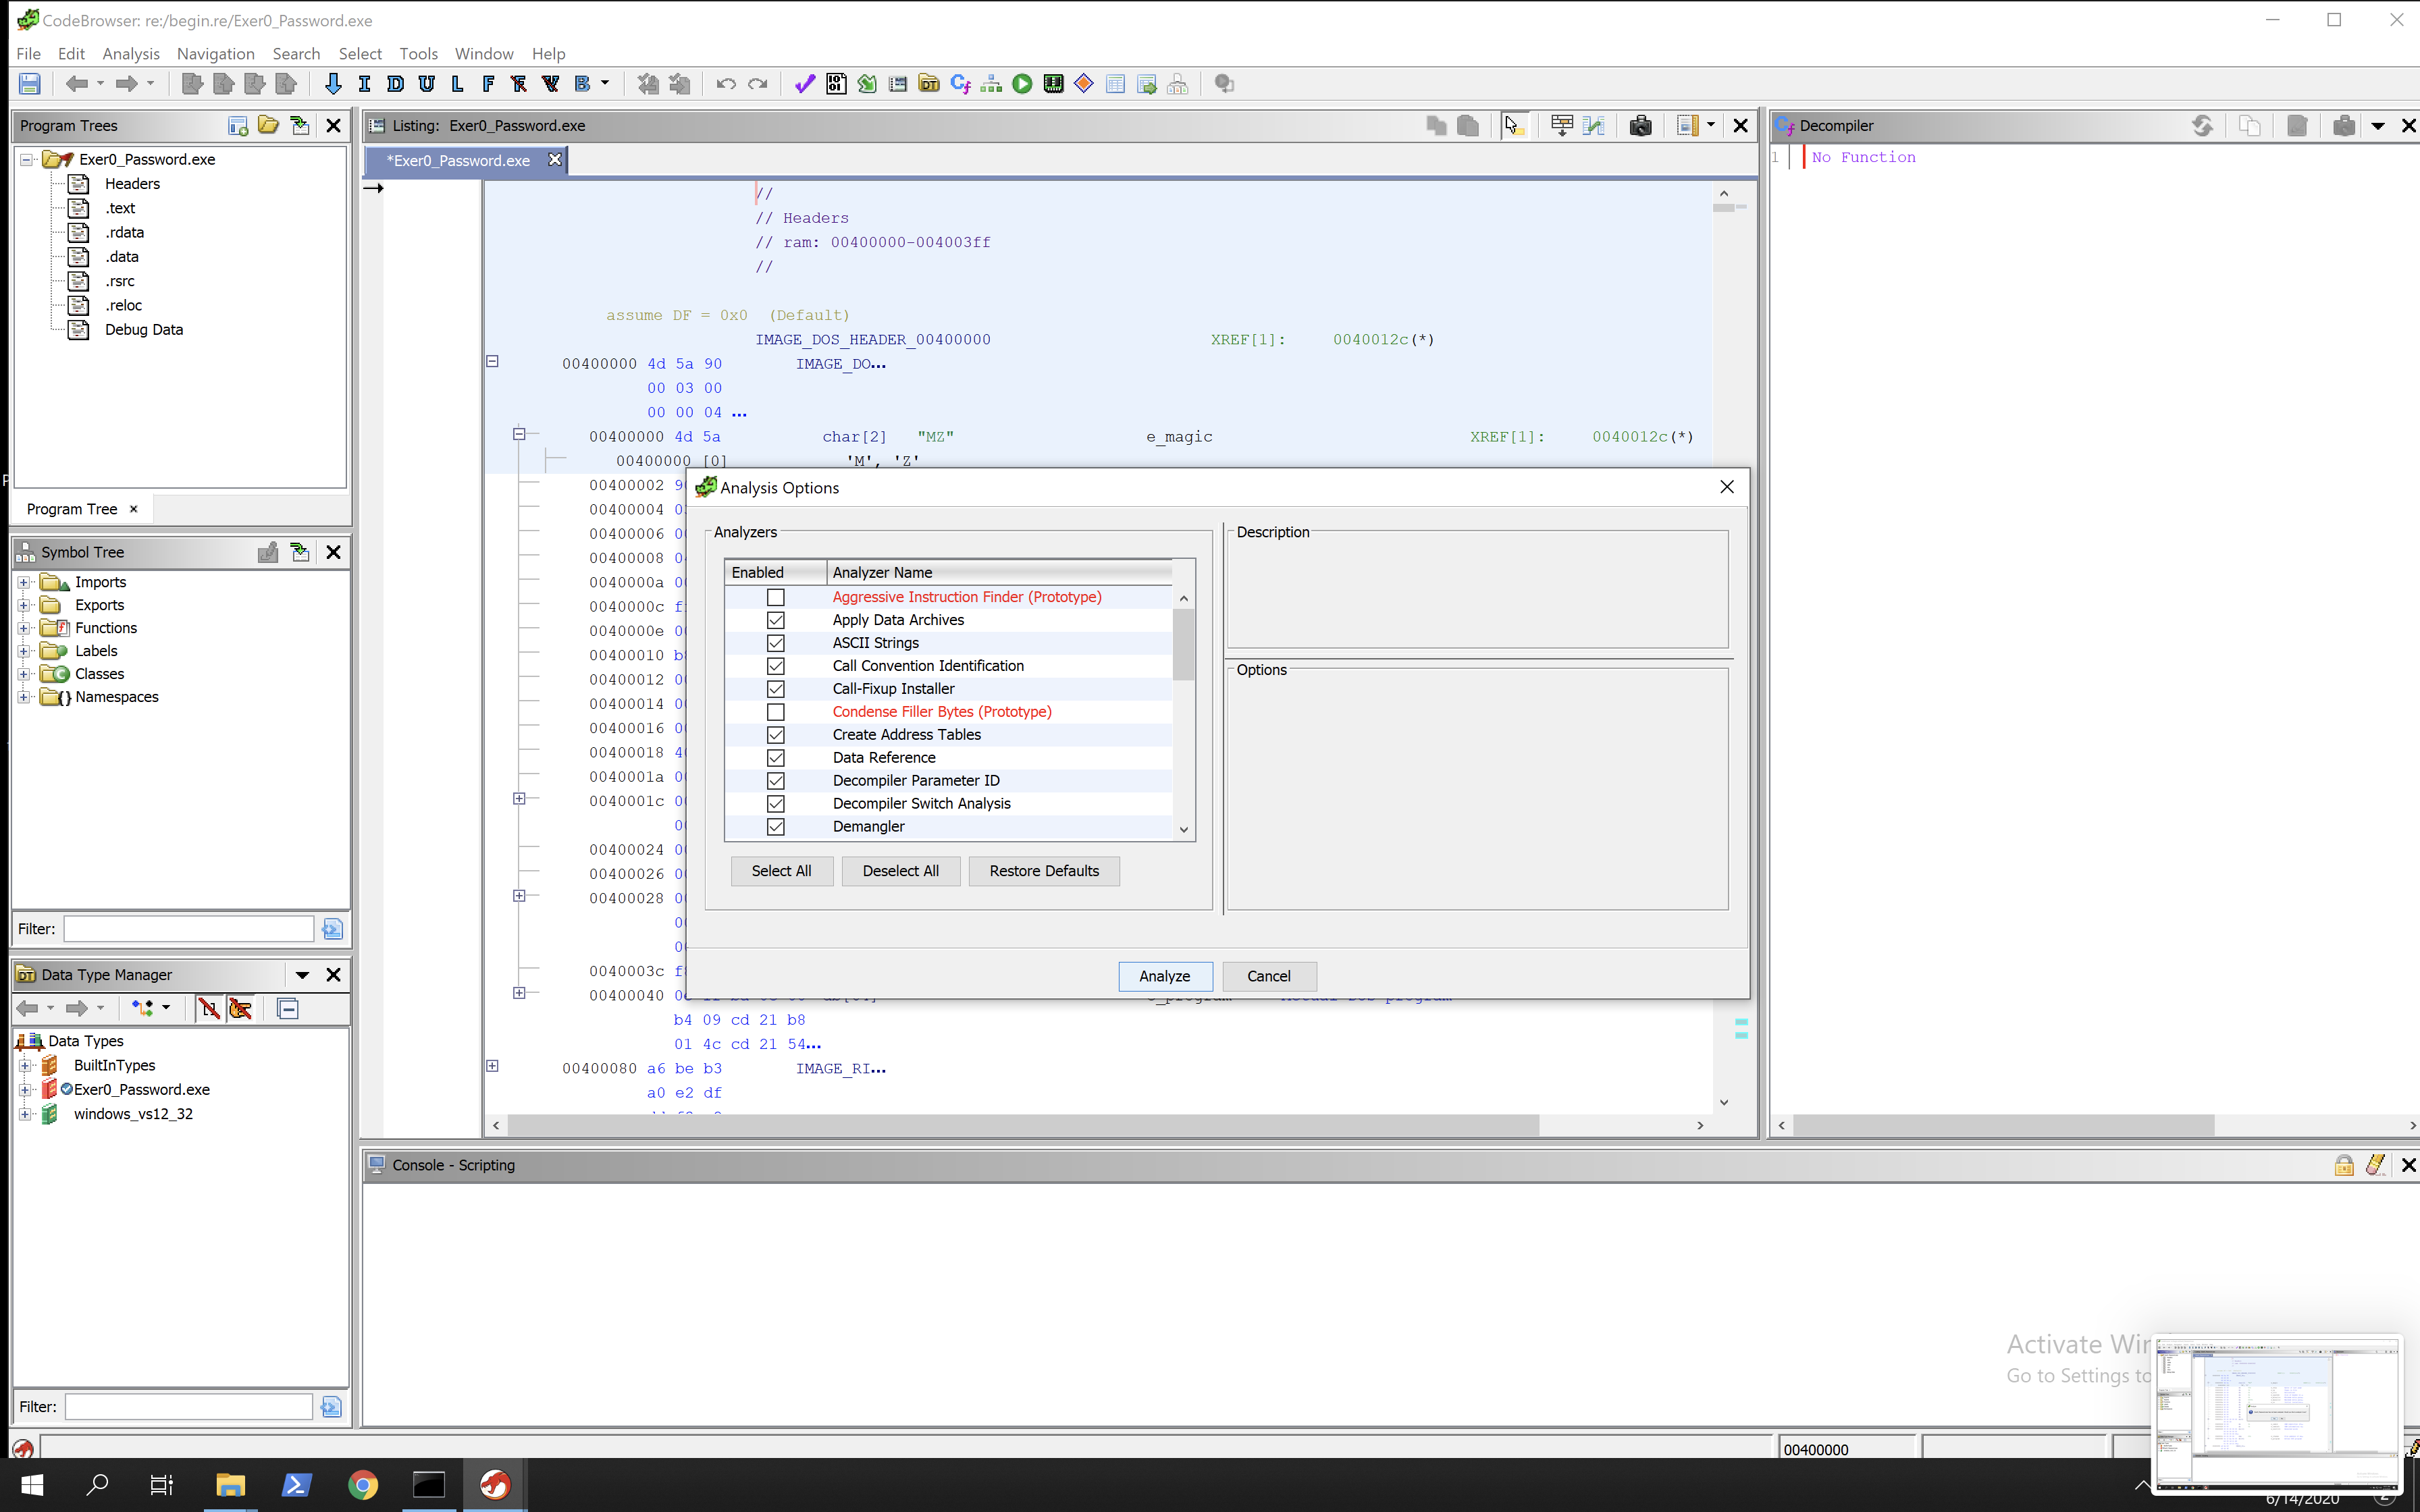
Now double click on the password executable and the code browser will be opened. It will ask you if you want to analyse the sample.
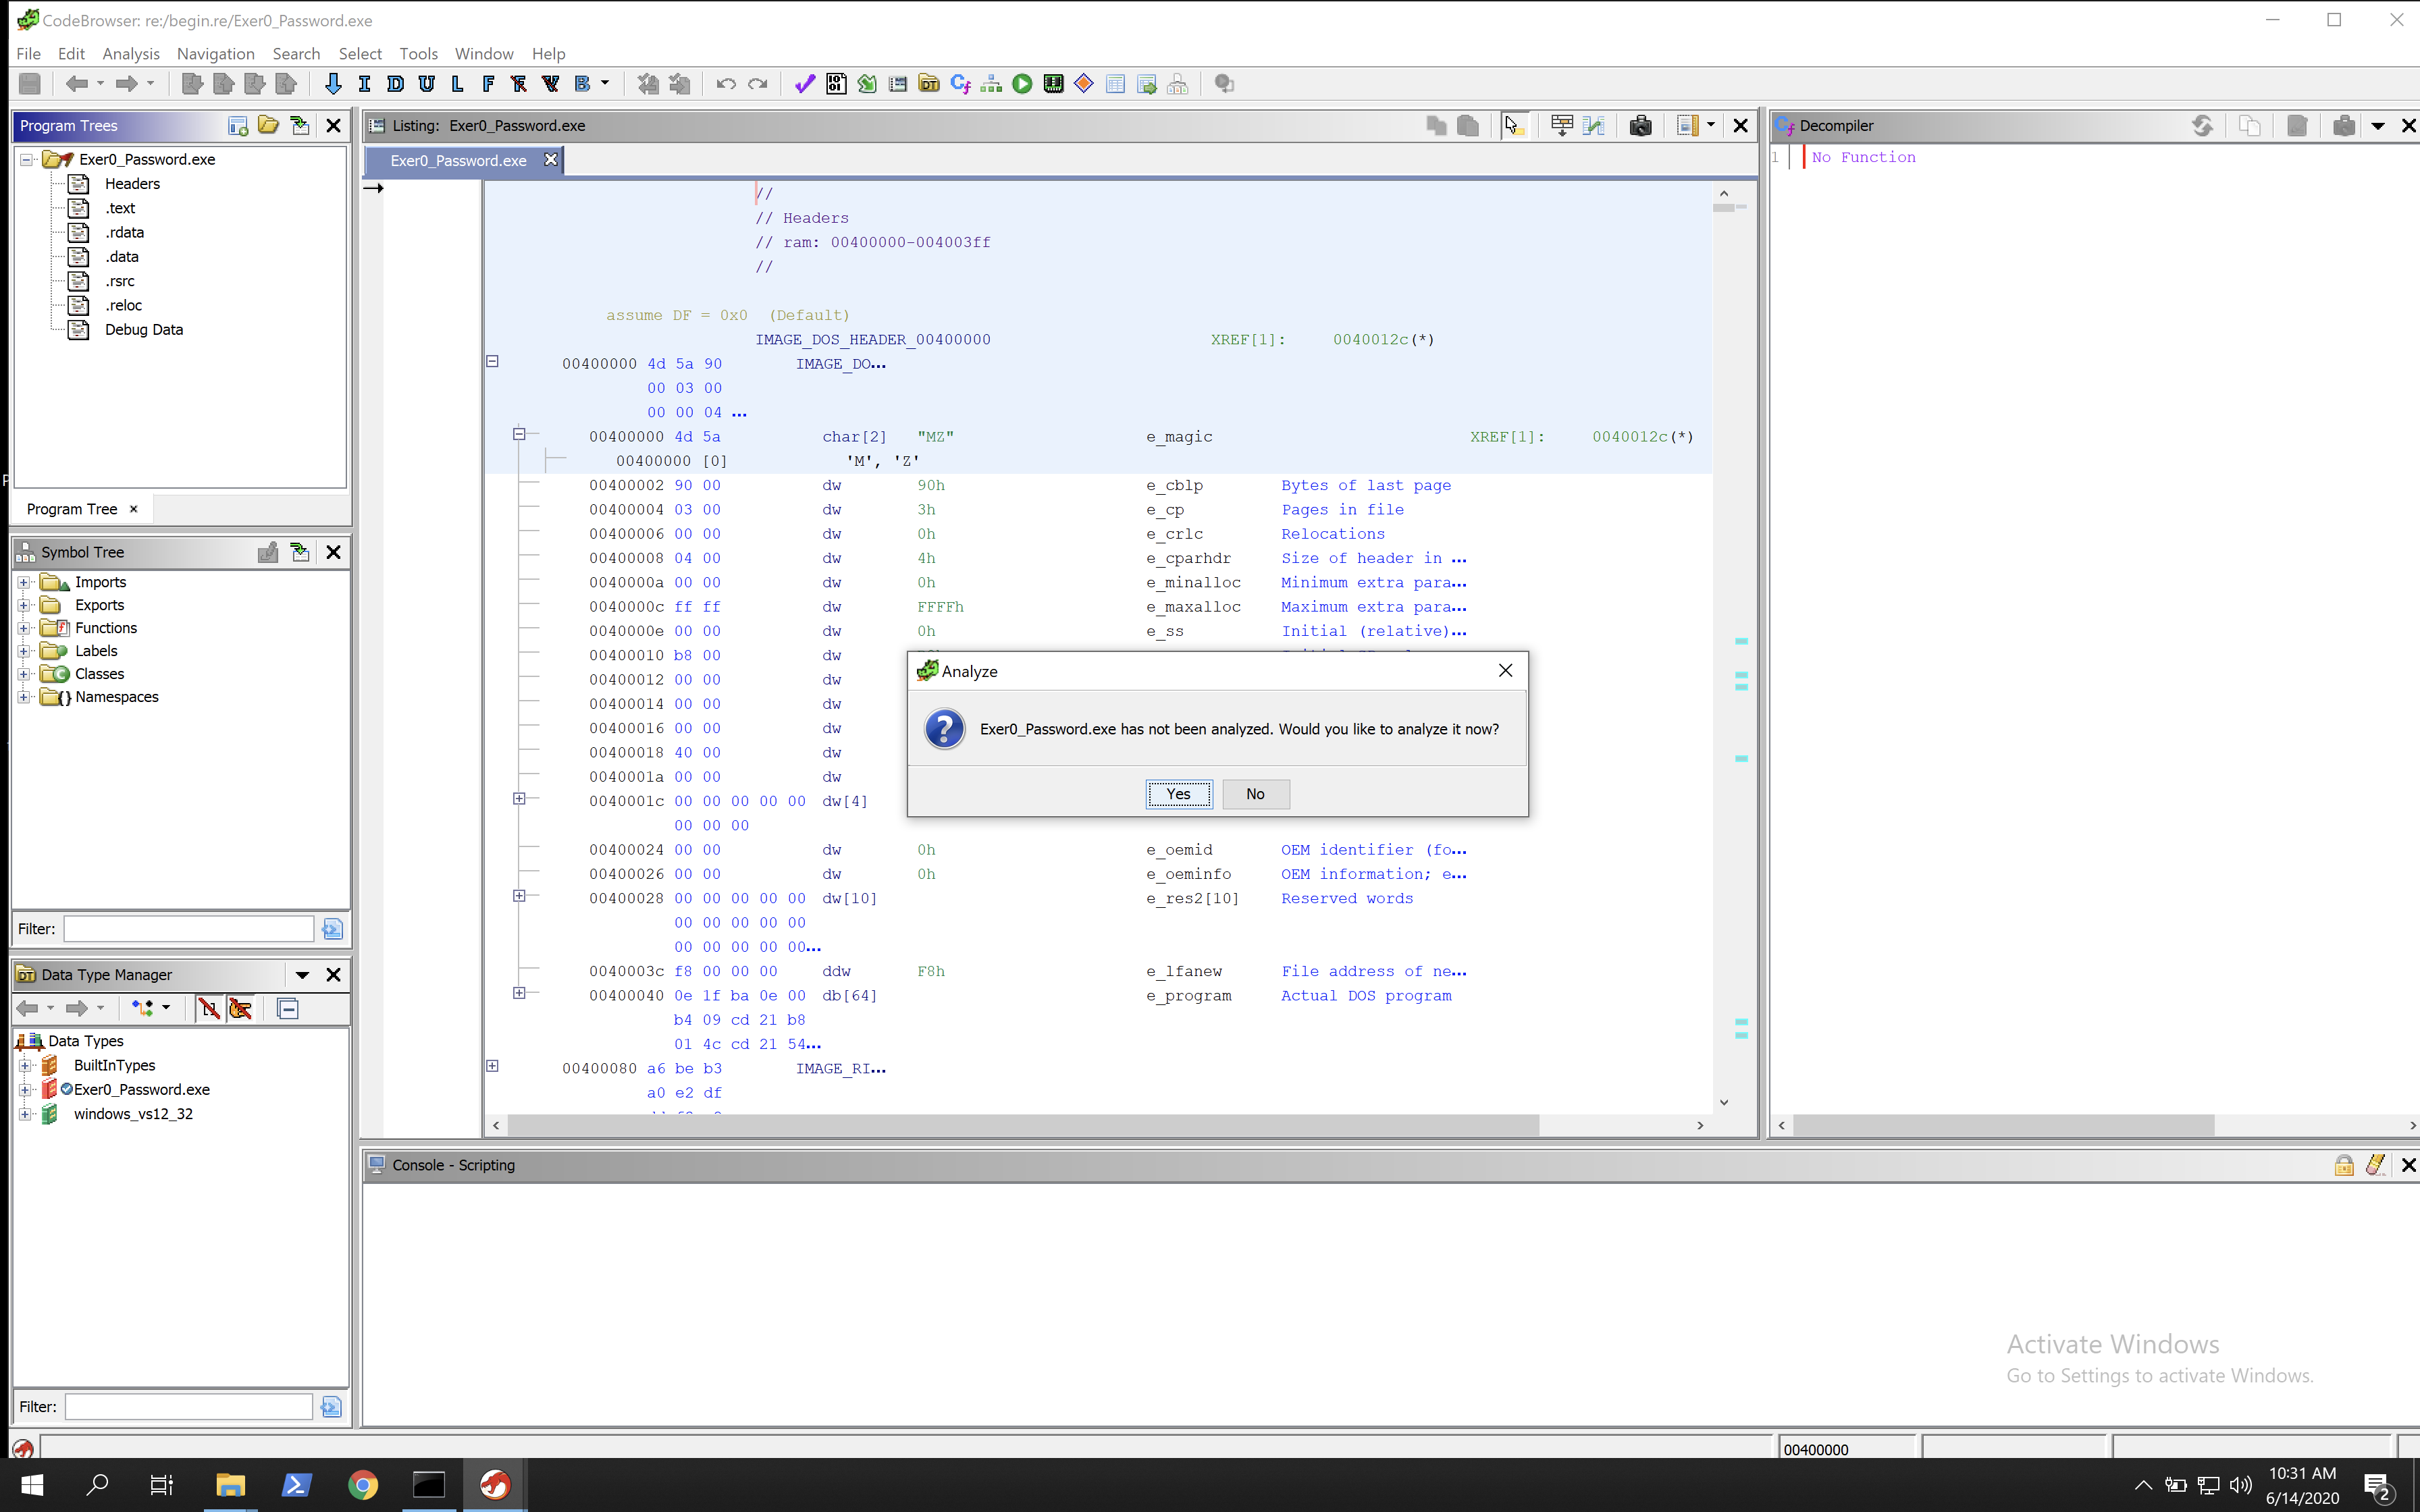
I don’t really know what this does but I selected yes and went with the defaults and waited.
It did come back with an error but seemed to have completed execution ok. This doesn’t run the sample, I assume it just tries to pick out relevant information.
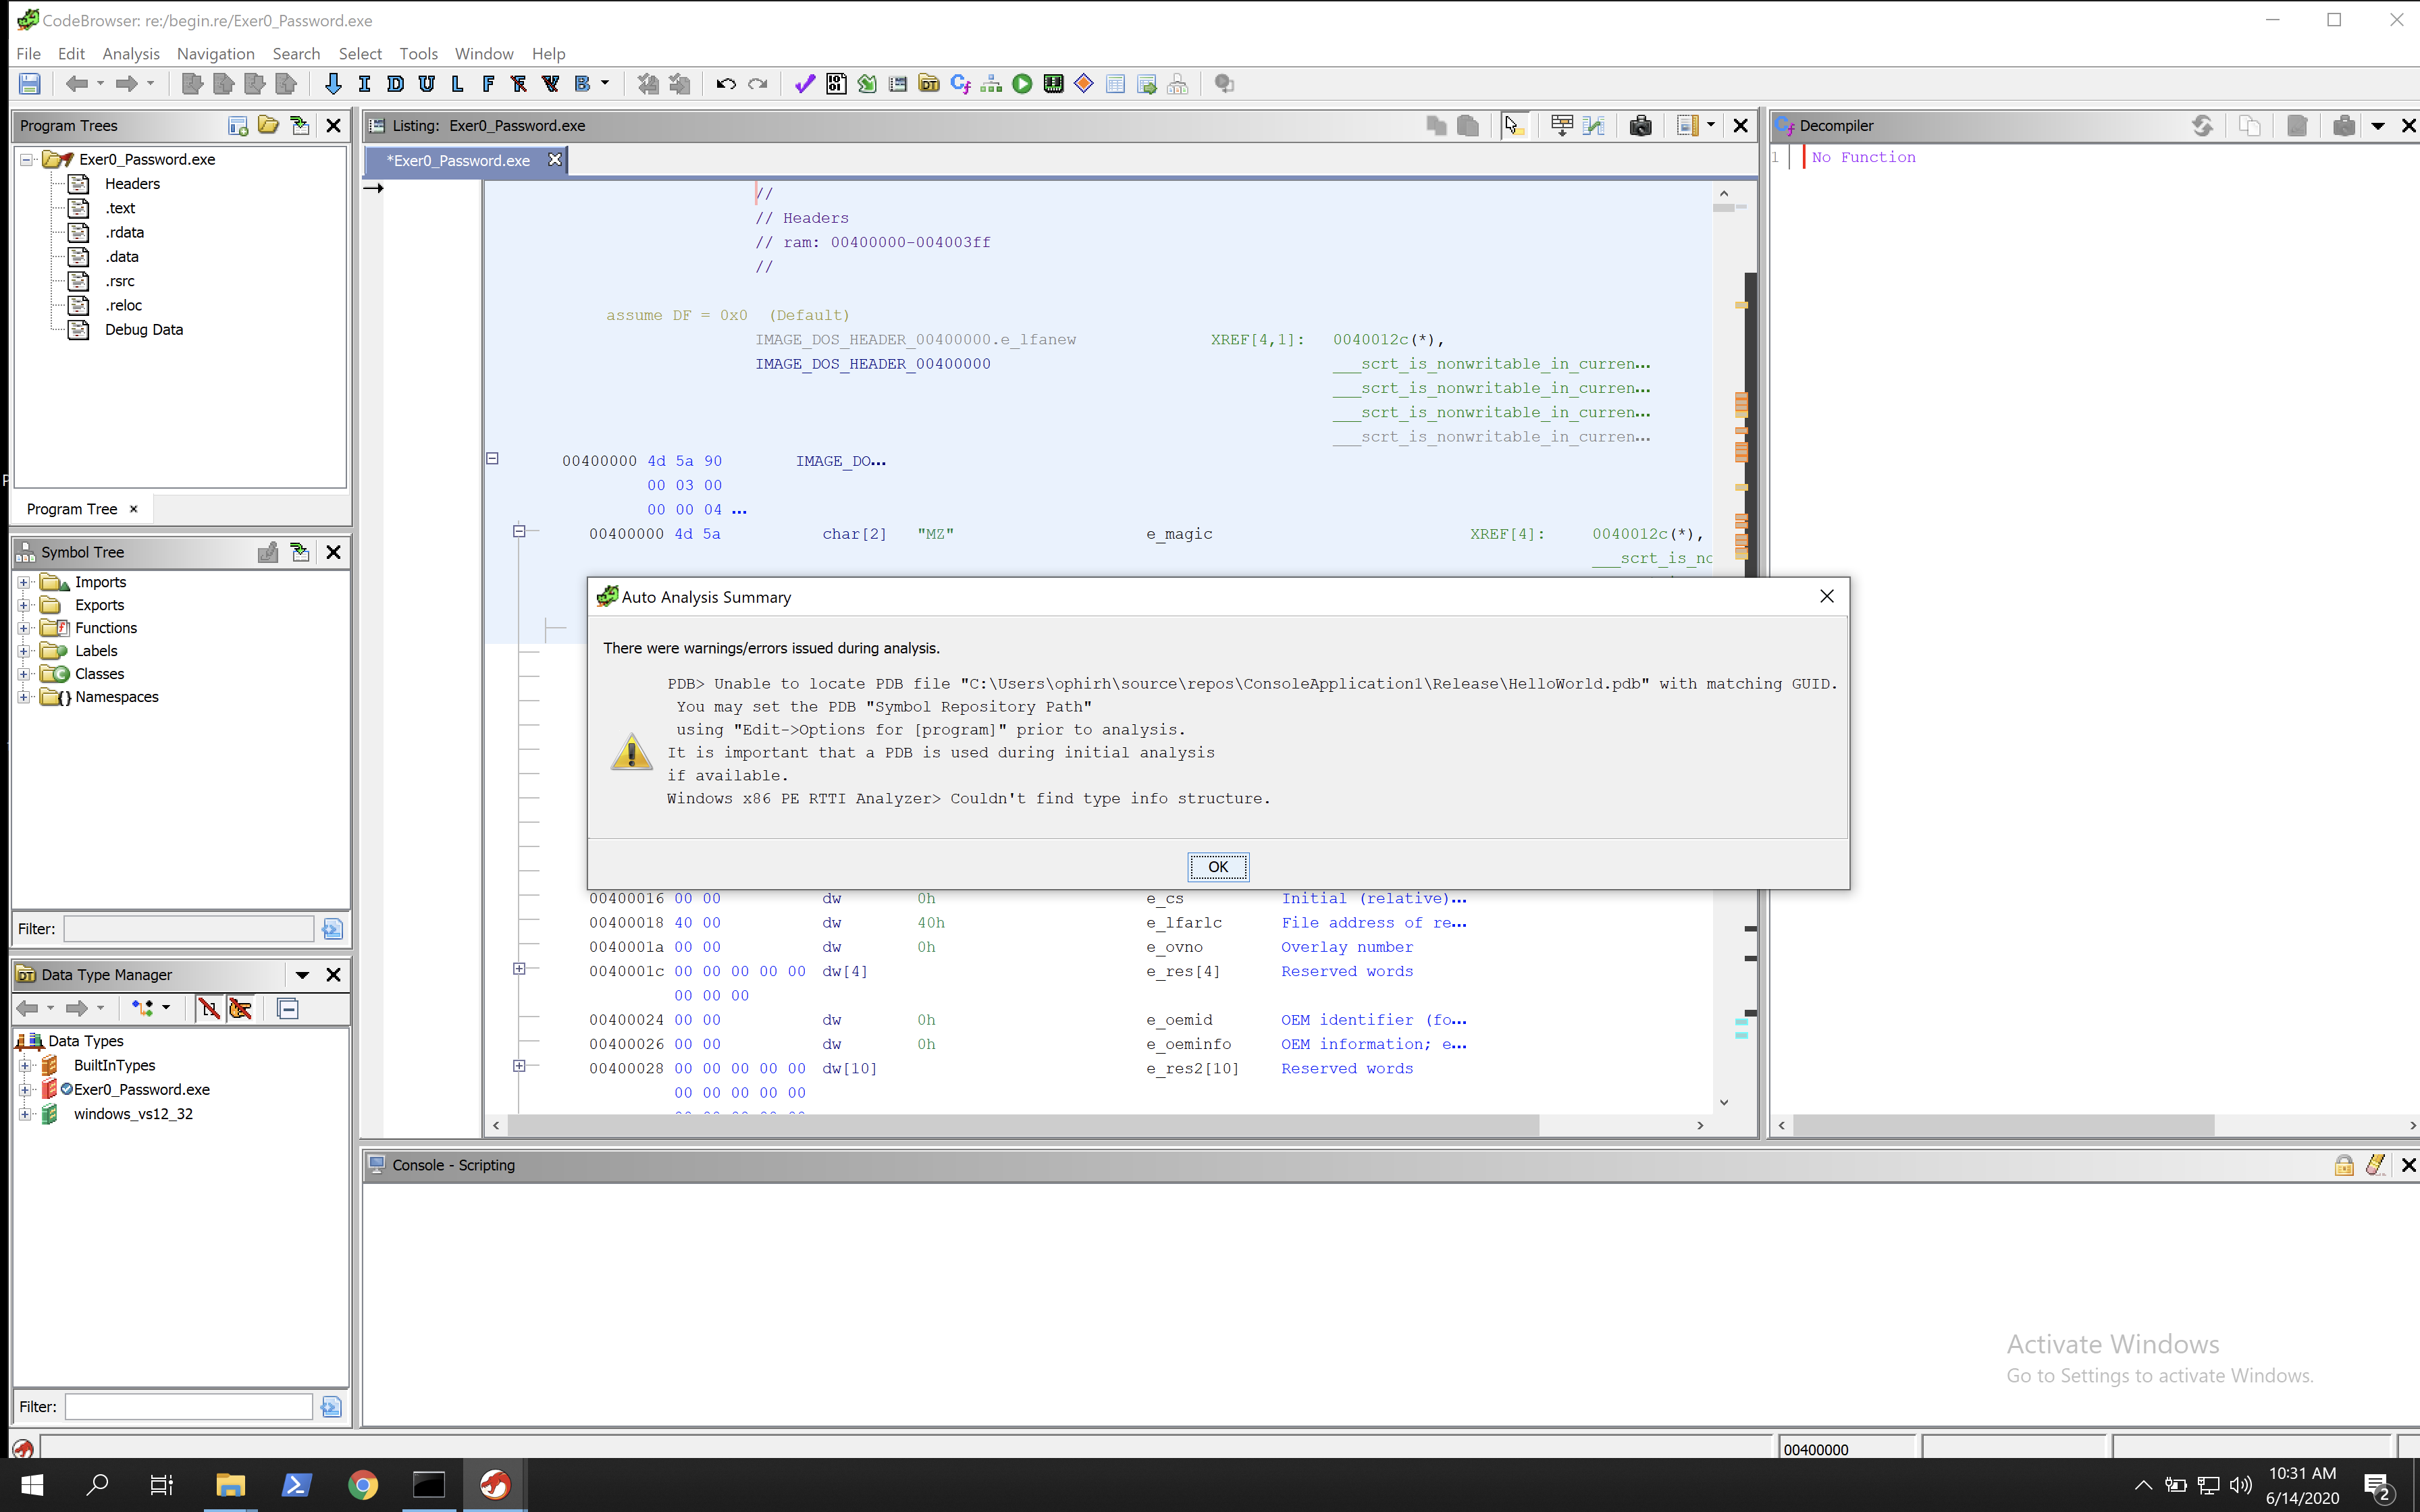
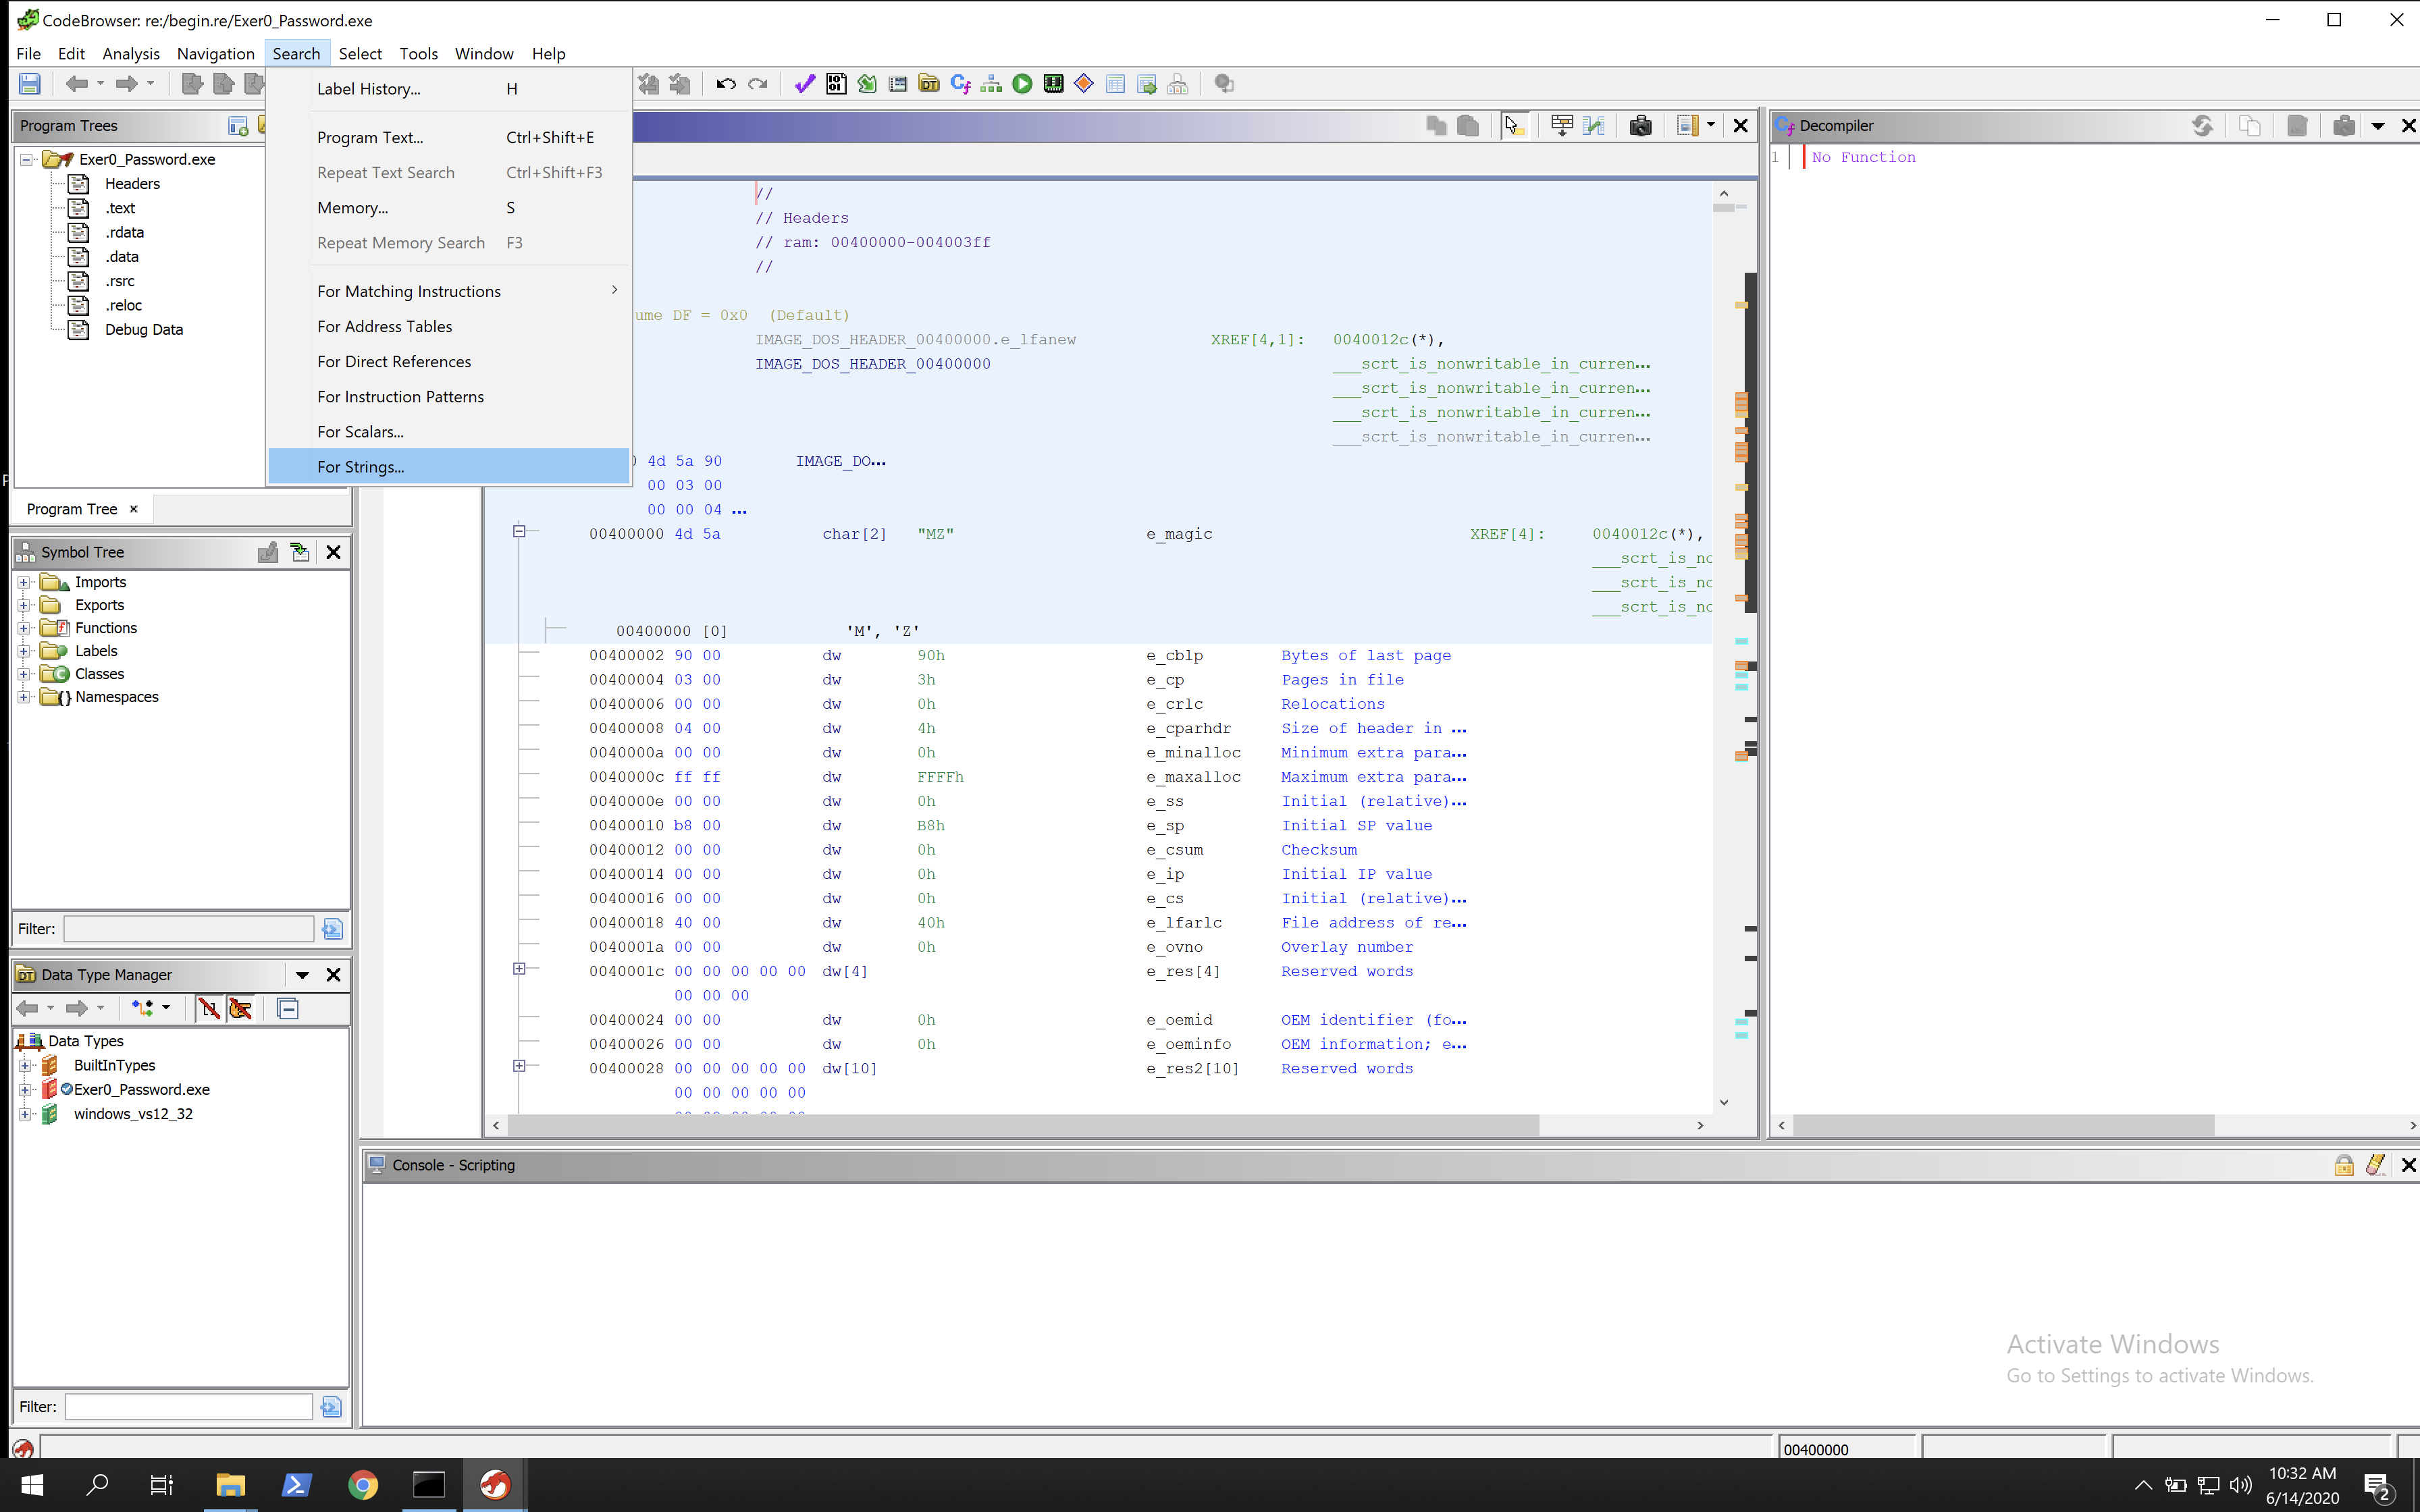
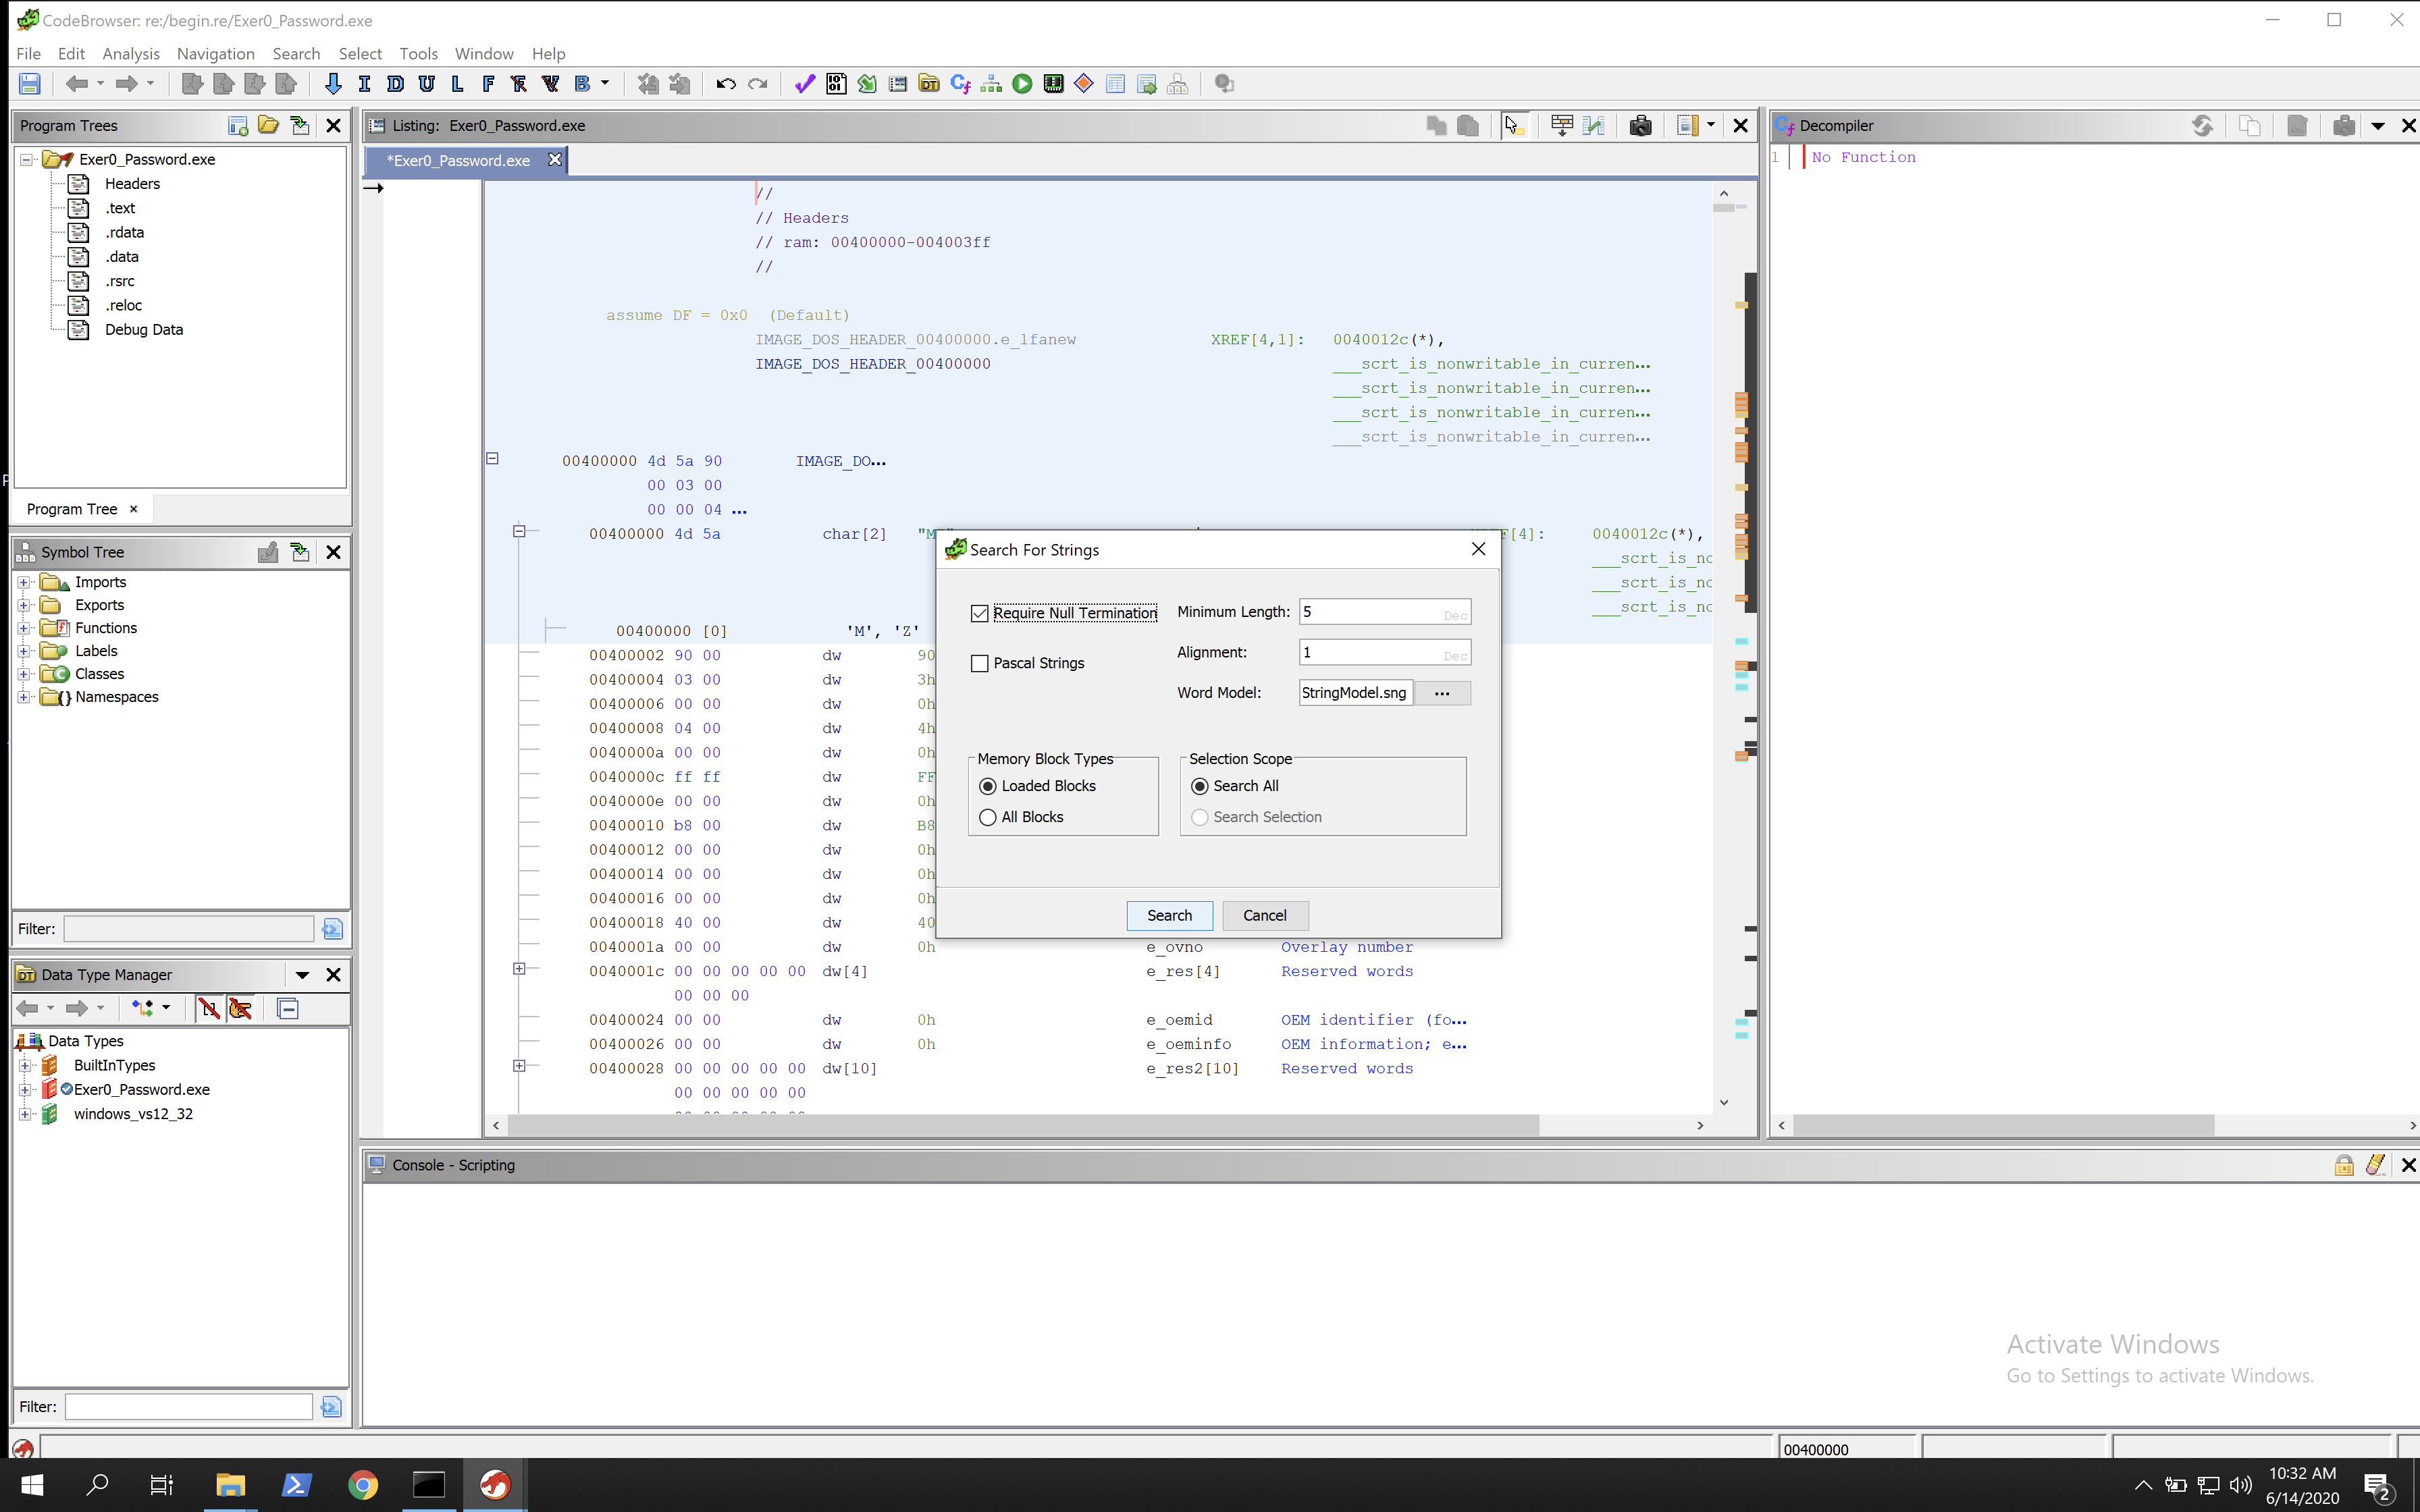
After loading we will search for strings to see if we can locate the incorrect password string, and by doing so find the main function.
This showed the following pop-up.
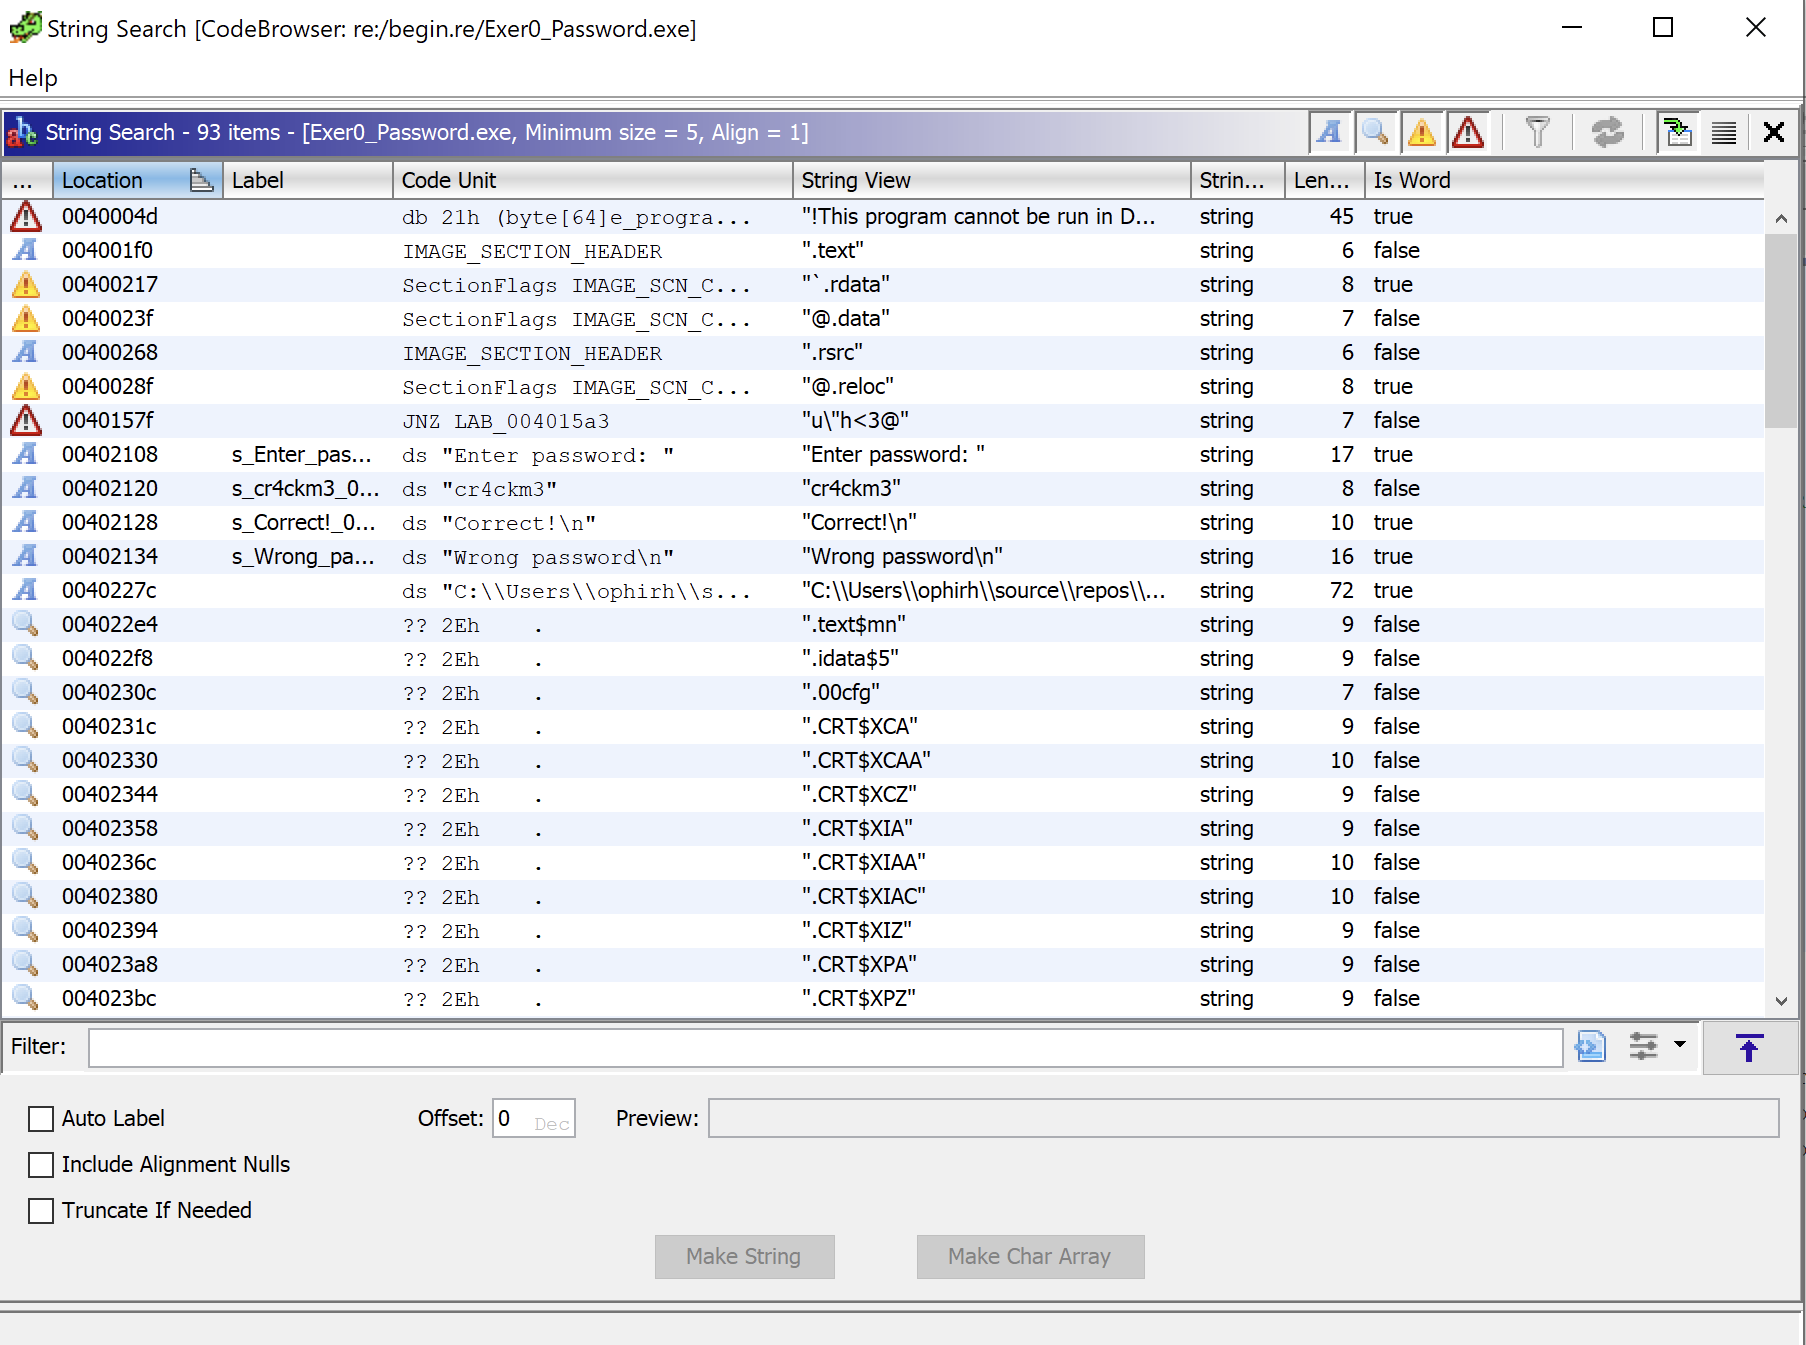
We can see in the strings that there is an interesting string “cr4ckm3” which seems like it will be the password. To confirm this we can double click on it and we will see a memory pointer with the string in, however its not within the main function.
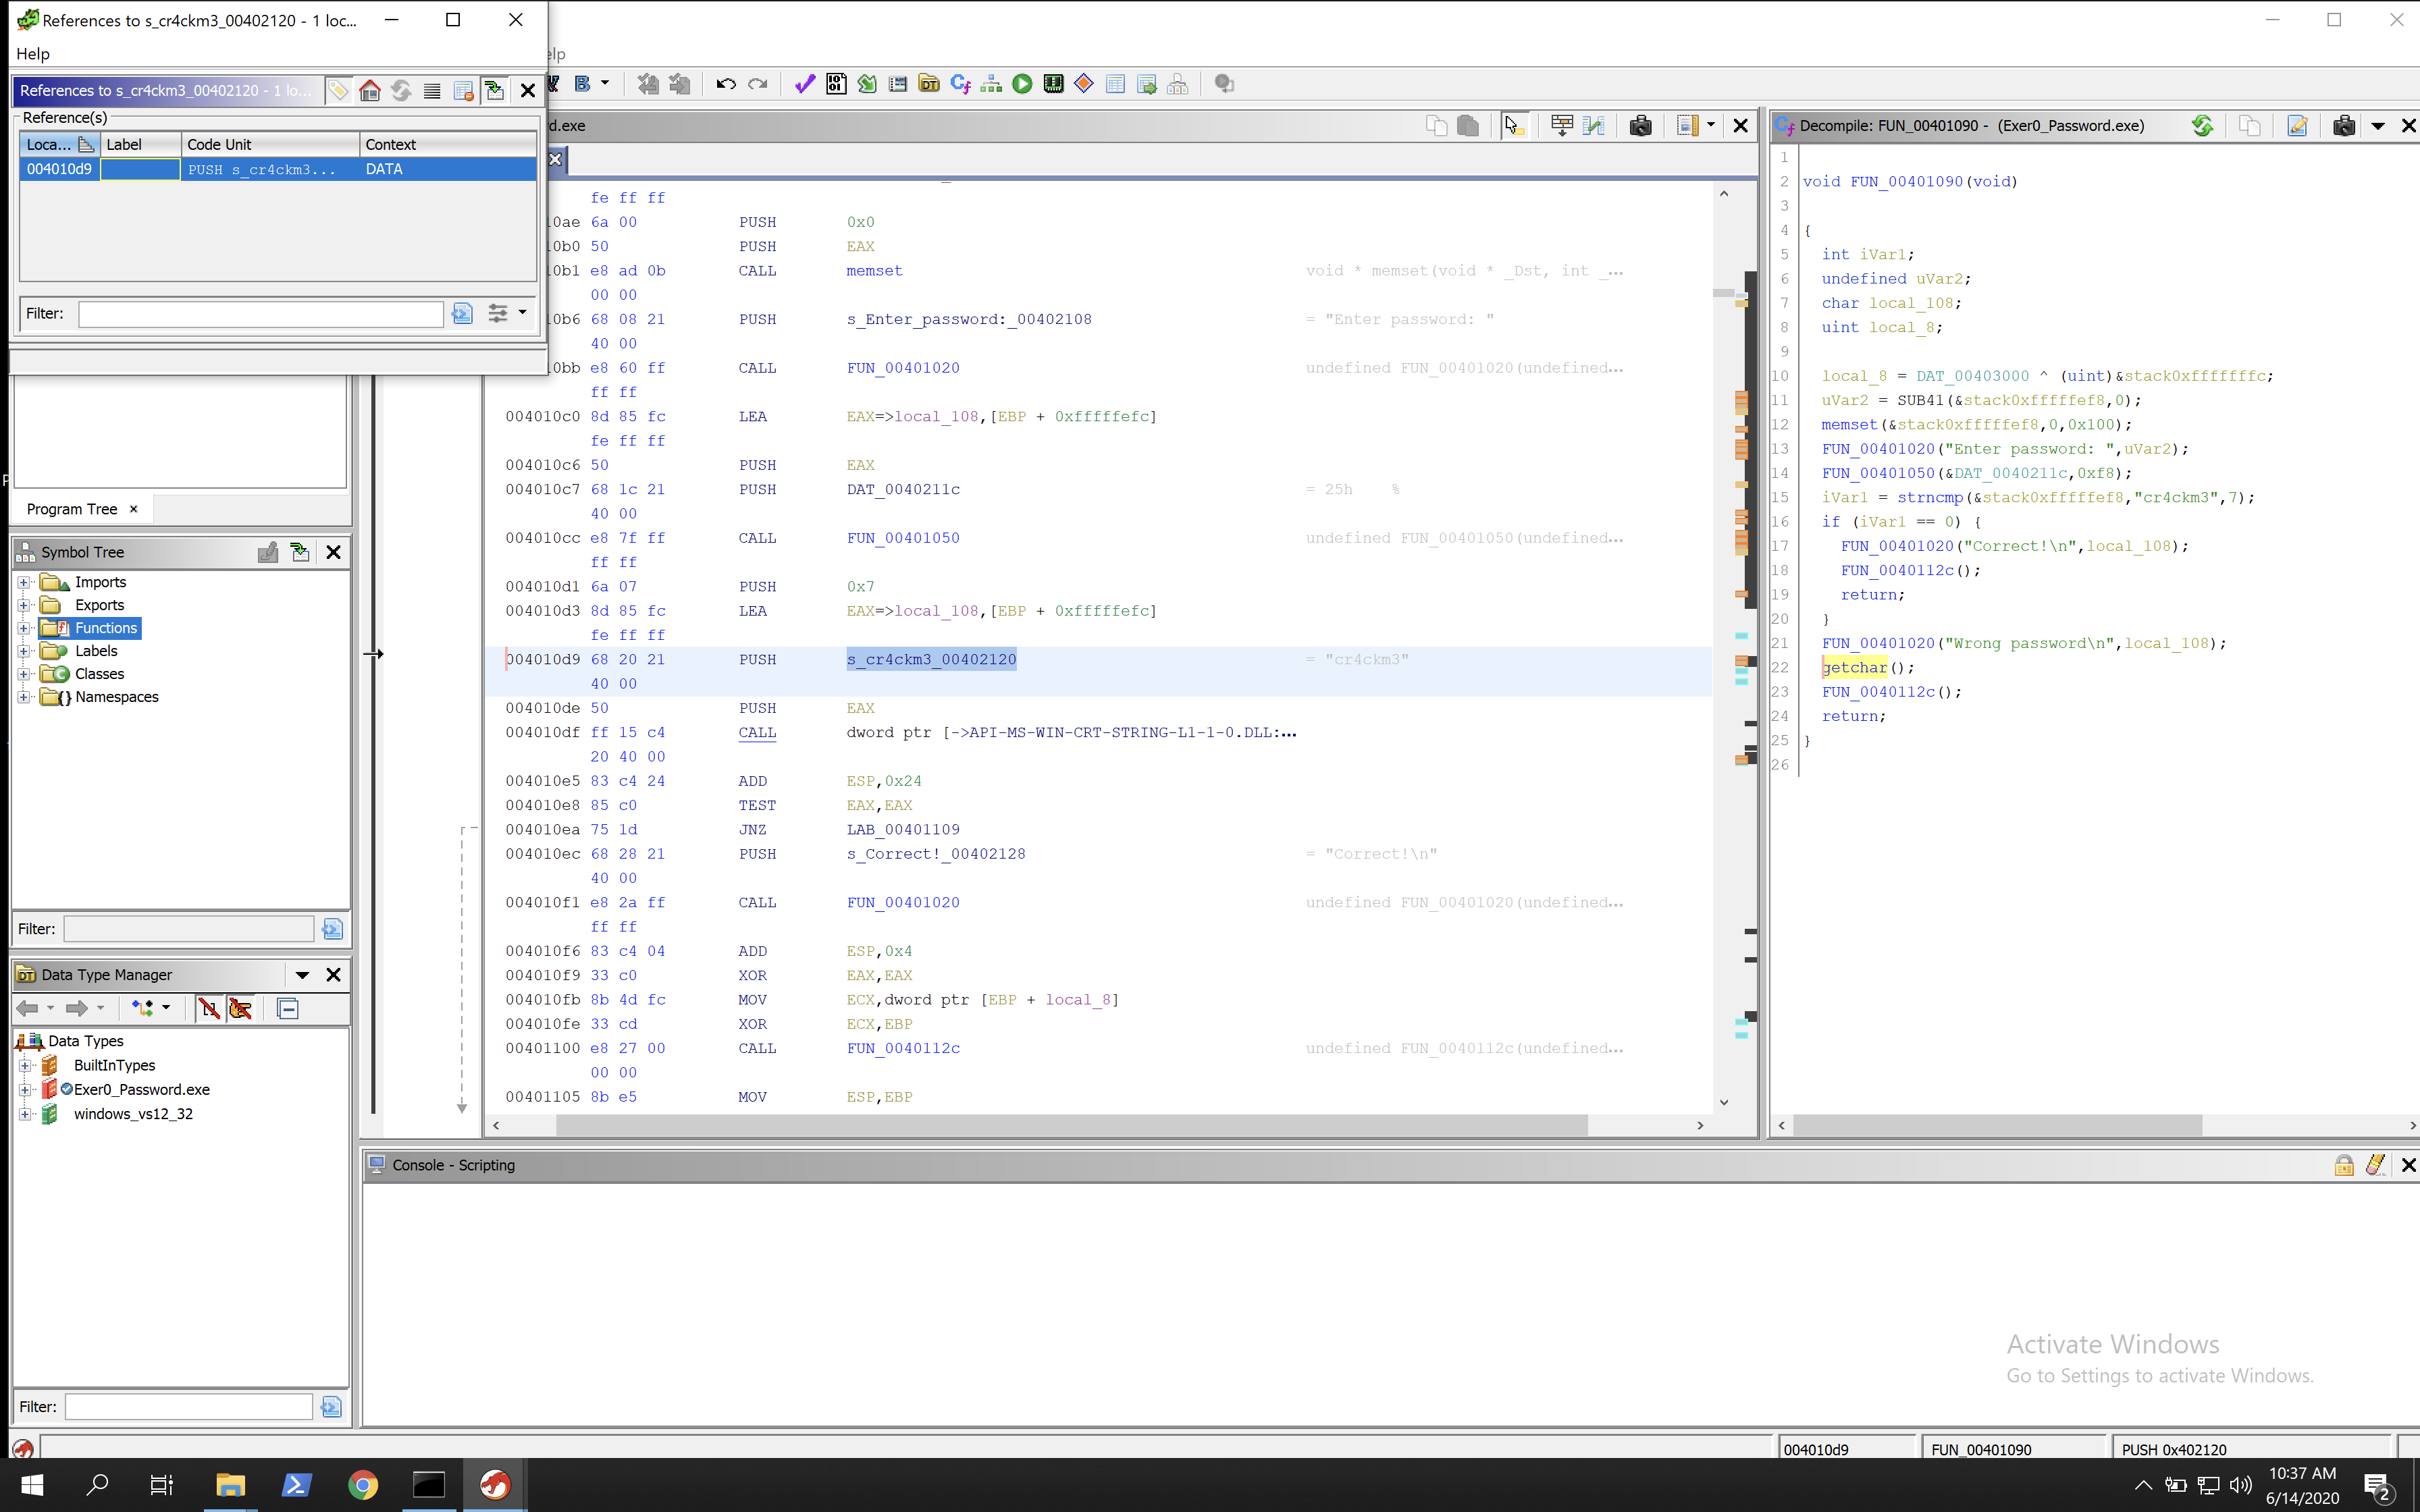
By right clicking on the memory pointer we can select References > Show References to to see where it’s called.

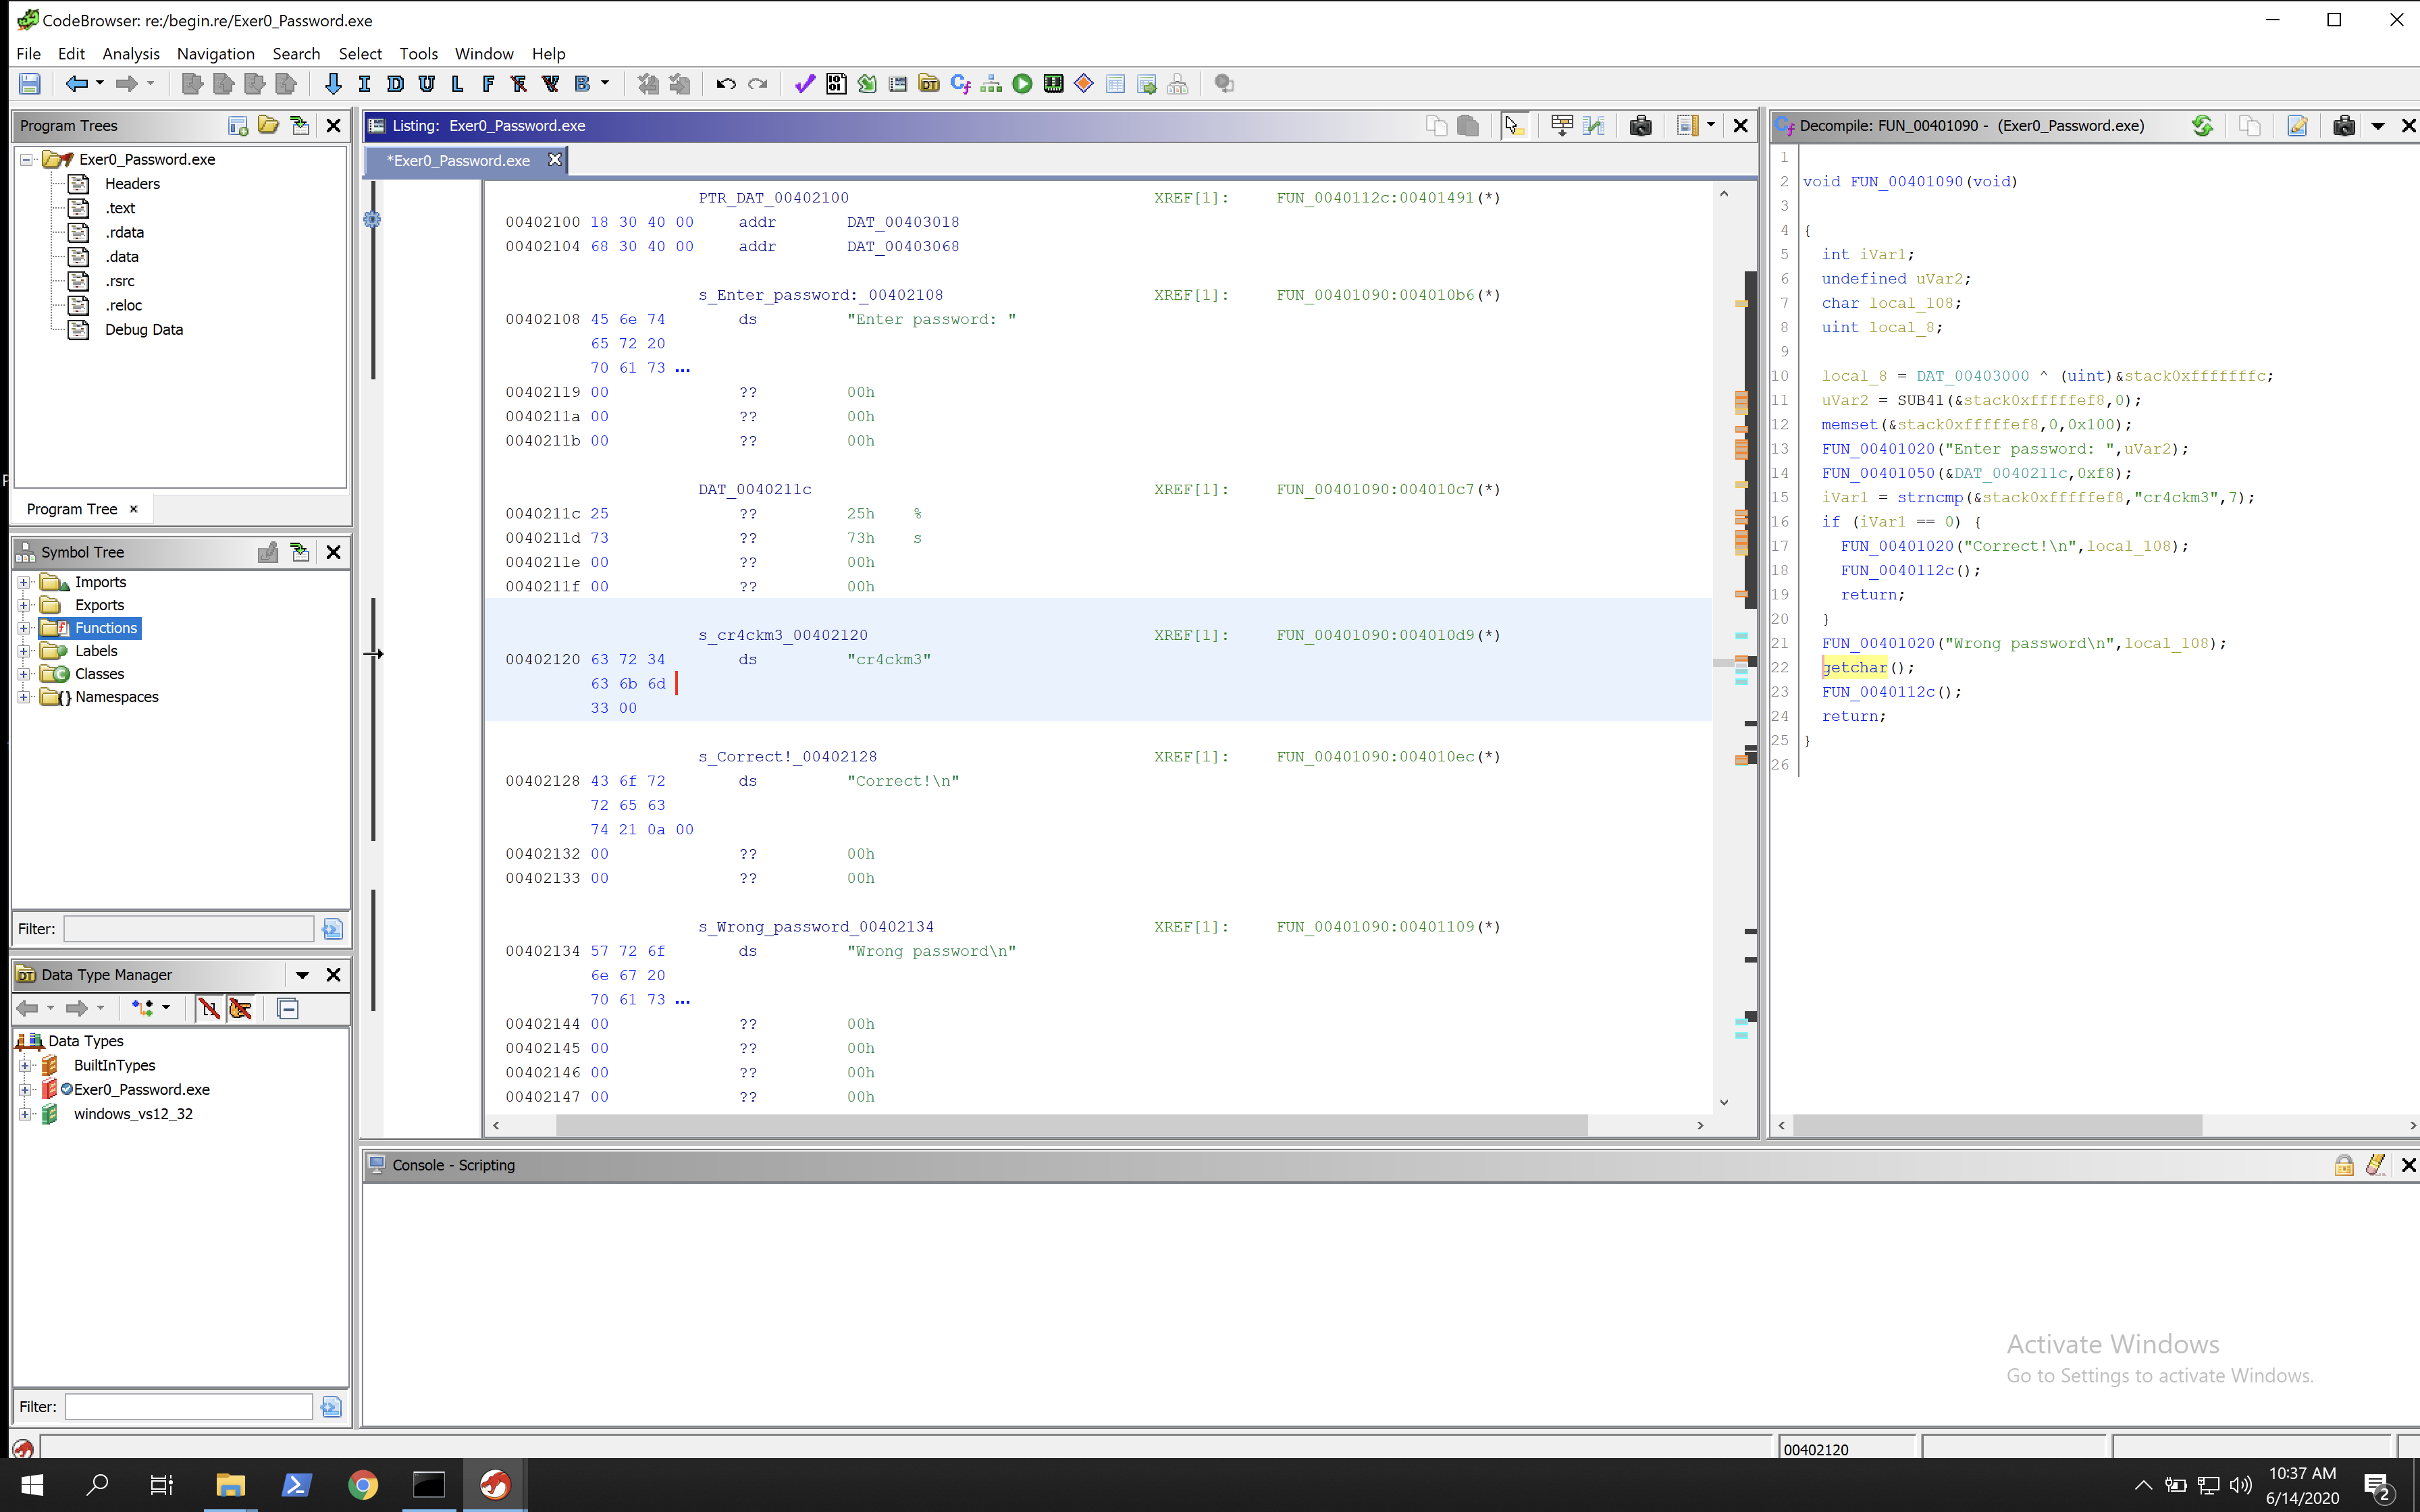
We can see it’s called only once. By clicking on that we are taken to the main function of the executable.
One thing I really like about Ghidra is that when you go into a function, the panel on the right hand side will show sample C code made by Ghidra that would produce the same machine code. We can easily see on the right hand side that its comparing the input string to “cr4ckm3” and if they are equal it will display the success, and if they are not then it will fail.
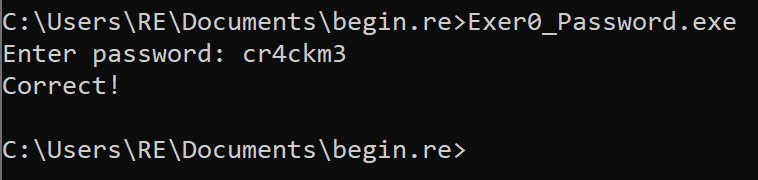
We can also test entering it into the executable to ensure we are correct.
Challenge 2 - Good_luck
This challenge is harder than the first. We will start by opening it in Ghidra. We will then find the strings, same as before, to look for values that may be printed to terminal.
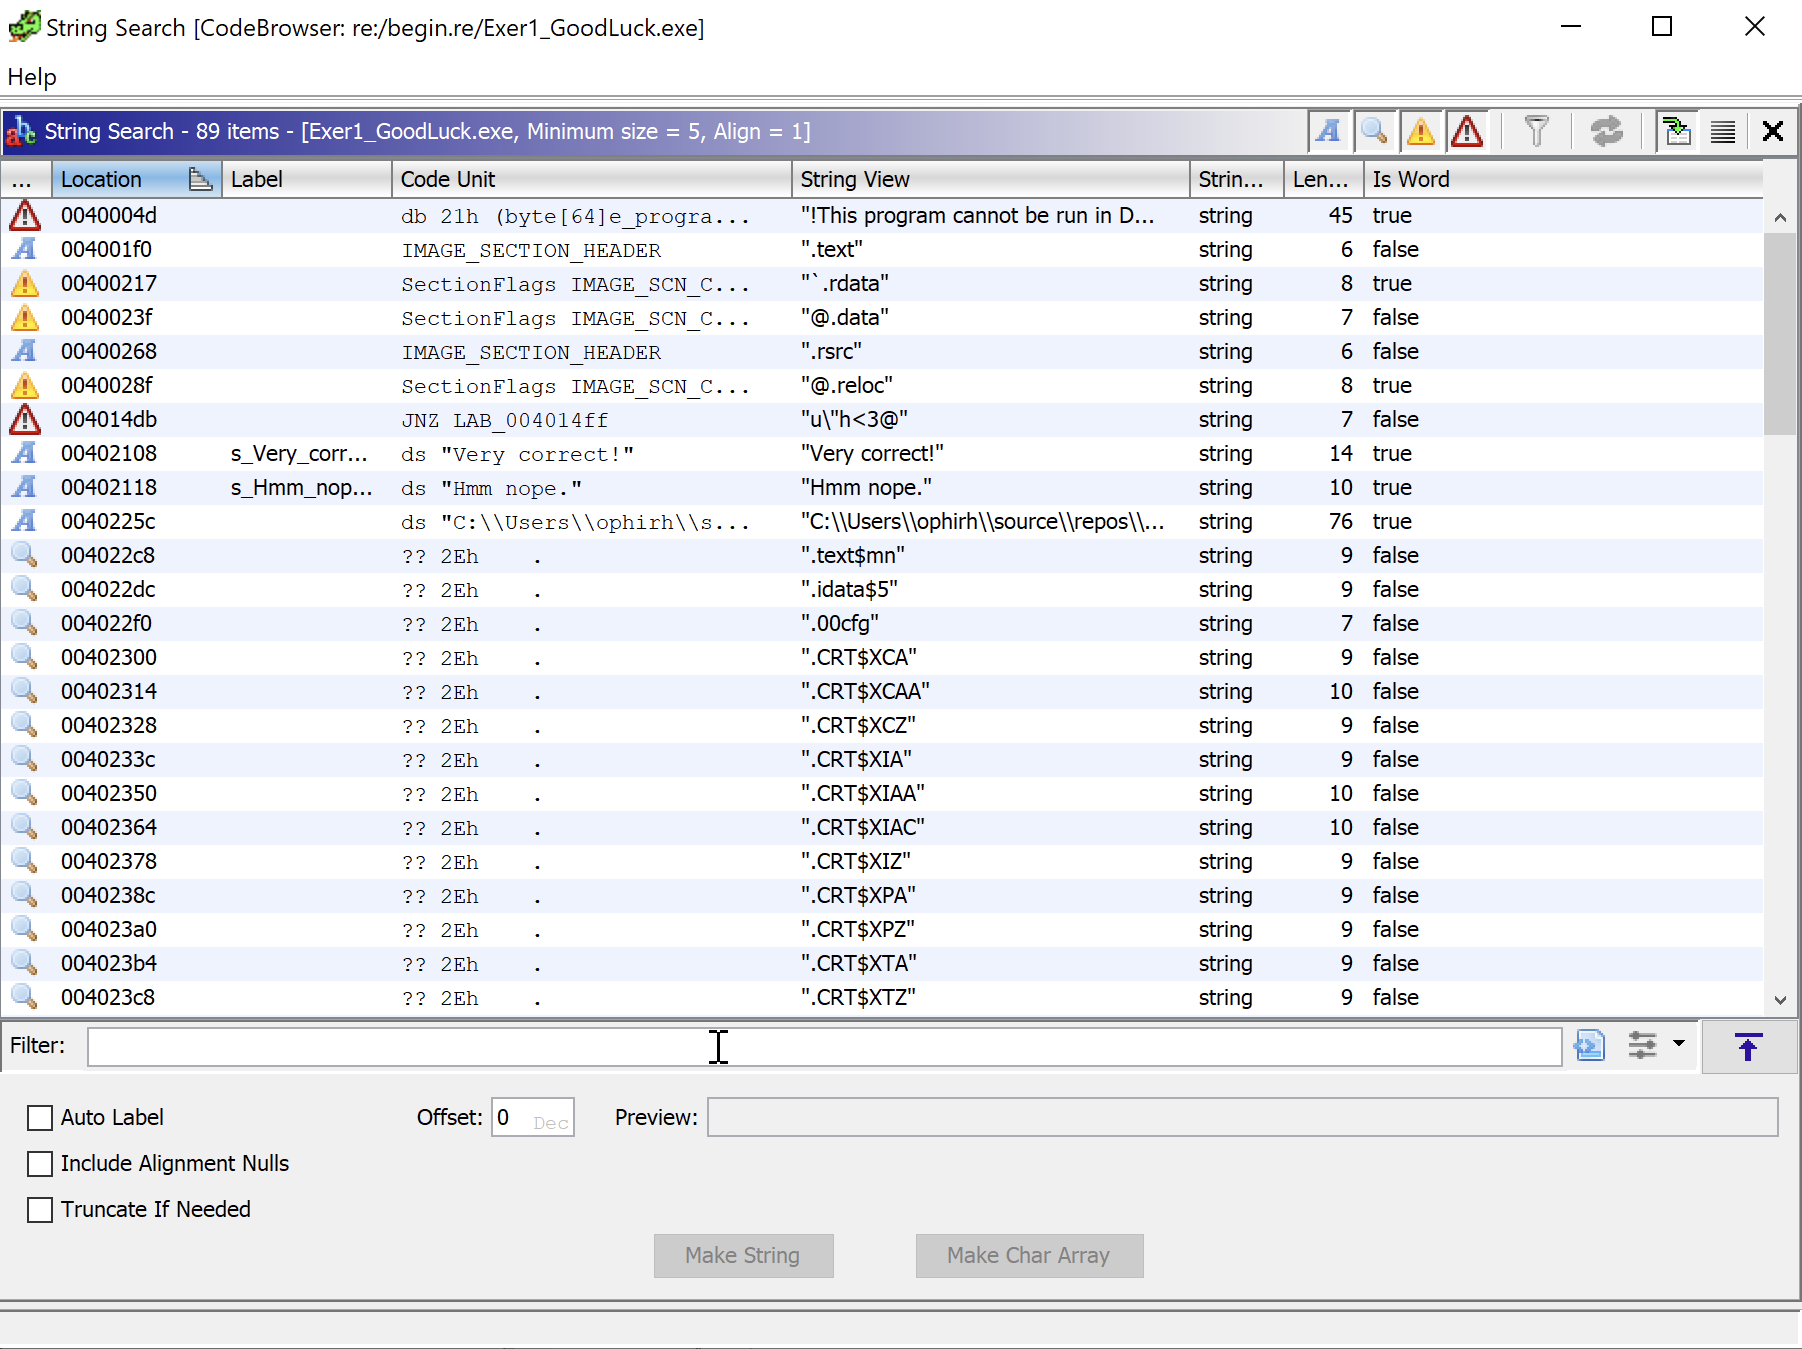
We can see that there is no hardcoded password string, but there are strings telling us if it worked or not. If we follow these by double clicking we can find the references as we did before. By following the reference we get the main function.
We can see in the C code to the right what is happening very clearly, however given this is a reversing challenge it feels a bit like cheating! However, it’s an invaluable tool for learning, even if you are not good with C or assembly. Having both here can help fill the pieces where knowledge lacks (for me it helped anyway). Since this post is more about the assembly side, lets take a look at that and not worry about the C. I like to go through main line-by-line in these challenges and try comment what I think is happening, ending up with something like the below:

Lets go into it a bit!
00401043 83 7d 08 02 CMP dword ptr [EBP + param_1],0x2
This instruction compares the strings given on the command line with 2. The executable itself will always be the first parameter. The fact we see 2 here means it’s expecting something like Good_luck.exe password on the command line.
00401047 75 3b JNZ LAB_00401084 if no second arg then jumps away
This is a Jump if not zero command (JNZ). The compare instruction from above makes sure there is 2 arguments. If there are not 2 arguments, then the result will be a 1 as they were different. In this instruction it will see the 1 (failure) and jump as it is not zero. This jump takes the user past the main function and onto a new section that cleans up memory and exits. If 2 parameters are given then this will not jump and execution will continue.
00401049 8b 45 0c        MOV        EAX,dword ptr [EBP + param_2]                    moves pointer to param 2
0040104c ff 70 04        PUSH       dword ptr [EAX + 0x4]                            push to stack
0040104f ff 15 40        CALL       dword ptr [->API-MS-WIN-CRT-CONVERT-L1-1-0.DLL   convert to int
         20 40 00
This section seems to move a pointer to the second parameter, then pushes the second parameter into EAX. It also adds 4, but I think that is done to make the space for the second param on the stack, and then its pushed into the EAX register.
Then a Windows API call is made. If you hover over it the following can be seen PTR_atoi_00402040. Looking up what atoi does in C and we can see that its a library that takes a string and converts it to an integer. So the second parameter is taken, moved to EAX, then converted to an integer.
00401055 83 c4 04        ADD        ESP,0x4                                          pushes int to value
00401058 85 c0           TEST       EAX,EAX                                          ensures it was successful
0040105a 74 28           JZ         LAB_00401084                                     if no int, jumps
This function adds the new integer value to EAX and adds 4, I assume to give it space to reside within. It then tests that EAX has a value within it. If the result is 0 (no result) then a jump happens to bypass the main function and close. (JZ = Jump if Zero). If an integer value is now within EAX, it will continue.
0040105c 8d 04 80 LEA EAX,[EAX + EAX*0x4] push and put 5x EAX -> EAX
0040105f 3d 1a 18 CMP EAX,0x181a compares to 0x181A
00 00
00401064 75 11 JNZ LAB_00401077 if not equal jumps
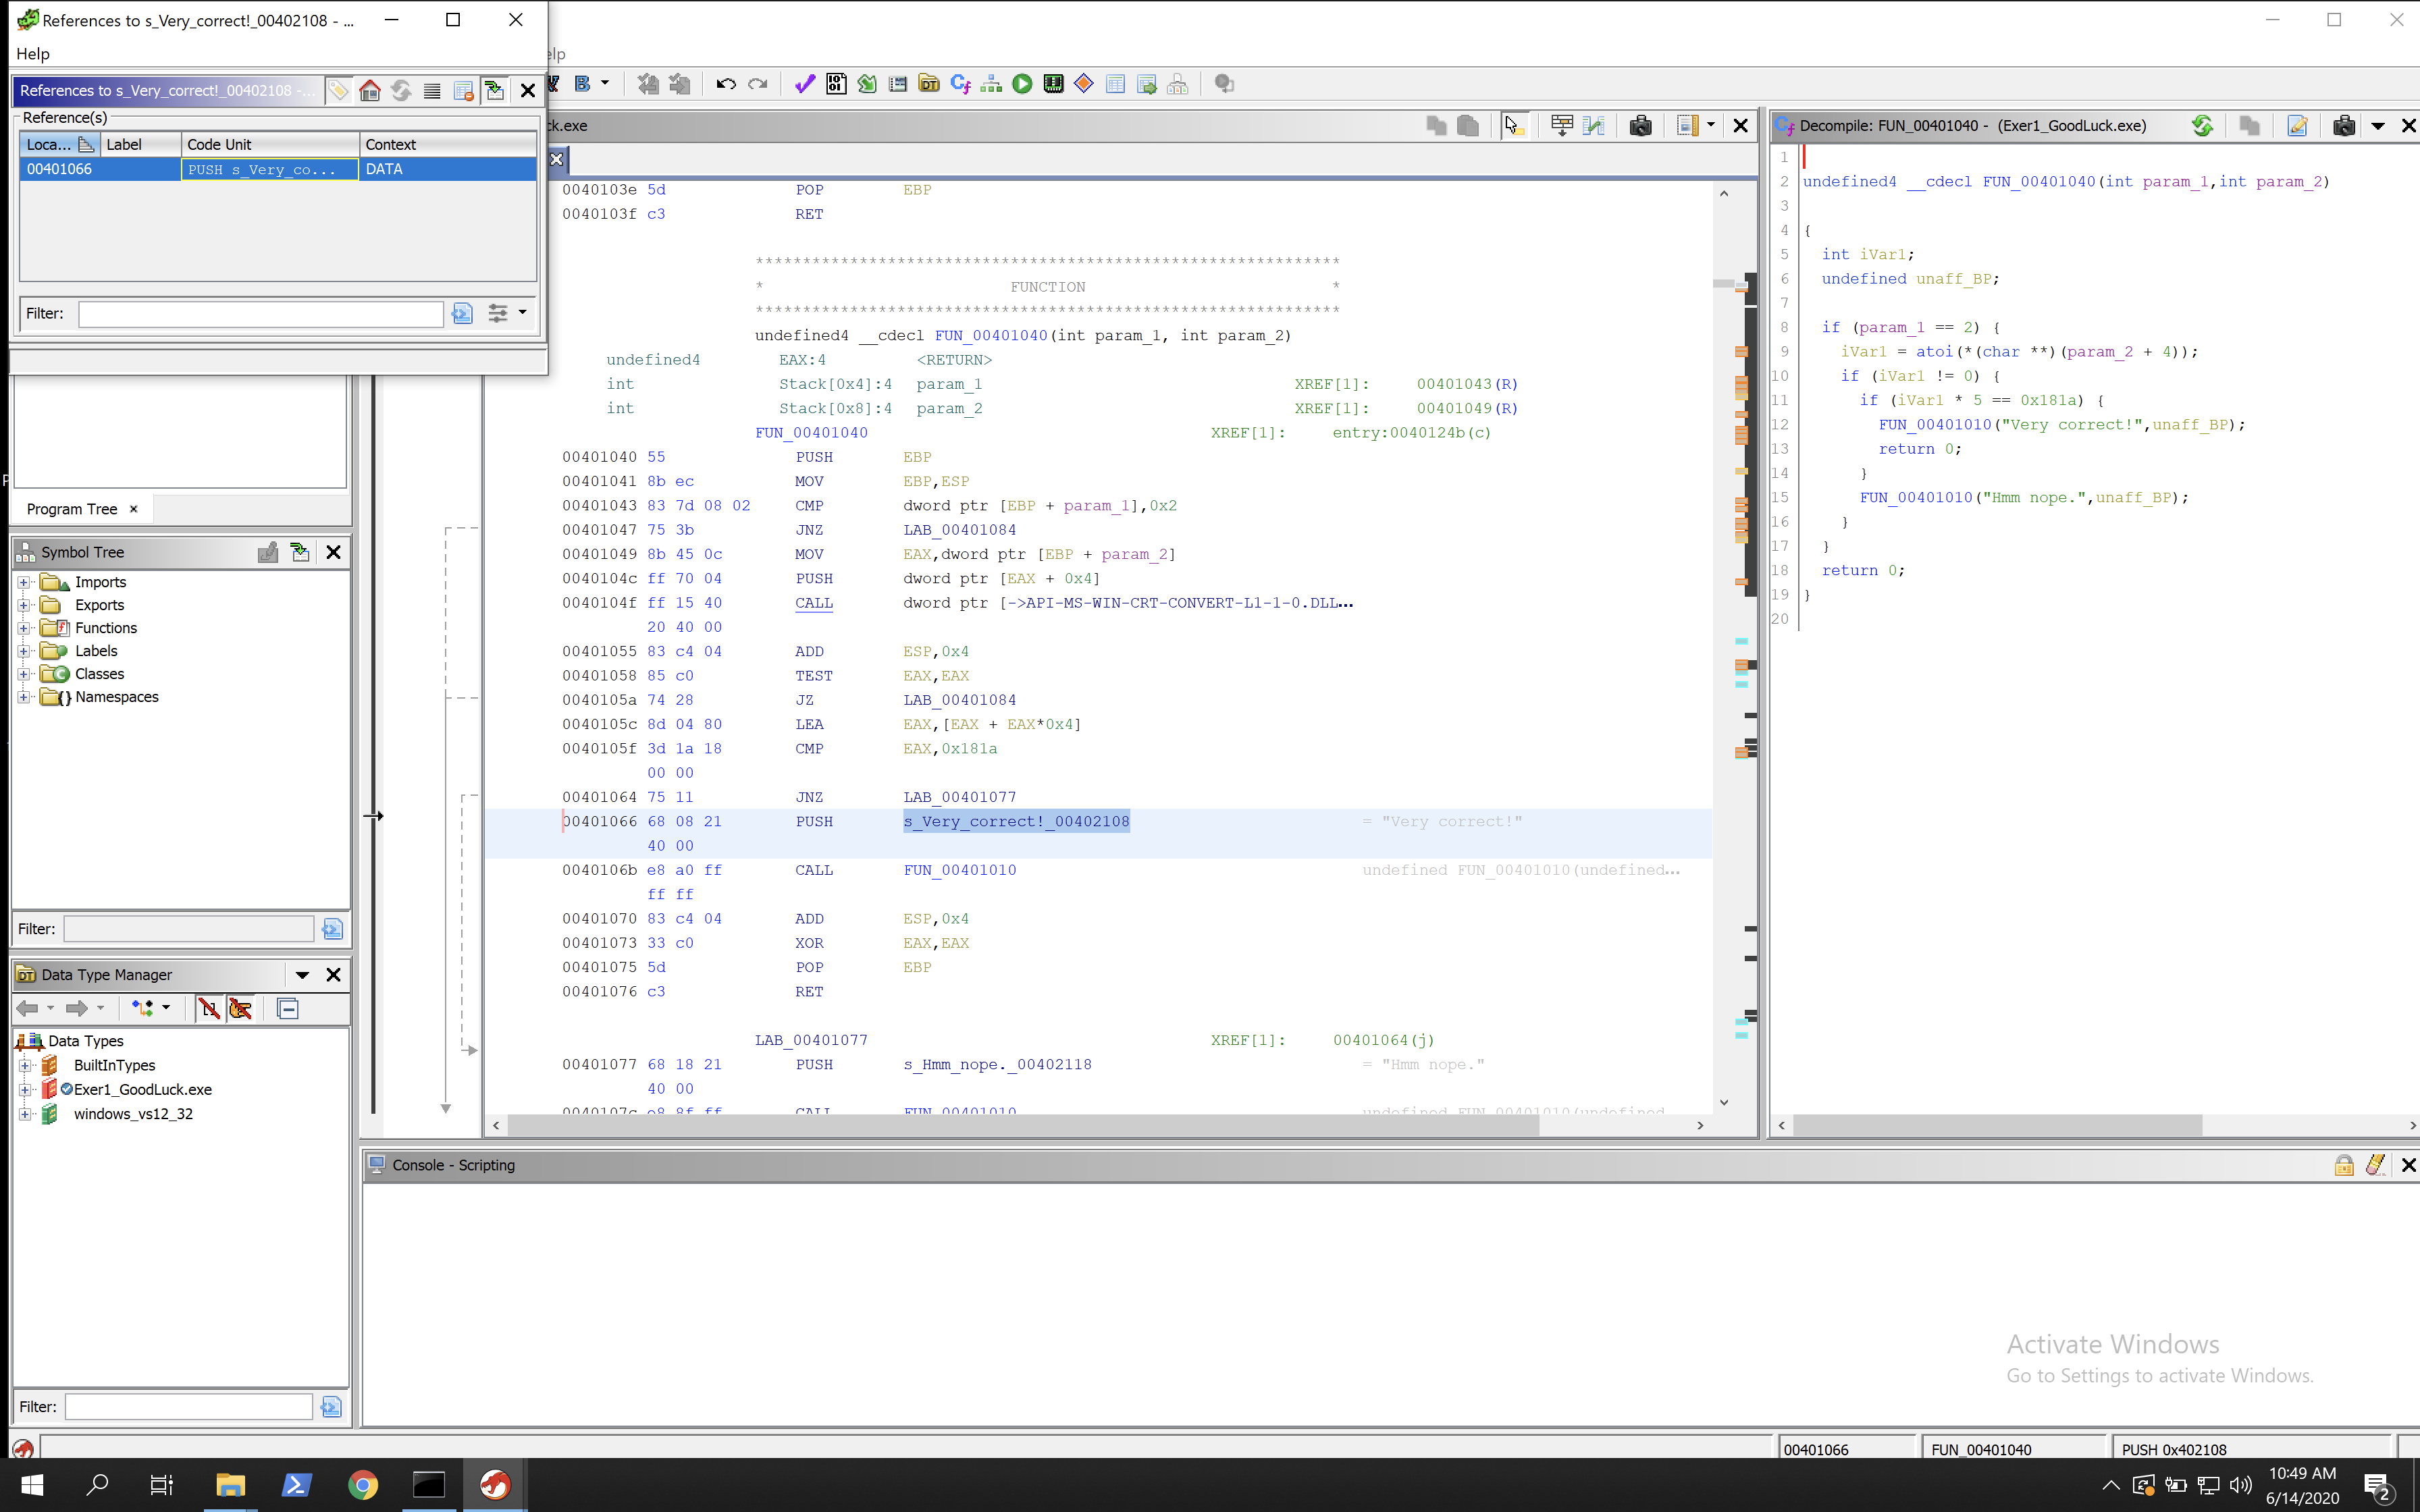
00401066 68 08 21 PUSH s_Very_correct!_00402108 = "Very correct!"
40 00
Now the value of EAX is pushed onto the stack and it puts EAX + EAX x4, which is essentially EAX*5. Then EAX is compared to 0x181a. If EAX is equal to 0x181a, then the result will be 0 and the success message will be pushed to the stack, showing we have the right password.
So 5 x EAX = 0x181a, which means EAX = 0x181a / 5. Using a hex calculator, 0x181a / 5 = 4D2 = EAX = Correct Param 2. 4D2 converted to decimal is 1234. So 1234 is the password, which can be shown through the executable.

Challenge 3 - Julia
This challenge starts the same as the others. You can run the executable and see what is shown, then load into Ghidra. Analyse, then search for strings. You will see some interesting strings near the bottom.

This looks like it includes a hard coded password, but it does not work. Lets go to it, then find the references and go to that. Just as we did for the last two binaries, this gets us to the main function.
This function is a lot larger than the other two. I renamed the function to main and starting working through the code with the walkthrough provided on begin.re, which is very helpful in understanding the sections.
The first section of main is:
00401040 55              PUSH       EBP
00401041 8b ec           MOV        EBP,ESP
00401043 83 ec 08        SUB        ESP,0x8
00401046 83 7d 08 02     CMP        dword ptr [EBP + param_1],0x2
0040104a 74 17           JZ         LAB_00401063
0040104c 68 0c 30        PUSH       s_Please_provide_the_password._0040300c          = "Please provide the password.\n"
            40 00
00401051 e8 5a 01        CALL       printfunction                                    undefined4 printfunction(undefin
            00 00
00401056 83 c4 04        ADD        ESP,0x4
00401059 a1 00 30        MOV        EAX,[DAT_00403000]                               = 00000001h
            40 00
0040105e e9 f3 00        JMP        errorcode                                        undefined errorcode(void)
            00 00
I have renamed the functions printfunction and error code, so they will look different to you initially. We can see a CMP instruction similar to last time checking that a second argument exists, so this executable is also looking for the password to be provided on the command line. If no second parameter is found then the CMP returns 1. In this case the jump does not happen, the error code is pushed to the stack, then called. It then jumps to an exit.
If a second parameter is found then the CMP returns 0, then the jump is taken and goes to the next section.
00401063 b8 04 00        MOV        EAX,0x4                                          add 4 to eax
            00 00
00401068 c1 e0 00        SHL        EAX,0x0                                          shift left 0 (does nothing)
0040106b 8b 4d 0c        MOV        ECX,dword ptr [EBP + param_2]                    takes second param
0040106e 8b 14 01        MOV        EDX,dword ptr [ECX + EAX*0x1]                    takes second param + 4
00401071 52              PUSH       EDX
00401072 e8 bc 0c        CALL       strlen                                           size_t strlen(char * _Str)
            00 00
00401077 83 c4 04        ADD        ESP,0x4                                          adds 4
0040107a 89 45 f8        MOV        dword ptr [EBP + input_length],EAX               moves calculated string length i
0040107d 8b 45 f8        MOV        EAX,dword ptr [EBP + input_length]
00401080 83 c0 01        ADD        EAX,0x1
00401083 50              PUSH       EAX
00401084 e8 b0 0c        CALL       malloc                                           void * malloc(size_t _Size)
            00 00
00401089 83 c4 04        ADD        ESP,0x4
0040108c 89 45 fc        MOV        dword ptr [EBP + dest],EAX
0040108f 83 7d fc 00     CMP        dword ptr [EBP + dest],0x0                       checks if malloc failed
00401093 75 0a           JNZ        LAB_0040109f                                     if Dest = 0 then failed so exits
00401095 a1 00 30        MOV        EAX,[DAT_00403000]                               = 00000001h
            40 00
0040109a e9 b7 00        JMP        errorcode                                        undefined errorcode(void)
            00 00
In this section I have added my own inline comments to keep track of what is going on. It essentially adds space into EAX, adds the second parameter into EAX, then calls another function that gets the length of the string. I have renamed this function strlen, so it will be different for you. You can analyse the function in Ghidra by hovering over it.
Then it takes the length of the string and puts the length into EAX. It then increments EAX by 1, I assume as some kind of buffer. It then sends EAX to malloc (I renamed it to malloc I believe). Malloc calls the memory allocation windows API, so essentially takes the length, assigns memory space for it.
Then the value of EAX is moved into memory in dest. This is another thing I have renamed for ease. A CMP instruction is done to make sure that dest contains the length of the string. If it does not contain it then it doesn’t jump and it errors and closes. If it contains the length then it moves onto the next section.
0040109f b9 04 00        MOV        ECX,0x4
            00 00
004010a4 c1 e1 00        SHL        ECX,0x0
004010a7 8b 55 0c        MOV        EDX,dword ptr [EBP + param_2]
004010aa 8b 04 0a        MOV        EAX,dword ptr [EDX + ECX*0x1]
004010ad 50              PUSH       EAX
004010ae 8b 4d fc        MOV        ECX,dword ptr [EBP + dest]
004010b1 51              PUSH       ECX                                              takes param 2 and puts in alloca
004010b2 e8 88 0c        CALL       strcpy                                           char * strcpy(char * _Dest, char
            00 00
004010b7 83 c4 08        ADD        ESP,0x8
004010ba 85 c0           TEST       EAX,EAX                                          makes sure param is in memory
004010bc 75 20           JNZ        LAB_004010de                                     if failed doesnt jump and exits
004010be 68 2c 30        PUSH       s_Input_copying_to_array_failed_0040302c         = "Input copying to array failed"
            40 00
004010c3 e8 e8 00        CALL       printfunction                                    undefined4 printfunction(undefin
            00 00
004010c8 83 c4 04        ADD        ESP,0x4
004010cb 8b 55 fc        MOV        EDX,dword ptr [EBP + dest]
004010ce 52              PUSH       EDX
004010cf e8 71 0c        CALL       free                                             void free(void * _Memory)
            00 00
004010d4 83 c4 04        ADD        ESP,0x4
004010d7 a1 00 30        MOV        EAX,[DAT_00403000]                               = 00000001h
            40 00
004010dc eb 78           JMP        errorcode                                        undefined errorcode(void)
Here 4 is moved to ECX, its then shifted left (SHL) by 0 (doing nothing). Its then taking the second parameter and putting it into EDX, then putting into EAX. It then seems to call strcpy function so I assume it copying the actual string into EAX. Then checking that EAX contains something and if not continues without jumping and fails. If something is in EAX it takes the jump to the next section. So at this point we have the length of the string in memory and the actual string itself.
                        LAB_004010de                                    XREF[1]:     004010bc(j)
004010de eb 09           JMP        LAB_004010e9                                     avoids increment first time
                        LAB_004010e0                                    XREF[1]:     00401107(j)
004010e0 8b 45 fc        MOV        EAX,dword ptr [EBP + dest]                       loop checking length of dest
004010e3 83 c0 01        ADD        EAX,0x1                                          increments by 1 every loop
004010e6 89 45 fc        MOV        dword ptr [EBP + dest],EAX
                        LAB_004010e9                                    XREF[1]:     004010de(j)
004010e9 8b 4d fc        MOV        ECX,dword ptr [EBP + dest]
004010ec 0f be 11        MOVSX      EDX,byte ptr [ECX]                               EDX looks at 1 byte of dest
004010ef 85 d2           TEST       EDX,EDX                                          if end of dest then its 0
004010f1 74 16           JZ         LAB_00401109                                     if EDX 0 end loop
004010f3 8b 45 fc        MOV        EAX,dword ptr [EBP + dest]
004010f6 0f b6 08        MOVZX      ECX,byte ptr [EAX]
004010f9 51              PUSH       ECX
004010fa e8 61 00        CALL       mystery_function                                  undefined4 mystery_fun(char curr
        00 00
004010ff 83 c4 04        ADD        ESP,0x4
00401102 8b 55 fc        MOV        EDX,dword ptr [EBP + dest]                       adds in value from mystery funct
00401105 88 02           MOV        byte ptr [EDX],AL
00401107 eb d7           JMP        LAB_004010e0                                     jumps back to loop
Now here we have a few sections but it makes more sense to look at them all together. This is a looping function, which you can see on Ghidra because there will be arrows showing a jump goes upwards.
The first section is an unconditional jump, which bypasses section LAB_004010e0. This section moves a pointer, increments one and then moves the pointer again. So this is likely moving across each letter within our string given to the program.
Section LAB_004010e9 moves a pointer to our string in memory, points to a single byte of it with the MOVSX instruction, then tests to see if the byte is a 0. If its a zero then the string has ended, so the loop ends and bypasses the rest. If not, execution continues. It gets the value being pointed too and sends it to what I have called the mystery_function. The result of that is then added, then the JMP takes it back to the start of the loop, increments by one and replaces the next character.
So we know the program is taking our string, getting the length of it, putting it into memory, looking at it byte by byte and replacing them with some result from mystery_function. So lets take a look at mystery_function.
00401160 55              PUSH       EBP
00401161 8b ec           MOV        EBP,ESP
00401163 0f be 45 08     MOVSX      EAX,byte ptr [EBP + current_char]                takes current character
00401167 83 f8 61        CMP        EAX,'a'                                          compares to letter a
0040116a 7c 16           JL         LAB_00401182                                     jump if less than a
0040116c 0f be 4d 08     MOVSX      ECX,byte ptr [EBP + current_char]
00401170 83 f9 7a        CMP        ECX,'z'                                          compares current to z
00401173 7f 0d           JG         LAB_00401182                                     jumps if greater than
00401175 0f be 55 08     MOVSX      EDX,byte ptr [EBP + current_char]
00401179 03 15 08        ADD        EDX,dword ptr [DAT_00403008]                     add 4 if between a and z
            30 40 00
0040117f 88 55 08        MOV        byte ptr [EBP + current_char],DL
                     LAB_00401182                                    XREF[2]:     0040116a(j), 00401173(j)
00401182 0f be 45 08     MOVSX      EAX,byte ptr [EBP + current_char]                happens again but for A and Z
00401186 83 f8 41        CMP        EAX,'A'                                          compares byte to A
00401189 7c 16           JL         LAB_004011a1                                     jump if less than
0040118b 0f be 4d 08     MOVSX      ECX,byte ptr [EBP + current_char]
0040118f 83 f9 5a        CMP        ECX,'Z'
00401192 7f 0d           JG         LAB_004011a1
00401194 0f be 55 08     MOVSX      EDX,byte ptr [EBP + current_char]
00401198 03 15 08        ADD        EDX,dword ptr [DAT_00403008]                     = 04h
                 30 40 00
0040119e 88 55 08        MOV        byte ptr [EBP + current_char],DL
                             LAB_004011a1                                    XREF[2]:     00401189(j), 00401192(j)
004011a1 8a 45 08        MOV        AL,byte ptr [EBP + current_char]                 puts new value + 4 back
004011a4 5d              POP        EBP                                              pop to stack
004011a5 c3              RET                                                         return to main
Double click on it within Ghidra to see the above. We can see that it takes the current character and compares it to a. If it is less than a it jumps to the next section. If its greater than or equal to a then it carries on. It compares to see if its less than z. If its greater than z it jumps to the next section. This is making sure it exists between a-z (lowercase). If it is between a-z it then adds 4 to the value and moves the pointer. If this happens then the second section won’t occur because it will compare with A, see that its lower and will jump to the end.
If the value is not between a-z, then it will continue to the next section. This section does the same as the first but only adds 4 if its between A-Z uppercase.
At the end it returns to main.
So now we know that the string is being taken and each letter of the string is being moved by 4 and then replaced, making this a caeser cipher!
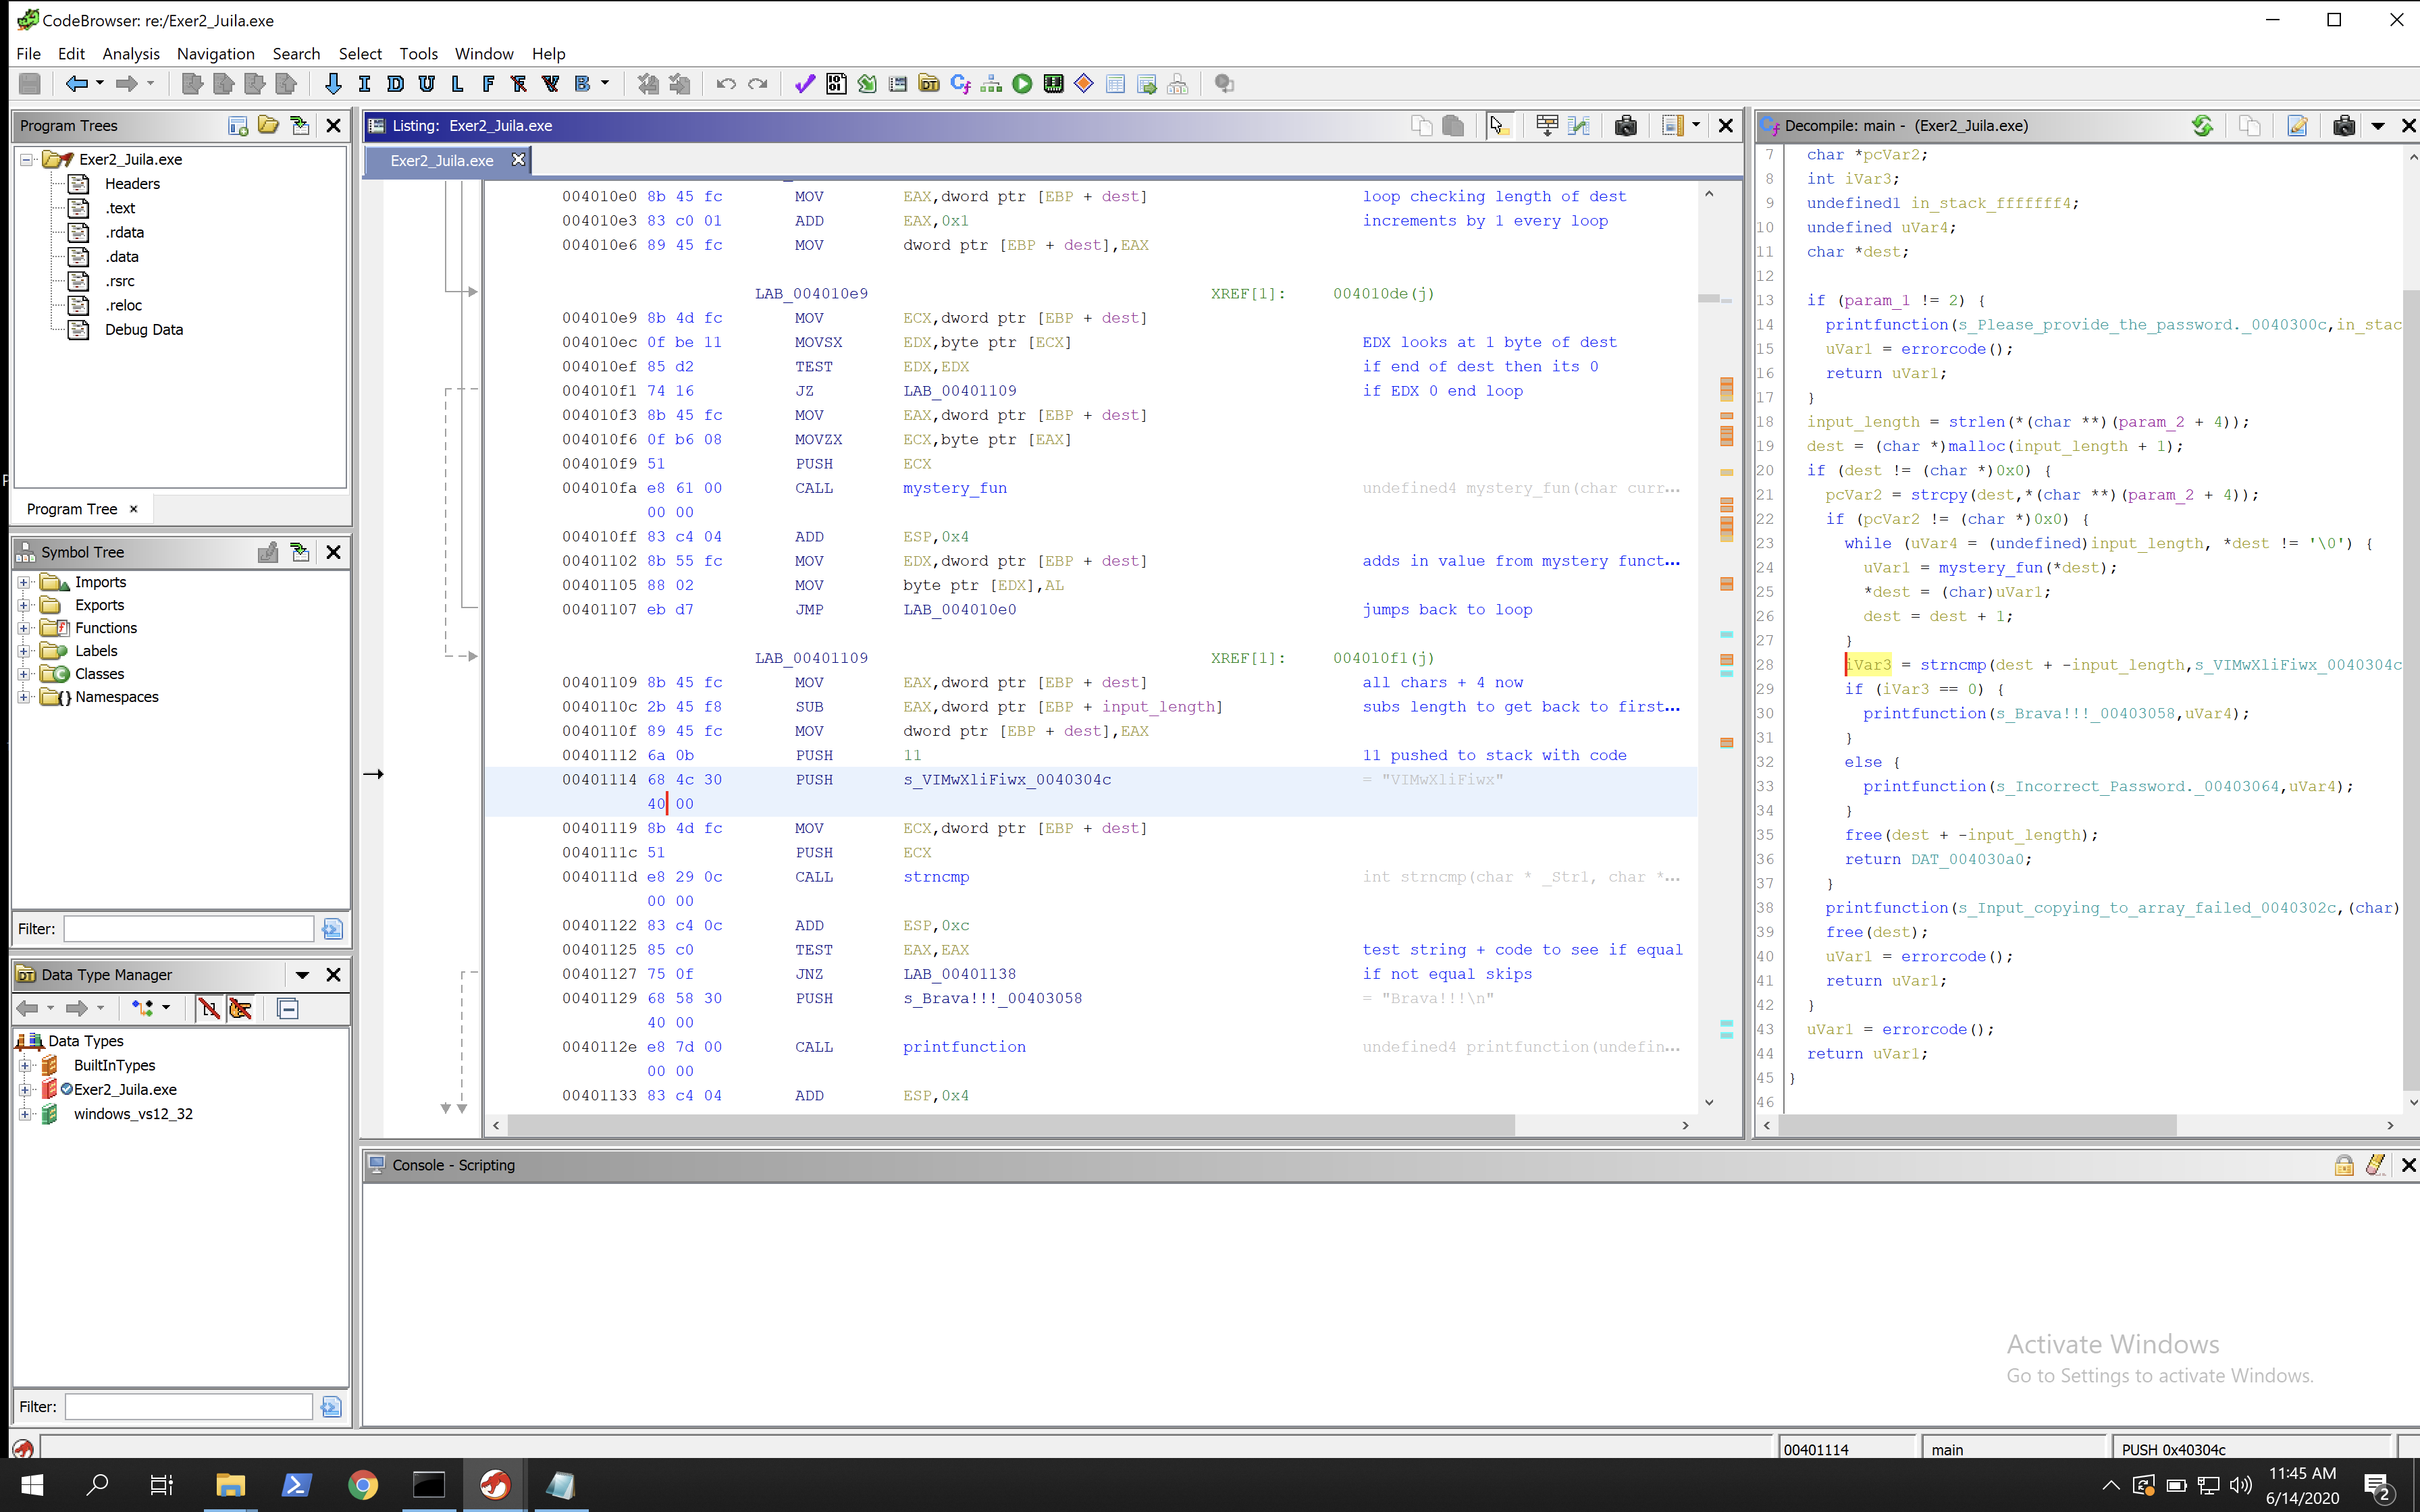
00401109 8b 45 fc        MOV        EAX,dword ptr [EBP + dest]                       all chars + 4 now
0040110c 2b 45 f8        SUB        EAX,dword ptr [EBP + input_length]               subs length to get back to first
0040110f 89 45 fc        MOV        dword ptr [EBP + dest],EAX
00401112 6a 0b           PUSH       11                                               11 pushed to stack with code
00401114 68 4c 30        PUSH       s_VIMwXliFiwx_0040304c                           = "VIMwXliFiwx"
         40 00
00401119 8b 4d fc        MOV        ECX,dword ptr [EBP + dest]
0040111c 51              PUSH       ECX
0040111d e8 29 0c        CALL       strncmp                                          int strncmp(char * _Str1, char *
          00 00
00401122 83 c4 0c        ADD        ESP,0xc
00401125 85 c0           TEST       EAX,EAX                                          test string + code to see if equal
00401127 75 0f           JNZ        LAB_00401138                                     if not equal skips
00401129 68 58 30        PUSH       s_Brava!!!_00403058                              = "Brava!!!\n"
         40 00
0040112e e8 7d 00        CALL       printfunction                                    undefined4 printfunction(undefin
         00 00
00401133 83 c4 04        ADD        ESP,0x4
00401136 eb 0d           JMP        LAB_00401145
This is the last section we are concerned with, given that it has the success string included.
We have had our password transformed by moving all bytes along by 4, then it subtracts the length of the string given so that the pointer is back at the first letter. It then pushes 11 to the stack (maybe as a buffer?) and also pushes the string VIMwXliFiwx. It then compares the transformed string that we gave it with this string. If they are equal then we get the success message!
So if we take the string VIMwXliFiwx, subtract each value by 4 (because mystery_function adds 4 to them and we are going in reverse), we get REIsTheBest (because R is 4 letters less than V, E is 4 letters less than I etc).
So if we use that as the parameter, we should succeed!

Challenge 4 - Hacking Minesweeper
The course covers an in-depth walkthrough of hacking minesweeper. The process is a bit different in general for this binary. Instead of finding the main function and reversing it line by line, it takes a more targeted approach.
The goal is to patch minesweeper so that you can always win. Minesweeper, for those unaware, is a game that came by default with Windows for a long time. The game creates a 9x9 grid and randomly places mines around the map. When you click on a block it is either a mine and ends the game, or is not and gives you a number which indicates how many mines are around you. You can also right click a block to place a map on a block without uncovering it. This is so you can put flags where you think mines are and avoid them.
So we need to have a random function that decides where mines are placed before the game starts, we need to have values that decide what is on a block, and the blocks can either be no mine, mine or flag. With this knowledge we can take the approach of finding the random function, finding how it assigns mines in memory and their value, then replace the mines with flags (as we can see flag placement). With the new binary when we launch it, it will just show the mines as flags and we can always win.
- First, download minesweeper Here
- Load minesweeper into Ghidra
- Go to the Imports section and expand it, then expand MSVCRT.DLL and scroll until you see the function named
rand - Click on rand and you should see it on the main view
- Right click on rand and use References > Show references to rand, follow the function in the popup box and you should see a function (rename it to rand_caller)
- View the references for rand_caller (you should see 2) and you should end up in the following loop
010036c7 ff 35 34        PUSH       dword ptr [DAT_01005334]                         value pushed to stack
         53 00 01
010036cd e8 6e 02        CALL       rand_caller                                      int rand_caller(int param_1)
         00 00
010036d2 ff 35 38        PUSH       dword ptr [DAT_01005338]                         value back from rand
         53 00 01
010036d8 8b f0           MOV        ESI,EAX                                          moved to esi
010036da 46              INC        ESI                                              +1
010036db e8 60 02        CALL       rand_caller                                      int rand_caller(int param_1)
         00 00
010036e0 40              INC        EAX                                              inc by 1
010036e1 8b c8           MOV        ECX,EAX                                          moved to ecx
010036e3 c1 e1 05        SHL        ECX,0x5                                          ecx = ecx * 2^5 (32)
010036e6 f6 84 31        TEST       byte ptr [ECX + ESI*0x1 + DAT_01005340],0x80     sum used in mem, tested against
         40 53 00
         01 80
010036ee 75 d7           JNZ        LAB_010036c7                                     if LSB is 1 loop
010036f0 c1 e0 05        SHL        EAX,0x5                                          EAX x 32 (redundant as done in ECX)
010036f3 8d 84 30        LEA        EAX,[EAX + ESI*0x1 + DAT_01005340]               load into EAX value stored earlier
         40 53 00 01
010036fa 80 08 80        OR         byte ptr [EAX],0x80                              settings LSB in EAX
010036fd ff 0d 30        DEC        dword ptr [DAT_01005330]                         decrease loop by 1
         53 00 01
01003703 75 c2           JNZ        LAB_010036c7                                     if not zero loops
This loop calls rand_caller twice and is the only place where its referenced, so we can be reasonably sure that this logic determines mine placement.
The course explains this loop very well, so I will just copy and paste their explanation here for this code as they know a lot more about reversing than I do. I will change pointer references so they align with what is seen in Ghidra.
We start with the first block. Some value is pushed onto the stack and then rand_caller is called. The value is moved to ESI and incremented by 1. Next, another value is pushed onto the stack and rand_caller is once again called. This time, the return value is incremented by 1, moved to ECX and multiplied by 32 (recall that shl ecx, 5 ~ ecx = ecx * 2^5). We finish with:
- 0 < ESI < DAT_1005334 + 1
- 31 < ECX < (DAT_1005338 ) * 32 + 1
Then, the sum of these two values is used as an offset of some memory location DAT_1005340. Whatever byte is in the resulting address is tested against 0x80.
Note that the lowest address we can get here (after summing up base + offset) is 0x1005340 + 31.
What’s the meaning of testing a value against 0x80?
0x80 in hex is 0b10000000 in binary. As you can tell, the only set bit is the 8th least-significant bit (if you count bits from right to left, the eighth is the only one set).
- Take every number with this bit set. ANDing it with 0x80 will result in the number 0x80.
- Take every number with this bit unset. ANDing it with 0x80 will result in 0x0 (zero).
In other words, testing against 0x80 checks whether the eighth LSB is set or not. If the resulted value is not zero (meaning, the relevant bit was set), we go back and run this same block - the one which calls rand_caller twice. Otherwise, we proceed to the next block. In this next block, we do the following:
- We once again multiply EAX by 32 (this is redundant as it was already done with ECX. Compiler issues I guess).
- We load into EAX the value stored in the same offset from the same memory location we referenced before.
- Then, we OR EAX with the value 0x80, which is a synonym to setting the 8th LSB in EAX.
- We decrease some loop variable (DAT_1005330) by 1 and continue.
All in all, it looks like the following: We randomize two values and then reference a single byte in memory using the sum of these values as an offset (you can think of it as fetching an element from an array using an index). If some specific bit is set in the fetched byte - we go and randomize an offset all over again. If the bit is not set - we set it and continue with the loop.
This logic seems like random positioning of mines where the 8th LSB marks a mine. If we randomize a location where this bit is already set (a mine is already present) - we try finding another proper location. Otherwise - if there is no mine on the square - we set a mine.
Now that the loop is understood, we move on to dynamic analysis. Keep in mine the memory location of where rand is happening (DAT_1005340), as mines will be placed somewhere near here. In the tutorial they use OllyDbg, but we are using a more modern version for this, so I used x32dbg (which is a 32 bit plugin for x64dbg). This is more actively maintained and runs on modern systems.
Load the binary in x32dbg, then press F9. This will take you to the main function usually. Then you will need to scroll up and look for 010036c7. In Ghidra we can see this is where the loop starts. Find that address, click on it and press F2. This will put a breakpoint there. Now hit F9 again and it will execute and hit the breakpoint. Now we have the execution stopped just before mines are assigned. You can click through each instruction at a time with F8 and see what changes as it loops and then hit F9 if you want to see the executable run and spawn minesweeper. If you do that hit the restart button and F9 then F9 again and you will be just before the loop again.
From the analysis of the loop we know that 0x1005340 is used in memory to calculate the offset from, this means that this is the start of the grid (or close to). In x32dbg right click on 1005240, then click follow in dump > constant, as below:
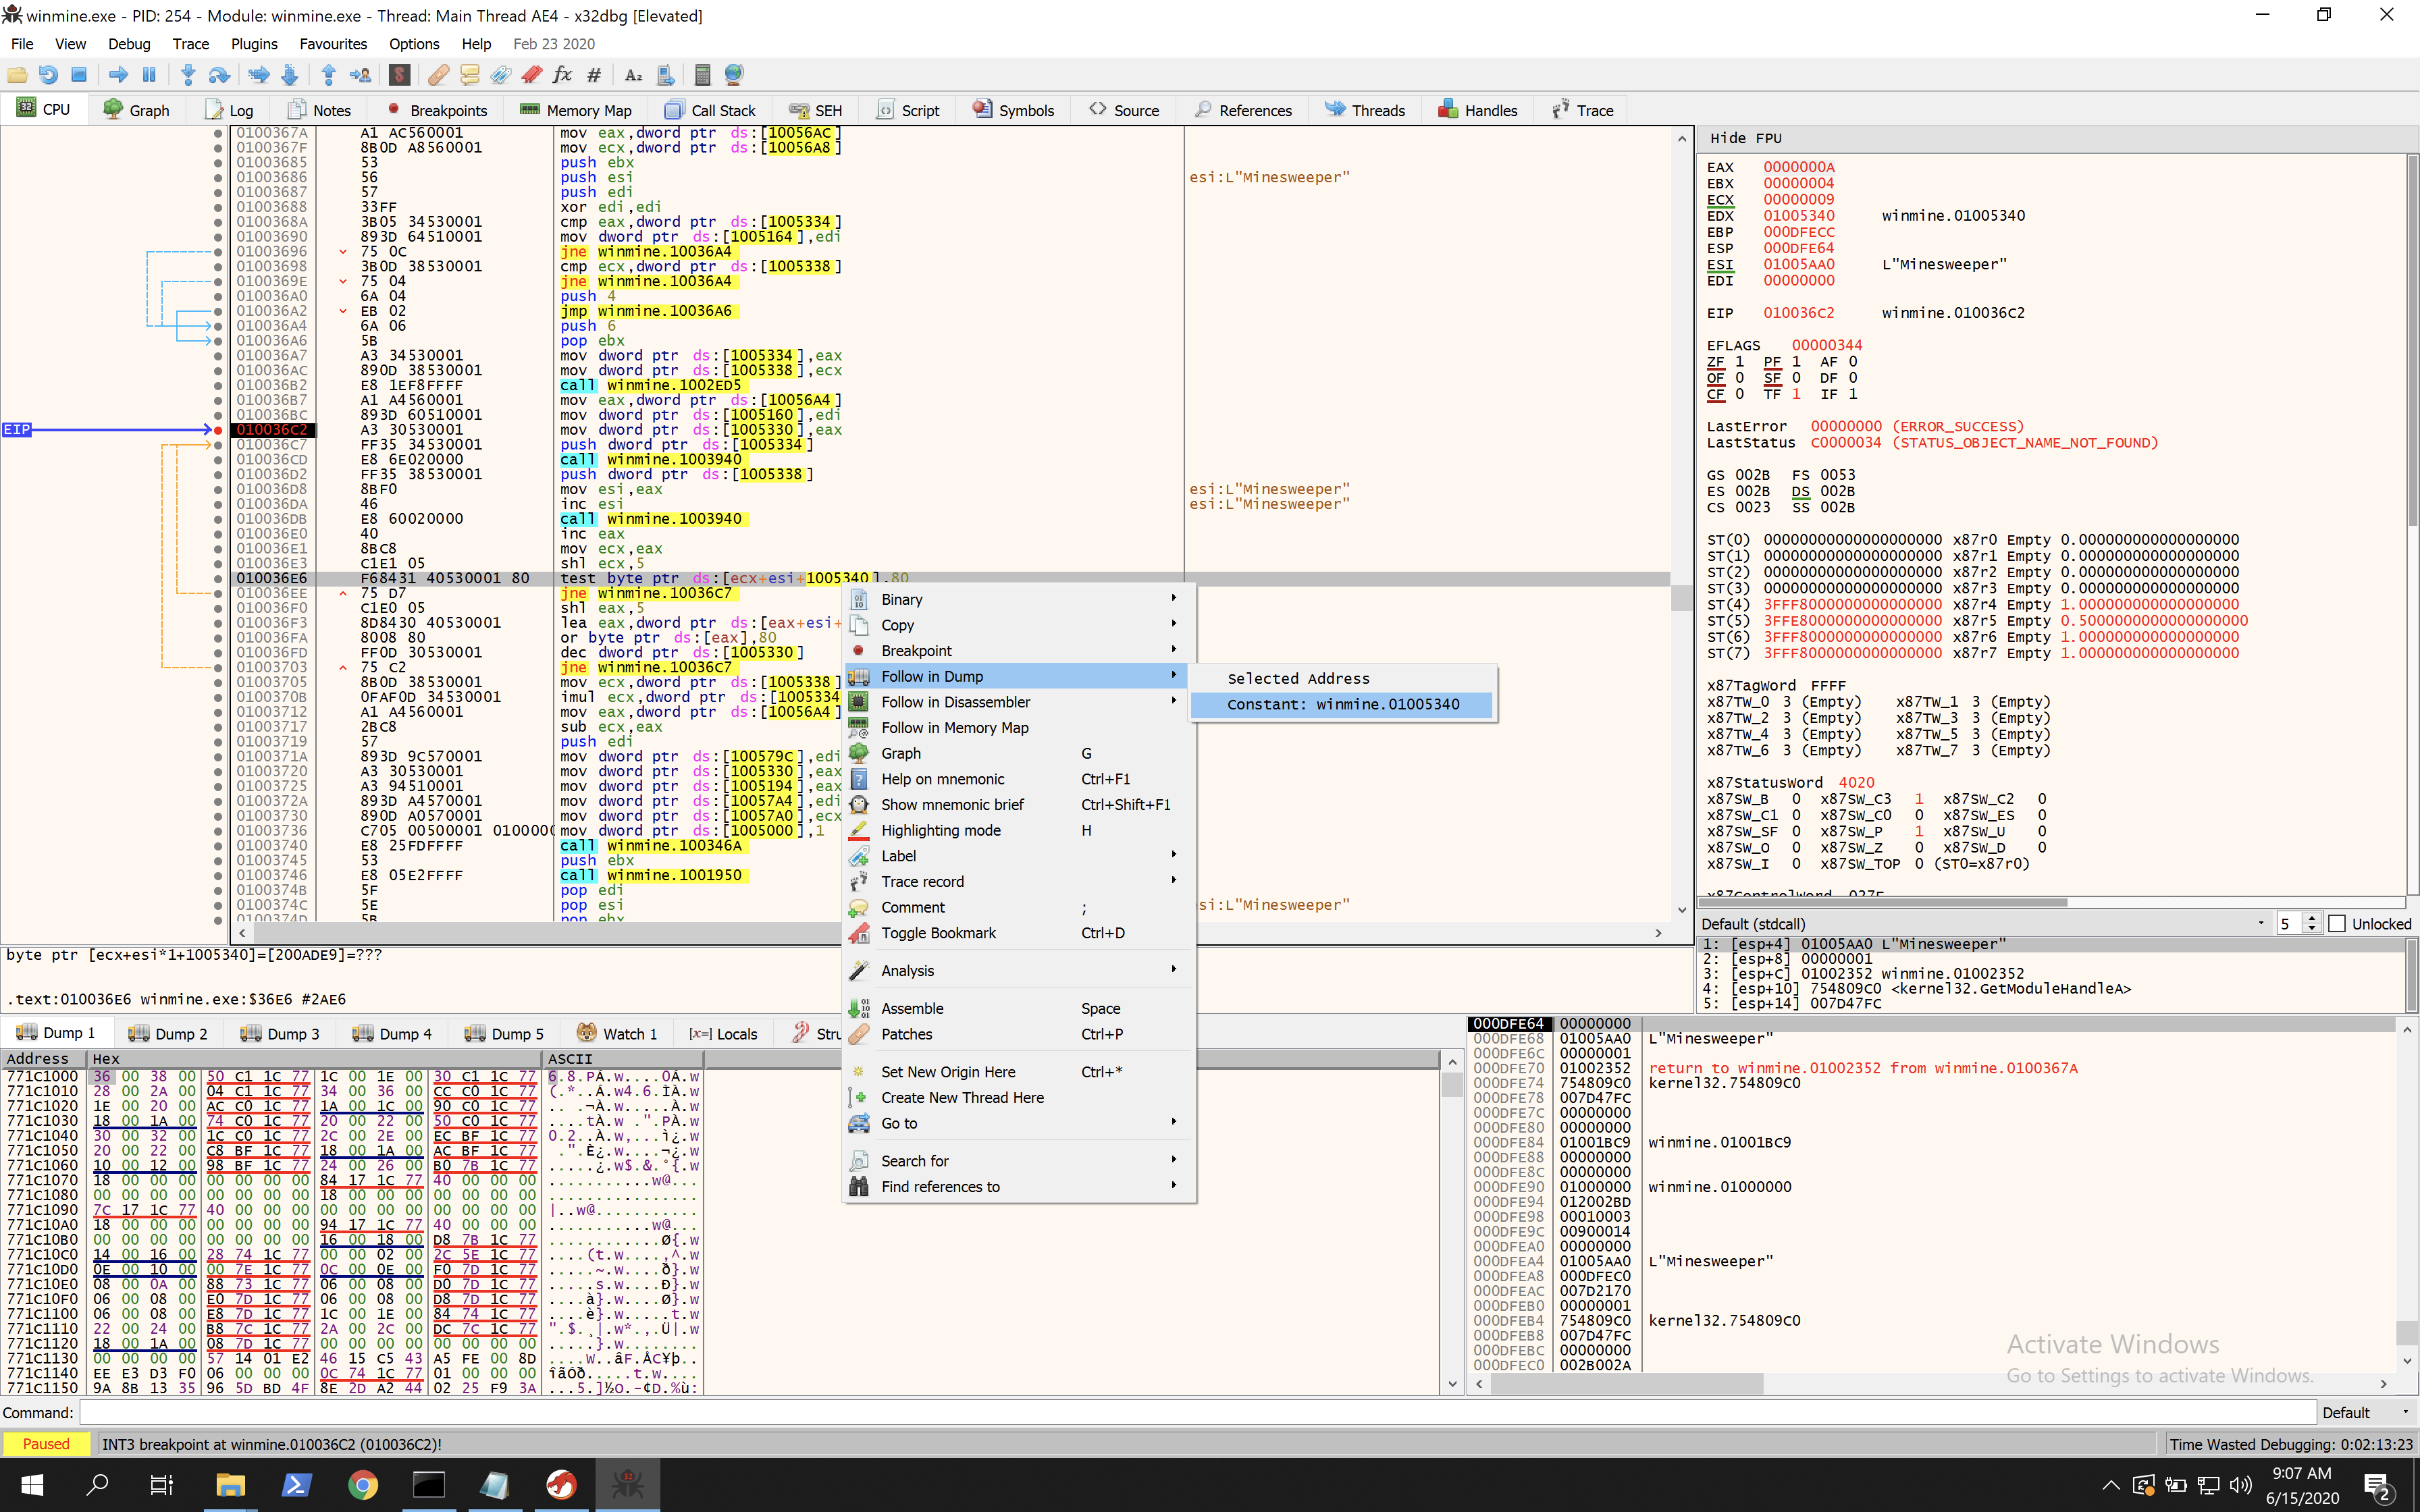
Now in the bottom panel we should see the memory dump of that address. Now step through the execution of the loop and you should see something like the following.
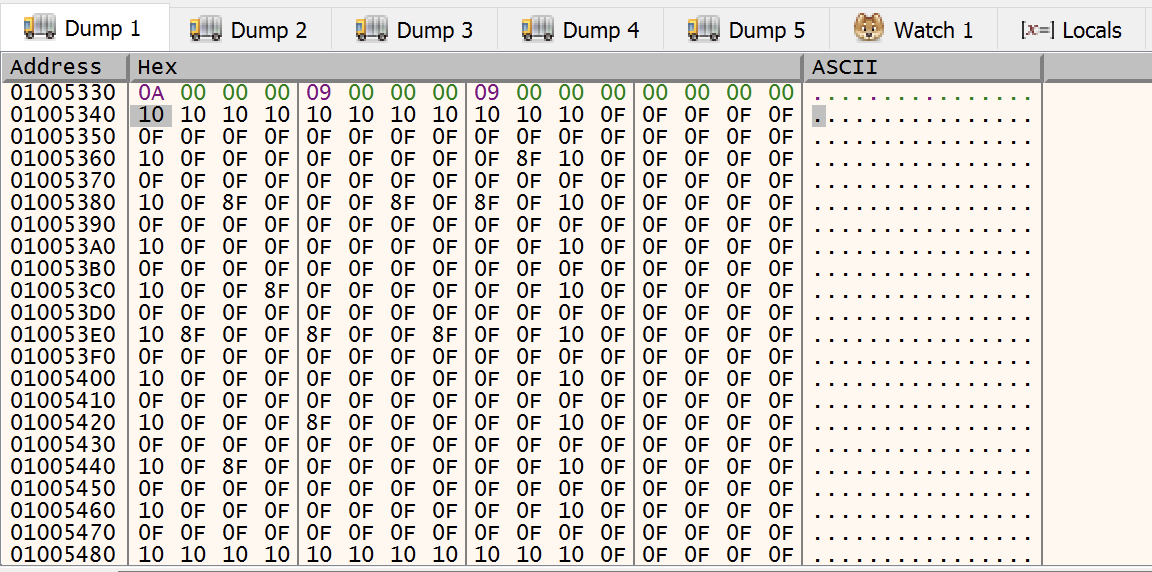
In here we can see that the value of 10 repeated 11 times, followed by the value 0F repeated 21 times. This gives a value of 32 characters repeated, which is the offset we saw earlier. We then see 9 repeating chunks, each being 32bytes and consisting of a single 10, a sequence of 0F characters and sometimes 8F.
9 chunks = 9 rows = each row in the 9x9 grid. The value 10 shows the end of a row. The value 0F shows an empty spot. The value 8F shows a mine!
So now we can see the position of all the mines in memory. You can validate this by hitting F9 and playing the minesweeper game, avoiding the mines because you can see their position in memory.
With minesweeper playing, try finding a mine, then putting a flag on it. You should see the value in memory change from 8F to 8E.
So if we can patch the logic to get it to show mines as 8E rather than 8F, we can create our hacked minesweeper game.
The line setting the mine was 010036fa 80 08 80 OR byte ptr [EAX],0x80, this sets the bit to 8F. If we can change this instruction so that it sets it to 8E, then we are done. For this we need to do some bitwise arithmetic.
- With Mine: 0x0F to 0x8F, or 0b00001111 to 0b10001111.
- With Flag: 0x0F to 0x8E, or 0b00001111 to 0b10001110.
So basically we need to do two things:
- Set the 8th LSB (the left hand bit (0x0))
- Unset the 1st LSB (the right hand bit (0x00000001))
Lets go with XOR here, look: 0x0F XOR 0x81 == 0b00001111 XOR 0b10000001 == 10001110 == 0x8E So double click on the OR instruction and this should bring up a popup. Change the OR to XOR and the 0x80 to 0x81 and we will change 8F to 8E!

Now right click and hit Patches > Patch File > Choose a place to save and change the name to something like winmine_patched.exe (make sure that the changes are ticked in the popup box for patching the file.)
Now when you launch winmine_patched.exe you should see something like this:

We have successfully hacked minesweeper and can see all the mines! Now just click on all the squares not flags and you will win!
Summary
So this was quite a long post, but in summary we reversed 4 binaries using Ghidra, we used x32dbg to do dynamic analysis of minesweeper and we patched minesweeper to always win. This was a really well done online course that took a day to do but gave a really good into to reverse engineering. I am very new to reversing and this helped a lot. It takes a long time to get your head around it, but I feel much more comfortable starting my reversing journey after this, so thank you!!